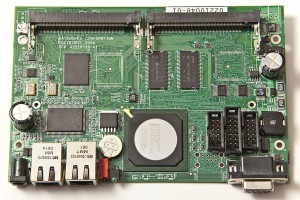
Not that I needed another project but I recently picked up a Gateworks gw2348-4 from Aliosa27. He was selling a few of them off after a dev project that he finished. I wouldn’t have bothered but I looked at the specs and noticed that the board seems to be sort of a souped up version of a WRT54G. Like WAY souped up. Here is a short list of the items that caught my eye:
- Intel XScale IXP425 533MHz Processor
- 64Mbytes SDRAM
- 16Mbytes Flash
- Four Type III Mini-PCI Slots
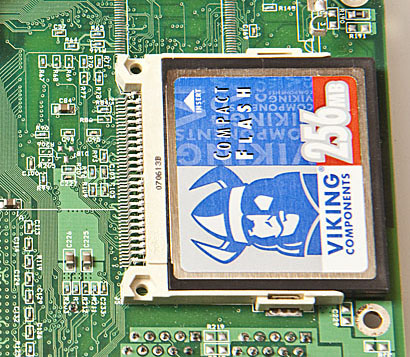
- Compact Flash Socket
- Two RS-232 Serial Ports
- Passive Power Over Ethernet
- Optional Dual Type A USB Host Ports
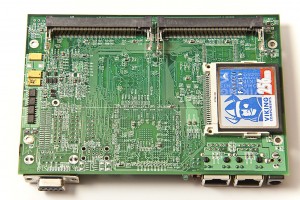
On top of all of that, OpenWrt supports it. That’s good enough for me. The ONLY disadvantages that I can see so far is that it only has 2 Ethernet ports and you have to add your own wifi card but in the end adding your own wifi card is actually an advantage. That will give me an opportunity to mess with some Atheros-based cards. Luckily I happen to have one of those on hand now along with an Realtek RTL8185L card that I picked up at a local computer recycler for $2.
First off, I tried just plugging it in and hooking it up to Minicom. I used the settings that seem to work with everything else I have which are 115,200,8,n,1 with no flow control. I ended up with a RedBoot prompt and a non-loading zImage left over from the previous owner. This is a used board so I didn’t expect much in this regard.
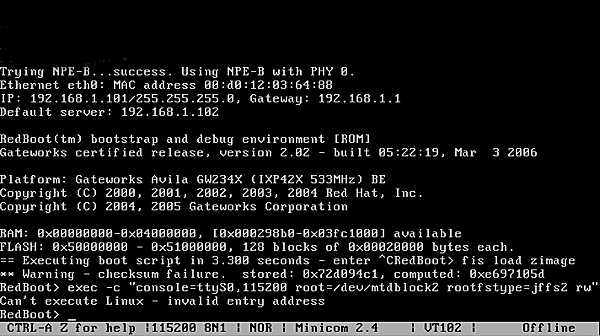 I see another few advantages to this hardware already. For one, this thing has a boot loader with a command prompt and console access. Already that blows away the WRT54G hardware. On top of that, if you flash a bad firmware, you probably won’t brick the device. I imagine you can just reflash it with the correct image and continue on your path.
Time to go to the OpenWrt site and grab the correct image. I’m going to use the Backfire 10.03.1-rc1 avila image. From the RedBoot prompt, I’ll clear out the flash memory:
RedBoot> fis init
Next I need to set up a tftp. For this I used tftpd32. I checked the ip addresses that were expected on the Gateworks device:
RedBoot> ip_address
This spit back that I needed to use 192.168.1.102 as the server so I plugged that into my network settings and tftp server on the Windows laptop I’m using. After some rudimentry setup on the Windows laptop, I ran the following command on the Gateworks board to pull the file down:
RedBoot> load -r -v -b 0x00800000 openwrt-avila-zImage
After that one returns a favorable result, next is:
RedBoot> fis create linux
Checked my free space with:
RedBoot> fis free
Now I need to grab the file for the rootfs on the Windows box and then tftp it from the Gateworks device:
load -r -v -b 0x00800000 openwrt-ixp4xx-generic-squashfs.img
Then I whipped out the calc app on my mac and changed it to programmer mode to calculate my free space. In my case it was 0xE80000 so I create the root file system.
RedBoot> fis create -l 0xE80000 rootfs
Finally, I run through the fconfig program from the RedBoot> prompt and then reset. My settings may differ slightly from what you will see on a brand new Gateworks board. I’m posting a screen shot for simplicity sake:
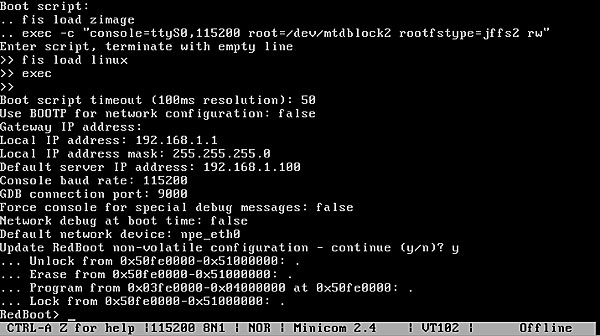
For more clarification of my instructions, visit this link. I think this board will make an excellent snort box or maybe something even better. Who knows?



 I see another few advantages to this hardware already. For one, this thing has a boot loader with a command prompt and console access. Already that blows away the WRT54G hardware. On top of that, if you flash a bad firmware, you probably won’t brick the device. I imagine you can just reflash it with the correct image and continue on your path.
