Latest Entries »

How to dig for DNSSEC records

DNS Security Extensions (DNSSEC) has been in the works for several years now but as of July 15th, 2010 (with little fanfare), the 13 name servers operating the root zone of the Internet’s Domain Name Servers (DNS) are now digitally signed with DNSSEC.  So far DNSSEC is mostly being rolled out by government and financial institutions but many other web-facing entities may soon follow because of the perceived advantages.  If you want to learn more specifically about how DNSSEC has been implemented at the root, check out http://www.root-dnssec.org/.

Up until recently, who.is has been my one-stop shop for records queries but when I query sites that I know have implemented DNSSEC, I can find no indication of this via who.is.  I recently participated in a local DC chapter protocol study night and learned about a couple of new tools and other interesting things about DNSSEC.

www.dnsviz.com – Compliments of Sandia Labs we are provided with “A DNS visualization tool” (dnsviz).  This allows you to view the public key of any given site that is using DNSSEC and shows you a flow chart of how the key is implemented.  It will show you the line between trusted and untrusted portions of your target’s website and help diagnose issues if you are configuring DNSSEC for your own entity.  I did find an interesting feature about this site.  When you are the FIRST person to ever use this site to query a DNSSEC-enabled url, it will take a couple of minutes to spit back the response.  Apparently I was the first person to think of querying bac.com.  After the first time a site is queried, the results are spit back almost instantly for anyone else that queries it.

dig – Not to be confused with the ubiquitous social media tool digg (give this article some diggs if you’re a member ;-), the Domain Information Groper (Dig) is a command-line tool that allows you to do deep queries of DNS records and explicitly include the security extensions.  It should be considered a replacement for nslookup.  I found that it was already installed on OS X 10.6 by default but on my Gentoo VM I had to emerge bind to access the dig command. Dig will not give you the security extensions by default in either case.  You will have to explicitly ask with a command such as:

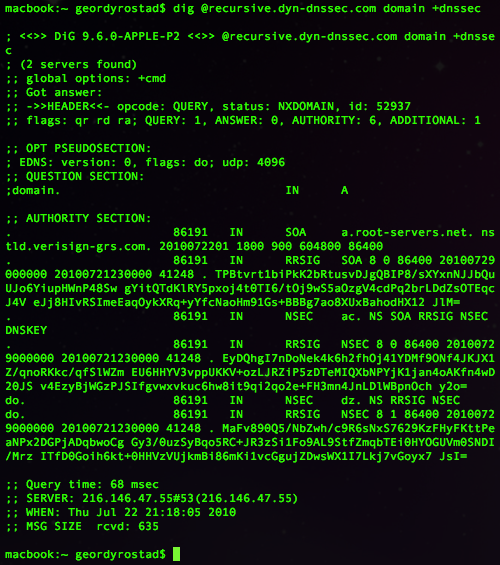
dig @recursive.dyn-dnssec.com domain +dnssec

This will return results similar to the following screencap:

For more information on DNSSEC, you can check out O’Reilly’s DNS and BIND.  Here are some other relevant links for more information.  If you only check one of the links below, make sure you read The Register’s take on DNSSEC since it gives you the quick overview of the situation.

Installing Gentoo in a Fusion VM

The other day I installed Gentoo on an old Celeron 466MHz and it was quite an adventure.  Today, I’m attempting to install it in a far more useful capacity as a virtual machine under VMware Fusion.  The first thing I did was create a new virtual machine.  There is no template for Gentoo so I tweaked the settings a bit.  I gave it 512MB ram, 30GB hard drive and set it to “generic linux 2.6.X kernel”.  I set it to boot from the minimal ISO that I used to burn the CD for the other day. After I was booted up, I ran a couple of benchmarks.  Thankfully this system is several orders of magnitude faster than a Celeron 466MHz.

Using fdisk, I created my 3 partions:

/boot /dev/sda1

swap /dev/sda2

/        /dev/sda3

Then I did my mkfsing:

mke2fs /dev/sda1

mke2fs -j /dev/sda3

mkswap /dev/sda2 && swapon /dev/sda2

Now it was time to snag my stage file.  This time instead of wget, I used links:

links gentoo.org

I hit the downloads link, then hit the stages button next to i686 and found the most recent stage3-i686 tar.bz2 file and downloaded it.  After that, I untarred it:

tar -xpjf s<TAB>

Next, I changed snagged the latest portage via links and untarred that:

cd  usr

links distfiles.gentoo.org/snapshots

tar -xpjf p<TAB>

Then it’s time to chroot:

livecd / # mount -t proc proc /mnt/gentoo/proc

livecd / # mount -o bind /dev /mnt/gentoo/dev

livecd / # cp -L /etc/resolv.conf /mnt/gentoo/etc/

livecd / # chroot /mnt/gentoo /bin/bash

livecd / # env-update && source /etc/profile

Then I set the timezone:

cp /usr/share/zoneinfo/America/Los_Angeles /etc/localtime

After that, it’s time to fix up the hostname:

cd /etc

echo “127.0.0.1 gentoo.notanon.com gentoo localhost” > hosts

sed -i -e ‘s/HOSTNAME.*/HOSTNAME=”gentoo”/’ conf.d/hostname

hostname gentoo

Now for the kernel.  I didn’t do a lot of tweaking with the kernel this time around.  I just added ext2 support and a couple of extra modules I want to experiment with.

emerge gentoo-sources

cd /usr/src/linux

make menuconfig

time make -j2

make modules_install

cp arch/i386/boot/bzImage /boot/kernel

Then I editted the /etc/fstab to look something like this:

/dev/sda1 /boot ext2 noauto,noatime 1 2

/dev/sda3 / ext3 noatime 0 1

/dev/sda2 none swap sw 0 0

Then I installed cron, syslog, grub dhcpcd:

time emerge syslog-ng vixie-cron grub dhcpcd

rc-update add syslog-ng default

rc-update add vixie-cron default

After that it’s time to nano /boot/grub/grub.conf:

default 0

timeout 10

title Gentoo

root (hd0,0)

kernel /boot/kernel root=/dev/sda3

Then I ran grub and entered:

root (hd0,0)

setup (hd0)

quit

After this, supposedly it’s time to unchroot, cross my fingers and reboot:

exit

umount /mnt/gentoo/dev /mnt/gentoo/proc /mnt/gentoo/boot /mnt/gentoo

reboot

Alas, it didn’t work.  I’ve yet to nail a Gentoo installation on the first attempt but this time I was much closer.  I ended up finding a wiki on installing Gentoo in a VM.  I rebuilt the kernel with some of the suggestions that were stated in the wiki and that did the trick.

I was listening to the pauldotcom.com security podcast the other day and heard then talking about netcat.  This peaked my interests and got me thinking that I should be able to print text files from any Unix-based system on which netcat could be installed/compiled.  At first I tried it the simple way:

cat file.txt | nc 10.10.10.201 9100

This did indeed send the file to the printer’s port 9100.  There were two problems though.  First off, the printer asked me if I wanted to print the buffer or wait until it was finished printing.  Pushing the button on the printer made the file print but is not as convenient as it should be.  This problem can be fixed with a “-w1” switch.  This tells netcat to quit if the input stream is idle for more than 1 second.

cat file.txt | nc -w1 10.10.10.201 9100

This prints the text file almost instantaneously but there is another problem.  All the text is stair stepped.  As it turns out, Unix uses only newline character at the end of each line.  In dos and apparently network laser printers, a newline and a carriage return are two separate things that need to be handled individually.  A little bit of sed trickery is just the thing to fix this problem.

sed ‘s/$'”/`echo -e \\\r`/” file.txt | nc -w1 10.10.10.201 9100

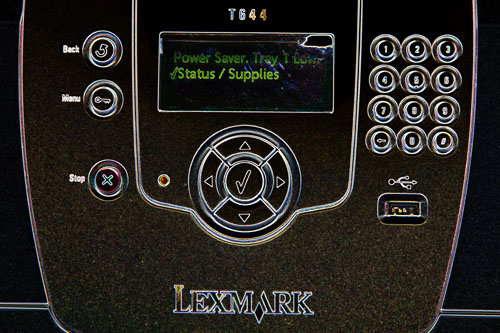
Obviously you will need to put your own printer’s IP address there.  This will probably only work with a decent networked laser printer.  I’ve tested this with my Lexmark Optra T644 and it works great.  Special thanks to rkdavis for helping sort out the sed bits.

Sed is a very powerful tool when used correctly but can also be a source of frusteration at times.  One problem with it shows up when you are trying to identify and replace non-printable characters.  Luckily sed has a nice command line switch that will help you debug certain problems with sed.

When you just use cat to display a file, you’ll see it as you are normally used to but this isn’t how sed sees files.

cat hello.c

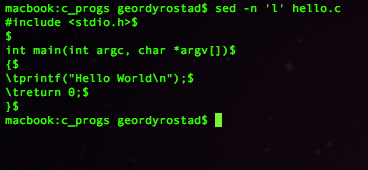
When you use the -n ‘l’, you’ll see the file how sed sees it.  (It’s a lower case “L” in the single quotes)

sed -n ‘l’ hello.c

Now you can see the new line characters at the end of the lines and the tabs that proceed some of the lines.

How to add a serial port to a WRT54G-TM

I have a small stack of WRT54G routers at my house.  When I find them second hand for cheap, they tend to be the WRT54G-TM variant.  This version is actually great for modding and hacking because people seem to think it’s tied to T-Mobile so it must require a contract to use or something and they will sell them cheap.  Personally I’ve had no trouble putting DD-WRT on the WRT54G-TM.  In fact, the WRT54G-TM has 32MB ram and 8MB which is far more than most of the other routers in the series.

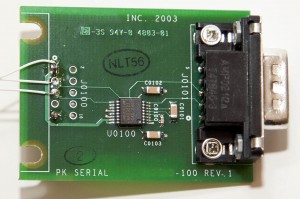
Today, I’m going to add a serial port to my WRT54G-TM so I can use a terminal to log into it.  I think this will be handy for debugging since I plan to change the firmware on this router to Openwrt.  I’m going to use a debugging board given to me by an unnamed friend at an unnamed company.  There is nothing special about the board.  It’s just a serial level shifter with a Maxim 3221CAE IC on it.  It’s a fairly standard circuit that they publish on the datasheet for that IC.  I’m just using this board because it will save me time doing this hack.  The nice thing about the 3221 variant is that it will run on the 3.3V that is already present on the header.  I’m loosely following directions from here showing two serial ports added to a WRT54GS.

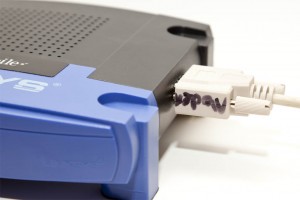
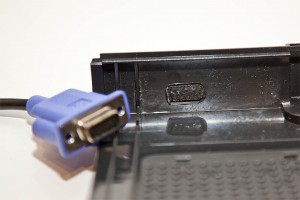
To mark out the location for my new serial port, I’m going to use fire.  I found a totally useless serial dock that corresponds with a defunct proprietary service and grabbed my blowtorch.  I heated up the end of the cable as hot as I could get it and made an impression inside the WRT54G-TM.  After that, I took a Dremel and routed out a hole for the DB9.

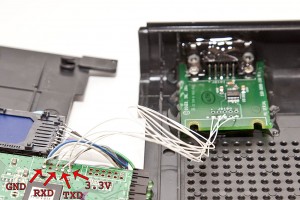
Next I soldered the wires in place.  On the Maxim chip, the r-out goes to the RXD pin on the header and the t-in on the chip goes to the TXD on the header.  3.3V on the header goes to VCC on the chip and GND goes to GND.  Make sure to leave the wires long enough to get the case closed again.  After I was satisfied with the soldering, I globbed on a LOT of hot glue to hold that little serial board in place.  Ignore my sd card mod since it’s not related to this hack.

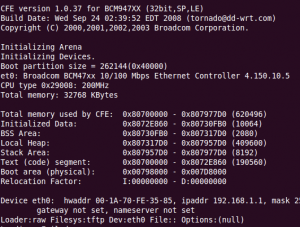
Once it was all back together I fired up Minicom with the settings 115,200, 8, 1, no parity and no flow control.  The no flow control part is especially important.  Now when I boot up the router, I can see all of the debugging information.  Now with this serial port I can experiment with vlans and other things that can break your SSH session.  If I wanted to get really tricky, I could probably even use my hacked WRT54G-TM as a wireless-serial bridge for consoling into my Cisco routers that I keep in the garage.  They are too loud to keep by my desk.

If you like this article, you can support my site by using this link to buy your next WRT54G from Amazon.  You might also consider buying Linksys WRT54G Ultimate Hacking for more advanced hardware and software hacks for your WRT54G.

Installing Gentoo Linux on my 466MHz Celeron

I’ve been listening to earlier episodes of pauldotcom.com‘s weekly podcast and have continually heard Twitchy go on and on about how great Gentoo Linux is.  I finally got to episode 62 where Twitchy did a tech segment about portage which is the package management system for Gentoo Linux.  It SOUNDS fantastic.  Pretty similar to Macports but even better since EVERYTHING on your Gentoo system is a manageable package. When you upgrade packages on your system, new source code is downloaded and compiled locally(or can be distributed to other systems you run) and you can specify configuration options on the fly.  Portage keeps track of all installed packages and their dependencies(recursively).  If you want to install a package NOT already available in Gentoo, simply write an ebuild file and Portage will handle the rest of the process including keeping track of the package for you.  You are able to upgrade your entire system with a single emerge command every day, week, month, etc.  After hearing this, I felt it was finally time for me to try out Gentoo.

I consider myself a fairly seasoned Linux user.  I’ve been using Linux on and off for work and play since Yggdrasil Linux came out in 1993 or so and moved back and forth with Redhat and Debian over the years.  Gentoo SOUNDS like it may be the answer to many of my annoyances with the other systems mainly being the broken package management systems.  That being said, installing Gentoo Linux does not follow an obvious process.  Not to say it’s not easy but it’s doesn’t have a scripted install like Redhat or Debian and it’s most certainly not a GUI-based installer like Ubuntu..  When you put in the installation CD and boot it up, you end up at a live cd prompt.  What do you do from here?  You read the 7-page(tiny print) Gentoo Linux x86 Quick Install Guide of course…
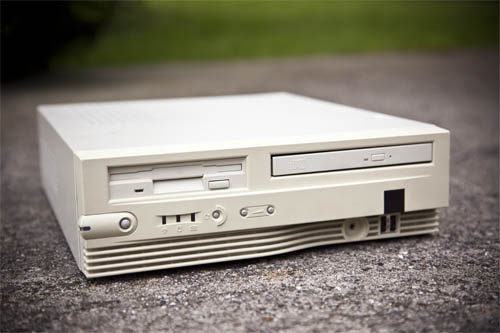
My ancient Celeron 466MHz micro desktop system about to get Gentoo'd

Note: The following is a recap of MY personal adventure of installing Gentoo Linux.  It’s not meant as a replacement for their excellent documentation.  If you read the steps I followed though, you might find a couple of ways that I did stuff differently than stated in the installation guide.

Starting out at the top of the quick install guide, I see that the installation was timed on a MUCH quicker machine than mine.  When I type in:

grep bogo /proc/cpuinfo

I get a result back of 933.54.  The AMD 2000 1.6GHz system used for this guide is really old but not nearly as old as mine.  The result on the AMD was 3337.81 bogomips.  Hopefully my system ONLY takes 3x as long to install.  This little Celeron system is the same system that wouldn’t install Haiku for some reason.

Moving on down in the install guide, it looks like I already screwed up.  Apparently I should have used some switches at the first boot prompt when I started the system up.  When I booted, I should have type in:

boot: gentoo-nofb nodetect

That would disable X from trying to load and prevent a zillion kernel modules from loading but I think since my system is soooo old and all the drivers for my hardware are extremely mature by now, I didn’t hit any hang ups.  Doing a “ping go.com” at the command line netted me a favorable result so I’m just going to move on and call it good for now.

The first real and destructive step of this install is to partition your disk manually.  Disk druid?  I don’t think so.  It’s all about the fdisk.  On my system, /dev/hda is the hard drive.  I knew this because running a “df” command showed my CD-ROM as /dev/hdc.  So…

fdisk /dev/hda

The installation guide assumes that you know how to use fdisk.  Luckily I do.  I’m going to create three partitions for my installation as suggested.  One 128MB partition for boot where the kernel and lilo or grub will live, swap which I’ll make 256mb and a / (root) partition that uses up the remainder of the space on the drive.  I remembered to change the swap partition type to 82 and set the /boot partition bootable flag.  Now I need to commit the changes and format the paritions:

mke2fs /dev/hda1

mke2fs -j /dev/hda3 (-j for ext3)

mkswap /dev/hda2 && swapon /dev/hda2

Now mount the partitions in their proper locations:

mount /dev/hda1 /mnt/gentoo

mkdir /mnt/gentoo/boot

mount /dev/hda1 /mnt/gentoo/boot

cd /mnt/gentoo

After that, you are supposed to set the clock.  Since I’m on the net, I’ll run:

ntpdate pool.ntp.org

Now onto the less familiar stuff.  I need to wget the stage3 archive from a mirror.  I’m going to skip the step of finding a local mirror and simply use the default location:

wget ftp://distfiles.gentoo.org/pub/gentoo/releases/x86/current-stage3/stage3-i686-*.tar.bz2

This pulled a 130MB file down into the root directory of my freshly formatted hard disk.  Now to unpack it with:

tar -xjpf stag*

After that, I need to snag the latest portage build and unpack that so I can start managing packages:

cd /mnt/gentoo/usr

wget http://distfiles.gentoo.org/snapshots/portage-latest.tar.bz2

tar -xjf por*

Now to the weird stuff.  We need to chroot the filesystem.  Chroot fools bash into thinking that a sub directory is actually your root directory.  This allows you to type and run commands in a sandbox of sorts that shouldn’t be able to effect outside files.  In this case we have booted up a live CD and have sketched out enough of a root file system on our new disk to operate now so it’s time to switch into the new root file system in order to finish building it:

cd /

mount -t proc proc /mnt/gentoo/proc

mount -o bind /dev /mnt/gentoo/dev

cp -L /etc/resolv.conf /mnt/gentoo/etc/

chroot /mnt/gentoo /bin/bash

env-update && source /etc/profile

cp /usr/share/zoneinfo/America/Los_Angeles /etc/localtime

While I’m dealing with the timezone, I’ll “nano /etc/cron.d/clock” uncommenting the TIMEZONE line and changing “factory” to “America/Los_Angeles”  Then I’ll set up the hostname.  This is certainly not the most straight forward process:

cd /etc

echo “127.0.0.1 mybox.at.myplace mybox localhost” > hosts

sed -i -e ‘s/HOSTNAME.*/HOSTNAME=”mybox”/’ conf.d/hostname

hostname mybox && hostname -f

After all that, it’s time to build the kernel.  If you’ve never build a Linux kernel, you will probably find this step extremely overwhelming but hang in there.  You will learn the most about Linux in this single step.  Make use of the help that is embedded in the menuconfig script.  They used to be somewhat of a joke back in the days of the 2.0.X kernel but now most of the helps are actually very helpful.  Generally in the more confusing kernel options, it will say something like “if unsure, say Y(or N)”.  This will let you fake your way through the kernel config for the most part.  Don’t forget, you can always rebuild it later.

Note: The first time I ran through this, I forgot to include second extension filesystem.  This caused a non-bootable system since the /dev/hda1 block device is formatted ext2.  These errors are common and you’ll learn a lot from making them since something may not work correctly down the road.  Don’t get discouraged, just retrace your steps and you shouldn’t have a problem figuring out where you went wrong.  The command “dmesg” can be very helpful if you get booted.  If you DON’T get booted, whatever the kernel is hanging on should be printed on your screen.  On my Celeron 466MHz, a fairly stripped down kernel is taking me 100 minutes to build.  I’m sure yours is MUCH quicker so don’t be afraid to rebuild it a few times.

emerge gentoo-sources

cd /usr/src/linux

make menuconfig

make -j2

make modules_install

cp arch/i386/boot/bzImage /boot/

I would have thought that the next natural step in the installation process would be to install grub or lilo but oddly they have you jump to an entirely different topic which is fixing up the /etc/fstab to make it bootable.  So I need to run “nano /etc/fstab” and change BOOT to /dev/hda1, ROOT to /dev/hda3 and SWAP to /dev/hda2.  I’m skipping the network config for now and crossing my fingers that dhcp will do it’s job.

emerge dhcpcd

Also should install cron, syslog and grub:

emerge syslog-ng vixie-cron grub

rc-update add syslog-ng default

rc-update add vixie-cron default

Now I need to point grub to the kernel image that I built earlier.  Using nano I’ll want to edit /boot/grub/grub.conf.  Something like the following should work just fine for now as a grub.conf file:

default 0

timeout 10

title Gentoo

root (hd0, 0)

kernel /boot/bzImage root=/dev/hda3

After the file is saved, then I’ll run grub and walk through a few commands to write the bootloader to the MBR.  If I screw this up, I can just reboot from the live CD, chroot again and fix it up but let’s hope it just works right the first time:

grub

grub> root (hd0, 0)

grub> setup (hd0, 0)

grub> quit

Now for a final bit of housekeeping:

passwd

Time to see if all the hard work paid off.  I’m going to reboot and snag the CD out of the tray in the process:

exit

umount /mnt/gentoo/dev /mnt/gentoo/proc /mnt/gentoo/boot /mnt/gentoo

reboot

This next part is an account of MY troubleshooting process.  In most cases you will have your own set of problems that are different from mine.

DOH!  Kernel panic.  For some reason, my hard drive that was being detected as /dev/hda when I was installing is now being detected as /dev/sda so the boot loader passes the wrong root parameter to the kernel.  I suspect this is a problem with the way I built the kernel.  For now, I want to get the box running.  Time to go back to the live cd, boot and chroot.  First off, I’m going to install lilo since I’m a bit oldschool and I’m more familiar with it.

emerge lilo

mv /etc/lilo.conf.example /etc/lilo.conf

I edited the lilo.conf to point it at /dev/hda for the spot to write the bootloader but then pointed the root partition to /dev/sda3.  When I tried running lilo, it crapped out with a fatal error since /dev/sda didn’t exist when booted on the live cd.  I can do a quick, ugly thing to fix that:

ln -s /dev/hda /dev/sda

lilo

This successfully wrote the Gentoo option to the MBR.  When I tried to boot however, I still got a kernel panic so I rebooted again and typed the following at the lilo prompt:

gentoo root=”/dev/sda3″ boot=”/dev/sda1″

That seemed to work and the system finally booted!  Not ideal but now I’m to a point where I can troubleshoot without the hassle of using the live CD and chrooting.  Next I edited the lilo.conf to show /dev/sda as the boot device and reran “lilo” at the prompt.  When all of this was done it was time for a reboot and this time everything came up perfectly.

My first task with this newly working system was to bring it up to an entirely current, updated state.

emerge –sync

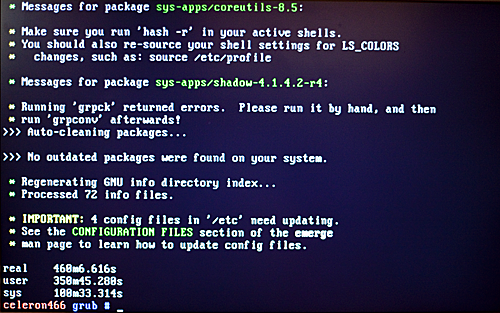
time emerge -u world

The picture speaks to the fact that this is an old, slow computer but the operation was successful in the end.
Final words

How many other modern, current and fully patched operating systems would legitimately be able to run on this computer?  Not many.  I’m not sure why Haiku wouldn’t run but it may have just been circumstantial.  Installing Gentoo was a bit of an adventure but using Gentoo makes Debian seem both bloated and outdated.

If you have been a casual Linux user and you want to learn WAY more about Linux, installing Gentoo is an excellent way to achieve that goal.  If you are a developer/hacker who always needs the latest and greatest packages at their disposal and doesn’t want to deal with dependency hell, you probably already use Gentoo.

I am currently searching for a 486/66 to add to my small cluster of old hardware.  After I find one, I will probably attempt to install Gentoo on that hardware and I expect to be successful with that endeavor.

How to teach your toddler about computers

It’s never too early to get your child started with computers.  They are a large part of everyday life and your toddler has the ability to learn very quickly.  The earlier they learn basic skills, the sooner they can learn more advanced skills that will help them in school and later in life.

The iPod touch 8 GB makes an excellent entry level platform for a young child around two years old. The touch interface is very intuitive and easy to grasp.  The interface is simply enough for your child to operate on their own but also complex enough that they will be learning useful concepts to apply to computers they encounter later in life.

One reason that you might NOT have given your child an iPod Touch already is that you are concerned about them dropping or throwing it.  You will certainly have to supervise your child, especially at first, to teach them how to do the things they want on the iPod and teach them the ground rules for using the iPod.  I would NOT suggest ever leaving them alone with the iPod but durability concerns can be mitigated with a case such the Tech21 iBand.  This case will go a LONG ways towards protecting the iPod from accidental drops on the floor.  If your child drops it on rocks(why are you letting them use it near rocks anyways?), all bets are off.  This case MIGHT even protect against a temper-tantrum toss but don’t count on it.  If they are getting frustrated with iPod, it’s time to give the device a time out.

What can your kid do with an ipod touch?

There are over 100,000 apps for the iPod/iPhone so finding the right ones can be daunting.  If you have any suggestions that I don’t list here, please feel free to comment down below and let me know.  Here is my short list to get you started though:

Letters A to Z – My son absolutely loves this $0.99 app.  He has been playing it for nearly a year on and off.  He was able to recite the alphabet at 2 years old and I’m not sure if it was entirely because of this app but I’m sure it didn’t hurt any.  The interface is incredibly simple to operate.  He simply touches the letter and the letter is spoken or if he touches the object next to the letter, the name of the object is spoken and a short animation of the object in action is played.  To this day, the frog animation still makes him smile.

The Dr. Seuss books by Oceanhouse Media – His favorite of this series has been Dr. Seuss’s ABC but he likes The Cat in the Hat as well.  These apps are fairly well crafted.  They have several levels of interactivity.  You can choose to “Read the Book” and just flip through it like a normal book and read it to your toddler or you can choose to “Read to Me” which reads the book aloud but your child will have to flip the pages manually.  The last option is “Auto Play” which will read the pages and flip the pages for your child.  These books last roughly 10 minutes each in auto play mode and can be handy if you just need a couple of minutes in a public place to get something done. These books vary in price but are cheaper than printed versions and have been far more useful since we take the iPod everywhere with us.

SpongeBob Square Pants tickler lite – This app is free and I somewhat regret spending the $1.99 to buy the full version of this app since it’s more complex and doesn’t actually enhance the experience any for a toddler.  Even if you find SpongeBob somewhat annoying(I happen to like him), this is actually an excellent little app.  This teaches your child new ways to interact with the iPod Touch.  You can shake the iPod and SpongeBob will jump up and down.  You can tilt the iPod and he’ll fall towards the edge of the screen.  You can touch the screen and make certain gestures on it that will invoke other responses from SpongeBob.  You will be amazed how quickly your child learns all the new ways to interact with the iPod because of this app.

Lastly, you can simply put music and videos on the device.  To put videos on it, you can either buy them from the iTunes store or rip DVDs from your own collection with a tool such as Mac the Ripper and convert them to iPod format with a tool such as Roxio Popcorn.  It takes a bit of time but the hours of entertainment are worth the effort.

Potential Drawbacks – Your child may grow up wondering why all other computers lack a touch screen.  Also, some parts of the interface may still be beyond your child’s comprehension.  They could accidentally delete an app from the home screen for instance but you can always restore it from iTunes later so that isn’t a huge concern.  Also, I would suggest NOT letting them operate the device while eating since it can get downright nasty and food could get stuck in the gap around the screen.

Why not an iPad?

Bigger is better, right?  Well, not always …  While the bigger screen is nice, it doesn’t really matter to your toddler. I would also be very hesitant handing my son a delicate $500 device. They don’t make an iBand case for it as of today so I think adequate protection would be a challenge.  Also, they are not nearly as portable so many of the times that you would have something small like an iPod Touch with you in a public place, an iPad would probably be sitting at home or worst yet, in the car.  Lastly, a heavier device such as the iPad is going to be more susceptible to damage from being dropper or thrown simply due to the law of gravity.

Next steps

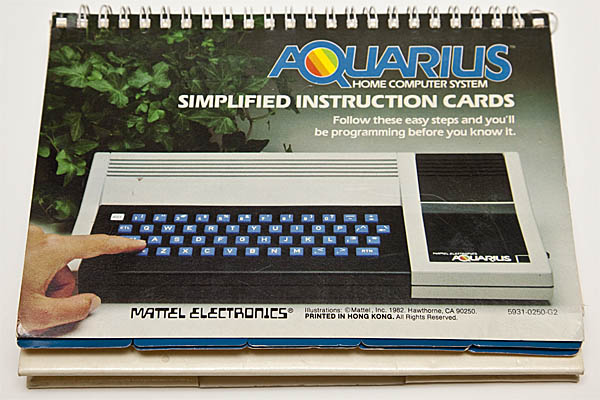
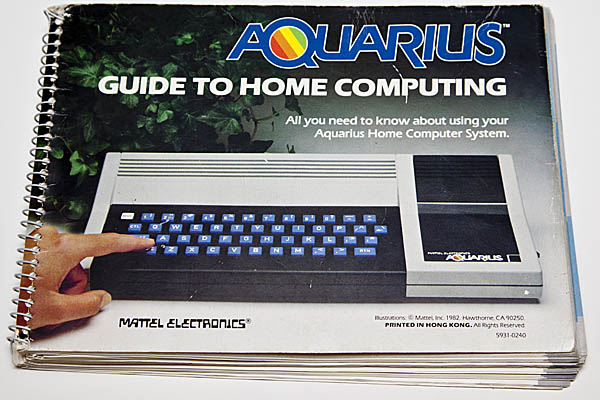
Mattel Aquarius circa 1983

I personally think sticking a toddler in front of a modern computer is a bit overwhelming.  There is so much going on and there really isn’t a good way to “lock” the computer in a state where they can just start banging on the keyboard without concern.  For this reason, I would actually suggest an ancient computer if you have access to one.  I’ve been blogging a bit recently about my Mattel Aquarius.  I received it as a Christmas present when I was 5 years old but I think I could have benefited from having it even at a younger age.  I think it’s perfect for teaching letters and cause/effect such as “hit a key, letter shows up”.  You can even go into semi-advanced topics such as punching in a short BASIC program and showing your child how to start the program by typing “run” and stop it by hitting ctrl-c.  Many older systems from around 1977-1985 have excellent characteristics for teaching a young child about computers.  Some other suggestions would be a Commodore 64, Atari 800, IBM PC JR, Apple IIe and the TI 99.  Pretty much any old computer with built-in BASIC that boots straight to BASIC.  Most(all?) of the computers above can be had for under $50 or so and will hook directly to your TV.  You don’t have to feel bad if your child destroys it but it’s not likely to happen anyways since most of them were built like tanks.  If you buy an old computer such as one of these and teach your child about it, you’ll probably learn something yourself in the process.

How to get started with Malware Analysis

I was listening to the ISD Security Podcast episode 168 the other day and heard this great interview with Paul Royal researched and helped shut down the original Kraken botnet in 2008. While the whole interview was excellent, one part at the end stood out as something that should be documented. Rick asked Paul how someone could get started in malware analysis if they are interested. The following is my paraphrased version of Paul’s response:

Check out the following sites to obtain malware samples:

Malfease – which is a public malware repository hosted by Georgia Tech. You don’t have to be a student at Georgia Tech to use this service. From the FAQ: “Q) What is the purpose of Malfease? A) Malfease is designed to automate many of the tasks associated with new malware collection. With thousands of new samples created each week, automation can help reduce the burden on researchers and industry analysts.”

Malware Domain List – is a site where volunteers document different malicious domains found on legitimate compromised sites, etc and has links to download some of the malware. There are several very interesting links right on the front page of the MDL that anyone interested in malware analysis, prevention and incident response should check out.

With the above links you can purposely download malware and allow it to exploit your virtual machine or other sandboxed environment running known vulnerable, unpatched software or software vulnerable to zero day threats. Once this has been done, you can study it at various different levels:

  • At a basic level, study the network traffic patterns with a tool such as Wireshark.
  • Next you could run it with a live binary analysis tool such as OllyDbg
  • You can also do a static analysis with a debugger/disassembler such as IDA Pro.

When you are ready to move beyond those initial methods, install Linux on a system that supports hardware virtualization extensions. Then you can delve into tools such Ether in conjunction with the Xen virtualization platform. This will allow you to play around with much more sophisticated malware and figure out how it operates.

Continue experimenting and piece by piece you will start to understand how the “modern threat landscape” works.

My first computer, the Mattel Aquarius

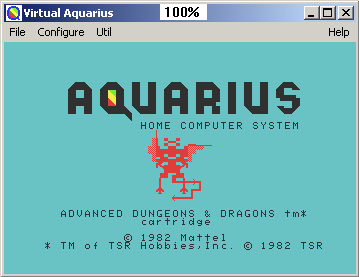
When I was barely five years old, I had a one of the best Christmas presents I’ve ever received to this day waiting for me under the tree.  It was the Mattel Aquarius which was a Z80-based computer released in 1983.  My dad had bought it for me at KB Toys.  We never had a computer before that so I didn’t really know anything about computers or video games but I was instantly hooked to it.  It came with four programs since it was sold as some sort of bundle.  The programs were Snafu, Astrosmash, Biorhythms and Advanced Dungeons and Dragons: Treasure of Tarmin.  One of the most interesting features to me however was the built in Microsoft Basic.  This allowed me to enter programs from the manuals that were included with the system.  The manuals were actually very good and I was able to understand and read them even at five years old.  I obviously didn’t fully understand the architecture of the computer back then but I understood enough to enter programs from the book, run them and make minor alterations to the variables to change the behavior of them.

When my dad purchased the system, it was actually on a close-out.  I wasn’t able to purchase any more software or accessories for that system until eBay was founded many years later.  This was a bit limiting but actually kept me focused on just the one system so I learned a lot about it.  At five, I wasn’t a great typist either so it was kind of nice that the Aquarius had a bunch of macros for common commands in basic already etched onto the keyboard.  In addition to that, most programs came with overlays for the keyboard to perform common tasks as well.

Most people look back on this system as a complete failure for Mattel.  Most would also state that the design was not even on par with technology of the late 1970’s.  To be honest, there are several flaws with it.  The first thing was that the keyboard was horrible.  To this day, I still can’t touch type on it since it’s made entirely of crappy rubber calculator keys.  I know at least one of them got modded to use a Macintosh keyboard.  Next, the controllers are just as bad, if not slightly worst than the Intellivision controllers.  You can physically plug in Atari 2600 controllers but they won’t function at all so I was stuck with the disc controllers.  Also, the power cord is hardwired.  This in itself would be fine except the power supply is external so you have this wall wart that is hardwired into the computer.  This caused me much frustration over the years with regard to cable routing.  Finally, there is only an RF output.  I eventually plan to hack my Aquarius by removing the RF modulator and pulling a composite signal out of the unit but I have not taken the time to so yet.  I will blog about it when I do.

Even with all of these flaws, it was actually a fun little system to play with.  It has only 4k of ram, most of which is used up by basic and by the video but it still left a few pages of memory for coding.  When I was five, I didn’t ever run into this limitation but I can see how some of the programs in the manual would push fairly close to the limits of the hardware.

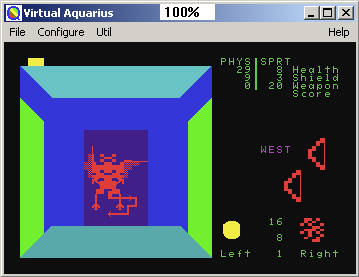
If you aren’t a total purist and want to check out what the Mattel Aquarius was like, you can download Virtual Aquarius for Windows.  This is a fantastic emulator that even includes the roms for all of the aquarius games.  It easily runs on modern hardware at full speed and is a fairly faithful representation.  The only thing missing is the rubber keys and disc controllers but I’m sure you will manage to live without these “features”.
My favorite thing of all on this system was Advanced Dungeons and Dragons: Treasures of Tarmin.  I’ve tried the version on the Intellivision and I have to say it sucks.  Perhaps “sucks” is too harsh but one thing is certain to me, the two games should NOT share the same name because they are nothing alike.  On the Aquarius, you are provided with a keyboard overlay to perform many of the game functions.  This was not a game you could simply pick up and play.  There was a learning curve to it and if you lost the keyboard overlay, you were pretty much screwed.  The graphics are of course chunky by today’s standards but at the time, I thought they were the coolest thing ever.  You crawl through the dungeon in 3D, fight monsters, level up, etc.  Pretty standard, yet primitive, dungeon crawler.  Recently on the emulator, I actually beat this game for the first time ever.  Back in the 80’s I didn’t know if it actually had an end.

A couple of months back, I went back and altered a few programs from the Aquarius manuals.  One of them was the “running man” program.  I also played around with some of the other programs in the manuals too and achieved some interesting effects.  It’s still fun to mess around with basic on an old system like this these days since it’s so simple compared to modern day programming languages and their IDEs.  It’s also easier to learn about computers in general on a system such as this because you potentially can have a full understanding of how all the subsystems work as opposed to modern architectures which have countless subsystems of subsystems that make everything function.  This is one of the reasons I keep this computer around even today.

These systems pop up on eBay a few times a month.  Generally they go for $50-$100 depending on what comes with them.  Not much was released for these systems and they were actively marketed for less than a year so it’s conceivable that you could actually complete a Mattel Aquarius collection.  On top of that, there has been brand new and sealed games sold on eBay for the Aquarius for years.  Night Stalker for instance comes up for sale all the time for $10-$15.  Many retailers and warehouses were apparently left holding the bag on this system so the back stock has slowly been sold off over the last 25 years or so.
Please leave me some comments down below if you have any fond(or not so fond) memories of the Mattel Aquarius you would like to share.

Thirteen great hacker/computer-related movies

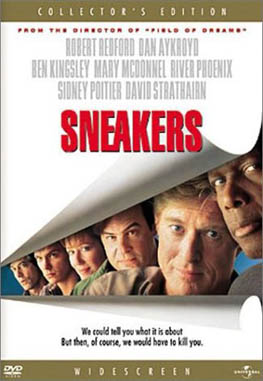
Sneakers – Why can’t there be more movies like this?  This has to be the most mainstream hacker movie of all time.  There are a couple of big name actors like Robert Redford and Dan Aykroyd.  As old as this movie is now, the concepts(if not the hairstyles) have stood the test of time.  Marty, the main character, is a penetration tester of sorts who gets hired by a three-lettered agency to steal a black box in order to clear his name.  If you are reading this web page and you have not seen this movie, go check it out.

Pirates of Silicon Valley – In my opinion this is much more of a movie than a documentary.  When I think of a documentary, I think of some low budget movie that you really can only watch once that was shot with a handy cam by amateurs.  Pirates of Silicon Valley is VERY entertaining, extremely well done and above all, has excellent replay value.  Yes, I realize that many of the events portrayed in this movie were taken out of context and blown slightly out of proportion but I certainly don’t think you get dumber by watching this movie.  They did get most of the big facts correct.  Best of all, my wife actually enjoyed this movie and she is not a techie at all.  Can’t say that about all the movies on this list.

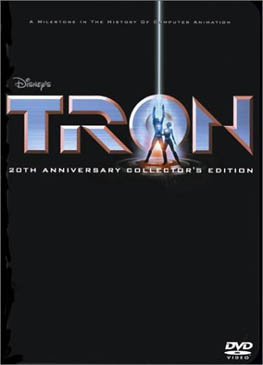
Tron – Unrealistic as it may be, this should definitely still be classified as a hacker movie since the whole point of the movie is Flynn hacking back into his former employer’s computer system in order to find the proof that he was the author of several successful(fictional) video games of the era.  The premise of the movie is pretty cool.  Computer programs are depicted as real living entities who, in some cases, are not aware of their “users” or programmers.  From this movie spawned one of my favorite arcade games of all time, Discs of Tron.

The Matrix – The Matrix is more of an action/thriller movie with computers but the main character, Neo, is certainly a programmer/hacker therefore I’m adding it to this list.  The premise of The Matrix is that the whole world is depicted by lines of ever changing code.  That is because most of the human race is enslaved in a virtual reality simulation that continually plays out society in 1999.  The first Matrix is probably my favorite but I would not ignore the rest of the trilogy.

Hackers –  Laugh as you will but I think this movie has more merit than it is given credit for.  Yes, the hardware and software they have in the movie is totally absurd, but would the movie have been better if everyone was sitting in front of Unix terminals doing their “hacking”?  I certainly don’t think so.  I think the movie is very creative and entertaining.  If you look past the 3D command line text popping out of the screens and the over-stylized hacker culture, there is plenty of realism and decent storyline to be had in this movie.  That being said, if you want realism, this isn’t your movie.  If you have an open mind and want entertainment, check this one out.

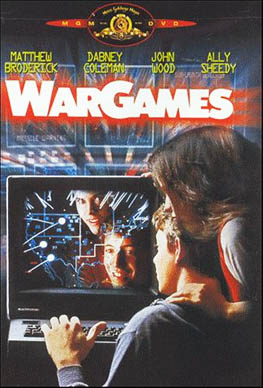
War Games – A really young Matthew Broderick stars in this old school hacker movie.  David accidentally hacks into a backdoor of a military computer and thinks that it’s some new video game.  In the process of “playing” the game, he triggers a chain of events that could lead to WWIII.  This movie demonstrates why EVERYTHING should not be connected directly to the net.  This movie is really old but still a classic with plenty of entertainment value and other merits.

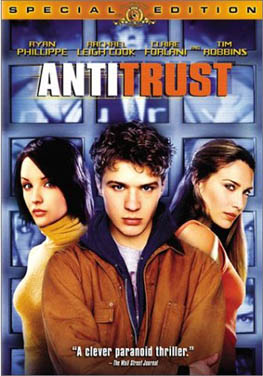
Antitrust – Antitrust is a bold jab a Microsoft right down to the pseudo Bill Gates who is the sinister mastermind behind the evil plot to eliminate the competition.  There is even a minor character named “Redmond”.  Ryan Phillippe plays Milo, a talented programmer who lands a dream job at a prosperous software company who is bent on world domination.  This movie is actually pretty decent and often absent from lists of hacker movies such as this one.

Johnny Mnemonic – I’m not sure why this movie isn’t mentioned more often.  It clearly belongs in the “hacker movie” category.  This movie has some classic Keanu Reeves moments.  There is a particular monologue that makes me laugh ever time, “Listen. You listen to me. You see that city over there? THAT’S where I’m supposed to be! Not down here with the dogs and the garbage and the fuckin’ last months newspaper blowing back and forth. I’ve had it with them, I’ve had it with you, I’ve had it with all this! I want ROOM SERVICE! I want the club sandwich. I want the cold Mexican beer. I want a ten-thousand dollar-a-night hooker!! I want my shirts laundered like they do at the Imperial Hotel in Tokyo.”

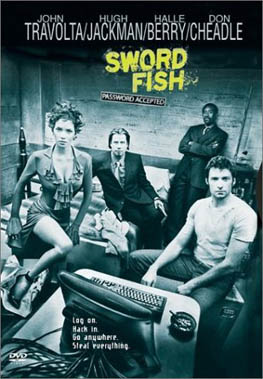
Swordfish – This movie has such a cliche plot line that you will probably think you have already seen it even if you haven’t.  A reformed hacker gets pulled in by super criminal Gabriel(John Travolta) to help him steal gobs of money from the US Government.  A lot of this movie is forgettable but it’s still great mindless entertainment for the computer nerd in all of us.  After you’ve seen the Matrix, pick up Swordfish for another machine gun and computer crossover movie.

The Lawnmower Man – The original(and best?) virtual reality thriller.  A scientist decides to experiment on his mentally handicapped gardener.  With a mixture of drugs and computers, it turns out that his garden is not only way smarter than him but he’s damned evil and pissed off.  Pierce Brosnan of James Bond fame stars in this classic sci-fi hacker flick.  If you are in the mode for some low-budget early 1990’s era CGI, this is definitely your movie.  Don’t bother with the sequel.

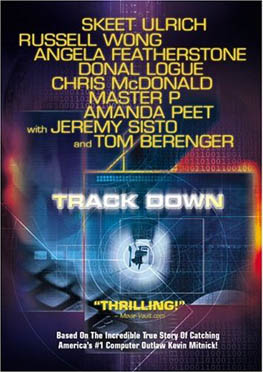
Track Down – This movie is based on the Kevin Mitnick story.  Skeet Ulrich plays Kevin Mitnick.  This movie is a little slow at times and shows a lot more social engineering ploys than actual computer hacking but I think it still has a place in any collection of hacker movies.  Honestly this movie would have benefited from Hollywood digging their mitts into it a bit further.

Brainscan – This movie SCREAMS low budget but if you can get past that part, there is actually an interesting story line here.  It was made in 1994 but seems far more dated.  The premise of the movie is that this gamer kid(played by Edward Furlong of T2 fame) is tired of all the same old boring video games.  In his quest to find something more interesting, he stumbles on this ad in the back of a magazine for this game called “Brainscan” that promises to be unlike anything he has ever played before.  This is a bit of a virtual reality/psychedelic experience but certainly worth a watch if you are in the mood for something even cheesier than hackers.

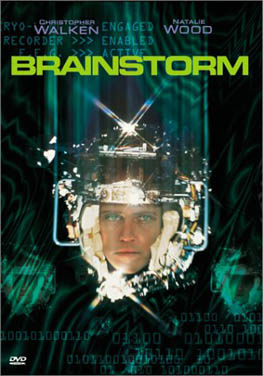
Brainstorm – This movie is brutally old but interesting none-the-less.  Christopher Walken stars as a scientist who has discovered how to record people’s thoughts and experiences and play them back to other people.  It’s really, really dated but there is some cool retro computer hardware and sweet rainbow-colored ribbon cables that tie it altogether.  It’s not as slow and boring as most other sci-fi movies of the era.  This one isn’t quite a hacker movie in the traditional sense but probably interesting to most computer nerds just the same.  Maybe wife friendly, YMMV.

If you’ve made it through this list and don’t see one of YOUR favorites, please post in the comments below.  I would love to hear about it.  If you would like to support my site, please buy the movies via the links above or buy anything that you like on amazon.com via the link down below.  This helps keep me motivated to post more articles and information on my blog here.

Powered by WordPress. Theme: Motion by 85ideas.