Latest Entries »

Building OpenEmbedded for the Zipit z2

OpenEmbedded was the original starting point for unlocking Linux on the Zipit Z2.  Nowadays there are plenty of userlands floating around out there but if you want to take things even further on your Zipit, you’ll probably need to build OE.

OpenEmbedded will allow you to compile packages and actually build your own custom rootfs from the ground up. You’ll be able to use your fastest desktop system to cross compile packages for your zipit and even build a custom kernel for your zipit as long as you are using U-boot.

To get started I’m simply going to expand on Sweetlilmre’s directions.

  1. Make sure you have like 80 gigs free on your hard drive.  I would suggest using Debian or Ubuntu as your base OS for these directions.
  2. At command prompt, go to your home directory and type “svn co https://openzipit.svn.sourceforge.net/svnroot/openzipit/oe”
  3. CD to the OE directory
  4. type in “make” and wait…

At this point, you may be getting a list of dependencies that are broken so you might need to fire up apt-get and get some packages.  After you are able to successfully “make”, then you should be ready to get started.  (That’s right, that was just the beginning)

  1. Run “./oe_zipitz2.sh”  This script sets up the environment to start building.  It should change your bash prompt to a green one.  That alerts you that you can start bitbaking.
  2. Now you need to build the base-image so run “bitbake base-image” and wait…

Many hours later, your base-image should be built and ready to go.  Just make sure you have no errors waiting for you on the screen.  If everything went well, you should have a rootfs and kernel waiting for you in “~oe/zipitz2-tmp/deploy/glibc/images/zipitz2”.  There should be file called base-image-zipitz2.tar.  You will need to untar that file to a blank sd card formatted ext3.  Use the “-pxvf” switch with tar so that the permissions are preserved.

After that is done, you should be ready to boot your new minimalist userland.  If you are using U-boot, you will need one additional step.  Copy this uboot.script file to the /boot directory on your SD card and make sure your U-boot environment variables are set up similar to how I have outlined it in this post.

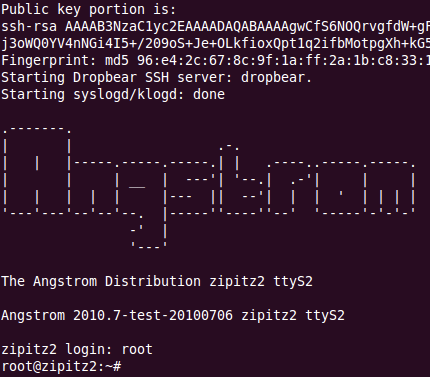
Apparently this distribution has both serial console and local support built in out of the box.  When you boot up over the serial port, you will be presented with a screen that looks like this:

There is no root password.  Just type in root and hit enter.  You’ll be logged right in.  Now that you’ve gotten this far, you should be ready to follow Hunter’s directions to build dosbox or maybe something even more exciting.  Post in the comments and let me know.

If you are interested in buying your own Zipit to hack and you like the information on my site, please buy your Zipit using this link and support my site. You won’t find them anywhere cheaper than that anyways.

Tweaking Side-Track linux for U-boot on the Zipit Z2

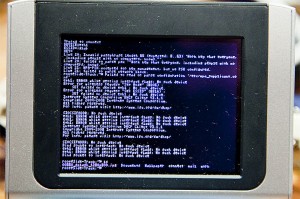
Side-track running on a U-booted Zipit

Irongeek’s side-track Linux was built around a semi-stock Zipit Z2.  In order to run side-track, you have to re flash the Zipit with a hacked 2.6.29 kernel but you keep the original blob bootloader.  The problem with keeping blob is that it doesn’t allow you to use any other kernels and things have come a LONG way since 2.6.29.  U-boot is the future of the Zipit as a hacking platform but right now it’s still a short bit away from being a seamless process.  One of the problems is that some userlands such as side-track will no longer act as expected.  There are a few things that will be tweaked in order for it to run at all.

For starters, you’ll want a uImage and uboot.script that will be good enough to boot with.  You will put these files in your /boot directory on your sidetrack sd card.  As stated in one of my other posts about U-boot, you will need to make sure this line is set as an environment variable in U-boot:

bootcmd=if mmcinfo && ext2load mmc 0 0xa0000000 boot/uboot.script ; then source 0xa0000000 ; elif mmcinfo && fatload mmc 0 0xa0000000 uboot.script ; then source 0xa0000000; else bootm 0×60000; fi;

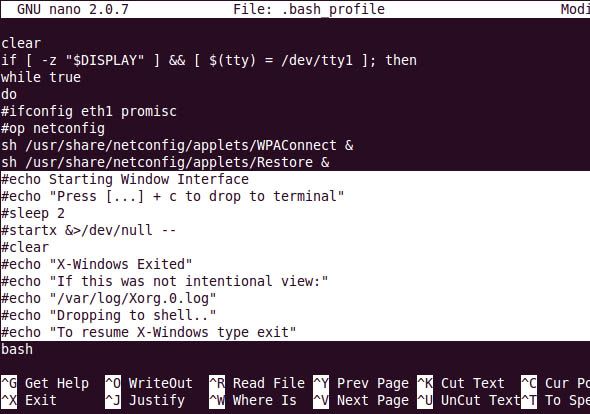
These things will probably make your system bootable at least.  When you boot however, you will not be able to do anything because the keymouse driver is broken under the new kernel.  Mozzwald and some others are looking for some solutions to this problem but for now, we should just disable X so we can try out the system a bit and see what else is broken.  To disable X in side-track, edit /root/.bash_profile.  Comment out the following line:

startx &>/dev/null —

If you want to clean up all the garbage messages on the console, also comment out the 3 line before startx and 6 lines after it since none of them are needed now either.

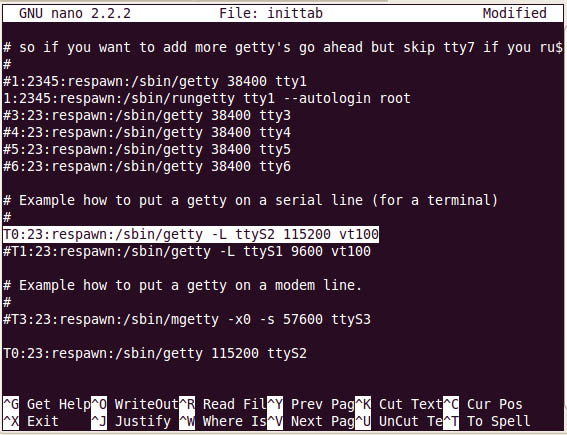
If you have a serial port, you will also want to enable the console access so you can log in from your desktop and type away.  To do so, you will need to fix this line in /etc/inittab to look like my screenshot below:

This gets you in a minimally running state where you aren’t locked out of the console anymore.  Then you can move onto other tasks such as making the font readable since the kernel sets the font size down to extreme eyes training levels.  I’ll leave that discussion for a different day.

If you are interested in buying your own Zipit to hack and you like the information on my site, please buy your Zipit using this link and support my site. You won’t find them anywhere cheaper than that anyways.

Sierra On-line Black Cauldron on the IBM PC XT

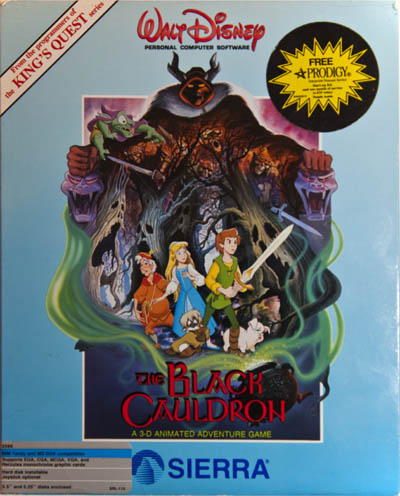
I was at the thrift store the other day and scored a copy of Disney’s Black Cauldron game made by Sierra On-line in their glory days of text/mouse based adventure games. When I first got an IBM compatible system back in the 90’s, the Sierra games were by far my favorites.  They were always consistent, always fun and sometimes a challenge to get running properly which was also fun.  This particular game was released in 1985 although this particular copy was printed and sold in 1989.  According to the box, the system requirements are very very low.  It requires 256k of ram, vga, ega, cga or hercules graphics and a keyboard.  Mouse or joystick optional.

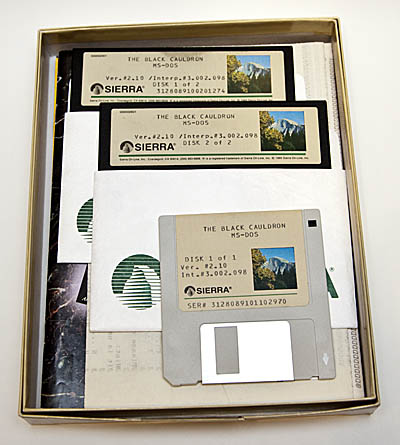
I opened up the packaging and was pleasantly surprised to find both the 5.25″ floppies and the 3.5″ floppy.  There were several other goodies inside as well including the manual, the tenth anniversary Sierra catalog and the original Prodigy Network trial offer which brings back many fond memories.  Another prize buried in this box was a hint guide that someone painstakingly downloaded via dial up and printed on a dot matrix printer.

Using a little forensics, it’s obvious to me that this game was played a lot but taken care of meticulously.  The computer it was used was probably late 80’s technology based on the fact the previous user obviously used the 5.25″ disks and most likely played the game straight off of the disk.  There is a characteristic fingerprint/smudge at the top of disk 1 but not on disk two.  I’m guessing the owner played through the game as far as they could get which took them a while.  They probably never made it to disk 2 on their own.  That’s when they resorted to printing the hint guide.  They played through the rest of the game, cheating with the hint guide to beat it in the matter of a couple hours.  After they beat it, they put the game away for 20 years and someone finally donated it to the thrift store.  All of this only leaves one question in mind: Will this game actually work on my PC XT after sitting in a box for 20 years?

Well much to my pleasure, it decided to work!  I put in disk 1 and ran the install script:

install c:

The 30 year old floppy drive sprang to life and copied the disk to the hard drive.  Disk 2 went just as well.  The installer left me in the c:\sierra directory and told me to type:

bc

This is obviously an updated version of the game since the older Sierra games had much cruder install scripts.  Anyhow, I started the game up.  Obnoxious 8-bit PC speaker music came blasting out.  Sad that the IBM’s didn’t even have sound as good as the C64.  I turned the music off with F2 and could then study the glorious 8-bit graphics.  This must have been an amazing game in it’s day.  As far as the sierra line up, I would say the graphics are similar to Space Quest 1, Kings Quest 1, etc.  The game play is much different however.  This game is geared toward younger players so it requires no typing at all.  Instead you use the F-keys to DO, LOOK, USE, etc.  It’s a good concept that Sierra didn’t fully develop until the days of King’s Quest 5, Space Quest 4, etc.

I tend to like both styles of the Sierra games for different reasons.  I plan to play this one through at some point and see what it has to offer.  Go check out Abandonia for much more information, screen shots and a download for the Black Cauldron.

Computer world recently published an article about some MIT researchers promising internet 100x faster and cheaper.  This always SOUNDS good when such promises are tossed around but it seems a little short-sited overall.  Generally a drastic change like this will cost a LOT of money re-outfitting all the NOCs, colos and other internet hubs with new routers and hardlines.  I imagine the end user will end up paying for it one way or the other.  Sensational promises remind me of things like memjet and transmeta that never quite seemed to live up to the hype …  (Still waiting on memjet)

This article says nothing about is getting fiber to the curb though.  Oddly, Verizon just laid a bunch of fios lines in my neighborhood and then sold them all off to Frontier less than 2 years after they did it.  This is just after Google announced they were going to bring 1gbps fiber to some lucky towns as testbeds with their Google fiber for communities project.

These are confusing times for making a decision on an ISP.  I’m sticking with Speakeasy for now.

Further tinkering with U-boot on the Zipit Z2

When U-boot was presented to me, the default behavior is to attempt to read your SD card and look for uboot.script on the first partition of the card which is expected to be vfat.  I found this to be a pain because so far all the user lands that I have don’t have a vfat partition as a primary.  Usually the first partition is your main user land partition and it’s generally ext3.  I wanted to tweak U-boot to be able to boot from a kernel and uboot.script that is placed in the /boot directory in whatever userland I’m using.  Marex suggested that it would be easy enough to use logic to accommodate both setups.  With a bit of his assistance, I was able to come up with a new environment variable that worked. The old bootcmd variable looked like this:

bootcmd=if mmcinfo && fatload mmc 0 0xa0000000 uboot.script ; then source 0xa0000000; else bootm 0x60000; fi;

If you break this down, you’ll see it looks for the uboot.script on the root directory of the first fat partition on mmc 0.  If it finds the uboot.script there, it loads it and executes the commands contained within it.  If not, it continues and boots whatever is sitting at the 0x60000 location in flash memory and uses the environment variables currently loaded in u-boot itself.  If there is nothing there, it fails.  My new bootcmd variable looks like this:

bootcmd=if mmcinfo && ext2load mmc 0 0xa0000000 boot/uboot.script ; then source 0xa0000000 ; elif mmcinfo && fatload mmc 0 0xa0000000 uboot.script ; then source 0xa0000000; else bootm 0x60000; fi;

This one will first look for the uboot.script file under the /boot directory on the first ext2/3 partition for the uboot.image on the first ext2/3 partition.  If it is not there or the partition is not ext2/3, it tries to look for the file on the first vfat partition.  If it can’t find that it will try to load a kernel that is in your flash memory if it exists.

Of course the old uboot.script does not work with the ext2/3 configuration described above.  I went ahead and tweaked the uboot.script.base file as follows:

if ext2load mmc 0 0xa0000000 boot/uImage; then
setenv bootargs console=tty0 console=ttyS2,115200 fbcon=rotate:3 root=/dev/mmcblk0p1 rootdelay=3
bootm 0xa0000000;
fi

I saved it and then ran ./mkscript.sh to make the uboot.script which is actually a binary file and then copied the uboot.script that was created to /boot on the proper SDcard.

To build a new uboot.script file, you need to:

apt-get install uboot-mkimage

the uboot.script.base and mkscript.sh can be found in this file: z2-uboot-06262010.tar.gz

Note: this file is outdated but does contain the script to rebuild uboot.script.

Earlier today, Mozzwald helped me flash a default static-linked kernel into the flash ram.  This allowed me to boot side-track under U-boot for the first time since upgrading to U-boot without ANY changes to side-track.  Unfortunately, the mouse driver is broken under this later linux kernel and will probably need to be recompiled.

I could go through the process of flashing that static kernel into memory but I don’t feel comfortable doing so because it’s not very streamlined at this point.  If you are interested in the instructions, just speak up on the #zipit channel on freenode and someone will probably be able to help you through it.

Upgrading to a newer version of U-boot on the Zipit

using ymodem to transfer the new firmware

Warning: This can brick your Zipit Z2 if you don’t follow the instructions precisely.  Even if you do follow the instructions precisely, you might brick your Zipit.  This proceedure only works if you already flashed U-boot onto your Zipit

Read all of the instructions completely before attempting this procedure.

With that out of the way, I’m going to upgrade to a newer version of U-boot that Marex provided me by following his instructions. This newer version will boot from an SDHC card.

First, you need a serial mod to use this method.  This is the safest method of upgrading U-boot since you are actually testing the firmware before you flash it.  There is also a method to update U-boot from Linux that I will post later.  Download the newer version of U-boot from:

http://marex.hackndev.com/zipitz2/U-Boot.rel.Jun.30-2010.bin.

The md5sum is e82ce84f11c1fa50106f5c005bf912f7.  Do yourself a favor and actually check the md5 hash.  It’s very important that this file didn’t get corrupted in transit.

Here are the instructions:

1) enter serial prompt on the Z2 in U-boot (best is to use minicom — for ymodem)

2) Type the following command and then send the new U-boot bin file via YMODEM

loady 0x5c000000

3) Run the new firmware with the following command and the Zipit will reboot.  Hit a key to cancel auto boot.

THIS IS THE LAST STEP THAT IS NOT DANGEROUS.

go 0x5c000000

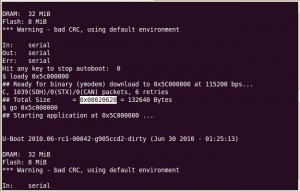
4) after you run “go 0x5c000000”, the new bootloader is now started and you need to cancel auto-boot … you’ll get a new prompt (of the new bootloader) … DO NOT TYPE ANYTHING BUT THE FOLLOWING COMMANDS.  If you power cycle the unit before typing the following commands or do any other actions, you will likely brick the unit.

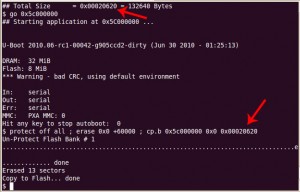
protect off all ; erase 0x0 +60000 ; cp.b 0x5c000000 0x0 0x00020620

5) Type “reset” and pray

Make sure the two numbers match BEFORE pressing enter

Caveats: DO NOT TYPE ANYTHING between step 3 and 4 if you want to reflash. If you just want to test the new firmware out without reflashing, stop at step 3. You can type boot at the prompt and that should show the new functionality and if it works. When you power cycle, the firmware will revert if you don’t complete step 4.  Do NOT run step 4 unless that last number matches as indicated in the picture by the two red arrows.

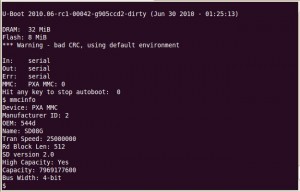
U-boot seems to recognize my 8gb SD card

Here are a couple of U-boot commands to play with:

If you want to get rid of the “*** Warning – bad CRC, using default environment” message upon bootup, just type “saveenv” at the prompt.

printenv will show you the current environment variables for U-boot

mmcinfo will print information about whatever card is in the SD slot

help should be obvious

reset should be obvious

boot should also be obvious

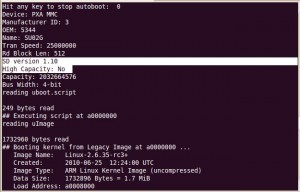
U-boot booting up my existing 2gb card

Thanks again to Marex for providing me the instructions, firmware and answering my questions.  Follow this link for further information on this version of U-boot.  Follow this link for more general information on U-boot on a Zipit.

If you are interested in buying your own Zipit to hack and you like the information on my site, please buy your Zipit using this link and support my site. You won’t find them anywhere cheaper than that anyways.

Upgrading the Zipit Z2 from blob to U-boot

Your Zipit looks like this when booting U-boot. No lights, blank screen, no sign of life!

A few words of warning first: The following instructions have been tested by me once and only once.  You stand a chance of bricking your Zipit.  I can’t be held responsible if you brick your Zipit either following these instructions or failing to follow the instructions.  If you brick it, you will either need to build or obtain a JTAG interface to fix it.  You probably should consider doing the serial mod first before you reflash with U-boot anyways just so you can see any error messages on the console if you get stuck.  MY instructions are NOT for reflashing from a stock kernel but there are instructions in the README.  If you haven’t already reflashed to the Open Zipit boot loaders then you will need to follow a different procedure to upgrade to U-boot.  Lastly, you will not be able to use SDHC cards after you upgrade so 2gb will be the limit although I understand there is already a new version of  U-boot which adds the SDHC drivers.  Make sure your Zipit is plugged in and fully charged.  This is cutting edge stuff for the Zipit.  You probably don’t need to go to the trouble and the risk of this procedure to enjoy using your Zipit as a pocket-sized Linux device.  Read this whole post and the README before you attempt flashing U-boot.

With that out of the way, let’s get started.  I’m using Mozzwald’s z2buntu to do the actual flashing of U-boot.  This distribution works well because it doesn’t have X11 on it by default to muck things up.  You’ll need to log in as root or use sudo.  Don’t get too attached to this install because you will be throwing it out the window soon enough.

First you’ll need to wget z2-uboot-06262010.tar.gz on your Zipit.  The md5 hash is c917bfd057e5bfd7e0a50e44e4192d25.  Untar the file, changed to the uboot-rel directory and run:

sudo ./z2debian.sh

You’ll see a few weird messages that freaked me out.  They say stuff like /dev/mtdblock0 no space left on device.  Don’t worry about these.  The script writes 0xFF to the flash memory before it done flashes until it runs out of room.   After all this is done, pull out the battery, and remove the AC to clear the ram entirely.  Then plug it all back in.

Here is more weirdness, if you boot up your system right now, there is NO way to tell anything is happening.  It will look dead dead dead.  No lights, no nothing.  The only sign of life you can get is if you push the reset button.  That will cause the keyboard light to briefly flash.  If you have done the serial mod, this would be a good time to fire up a terminal and see if everything went well.  If you hit the reset pin while plugged into the Zipit, you should see this in your terminal:
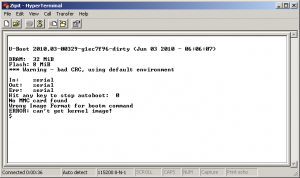
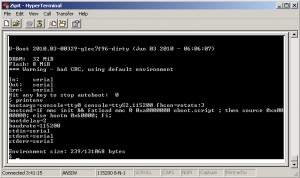
From here, you can see that U-boot is not finding the kernel partition that it needs to on the flash card.  Also, Mozzwald’s script was supposed to load a static linked kernel into flash that would be bootable by U-boot but something is a little screwy with the flasher script at the moment.  No worries since we can fix that later.  I don’t know much about U-boot but I do know it’s far more powerful than the blob loader I was using.  The difference is that U-boot allows you to boot any properly build kernel that you stick in the primary fat32 partition.  One command I know that you can do is “printenv”.  This will show you current loaded environment variables:
After you’ve tried that out, I’m sure you are ready to make your Zipit actually boot up again.  If you’ve gotten as far as the U-boot shell, at least you aren’t bricked.  If you haven’t done the serial mod, you are probably pissing yourself at this point thinking you probably bricked your Zipit.  Relax, take a deep breath and hit the reset button.  If the keyboard light flashes quickly, you are probably not bricked.  No guarantees though.

You will now need to download Mozzwald’s U-boot ready tarball.  While you are waiting for that, you need to partition a SD card as follows:

  • partition 1: vfat(fat32) 32-64MB (this partition holds the uImage and uboot.script files)
  • partition 2: ext3 for the remainder of the space (this is where your root fs goes)

I used gparted under Ubuntu to complete the partitioning operation since it’s free and easy to use.  Make sure your SD card is plugged in and recognized but unmount it if it’s not already.

After the new partition scheme on the  SD card is created, mount the card and change directories to the mountpoint (/media/z2buntu on my system), untar the filesystem into place with:

sudo tar -pxvf /path/to/z2buntu-uboot-rootfs.tar.bz2

There is another tar file inside of the main z2-uboot tarfile that you downloaded first(z2-uboot-06262010.tar.gz).  The file is called z2-2.6.35-rc3.tar.gz.  Untar that file and then:

cd lib/modules/2.6.35-rc3+/kernel/

You need to copy the uImage file from that directory to the vfat partition on your SD card.  You’ll also need the uboot.script file that lives in the root directory of the z2-uboot-06262010.tar.gz tarfile.  You should now be ready to put your SD card back in the Zipit and boot it up.  If you did everything correctly, it should look like this after a few seconds of being completely blank with no lights on:

More caveats.  To quote Mozzwald, “things won’t work the same anymore”.  You will want to disable your power management scripts for now.  Closing the lid could cause you to get stuck in a blank screen loop.  In most root file systems it just involves commenting out some lines in your rc.local and perhaps making a few other changes.  I would suggest jumping in the /etc/rc.local file as soon as you get booted so that you can tweak the Zipit-specific settings.  The files that I’m linking to above are NOT the newest and latest versions and there are things in them that I know are broken but none of it is unfixable.  I’m providing this set of instructions so people can see that U-boot is still in a very experimental stage.  I wouldn’t not suggest U-boot for 99.9% of the Zipit hackers out there but if you are dying to build your own custom kernel for the Zipit, U-boot is really your only option.

Why would I go to all this trouble to seemingly downgrade my Zipit you might ask?  This brings me one step closer to Zipit nirvana with the Zipit USB mod.  A custom kernel is required to have the USB host drivers in it so this is a necessary evil.  Many thanks to Marex for U-boot, gpsfan for pioneering the USB mod and being one of the early testers/tweakers of U-boot, rkdavis for bricking one of his Zipits trying to upgrade to U-boot, and especially to Mozzwald for putting up with at least 5 pages of questions that I asked him regarding this mod and for providing all of the files I’ve linked to above.  None of this is my work and the credit belongs to them and a few others for pioneering this hack.

If you are interested in buying your own Zipit to hack and you like the information on my site, please buy your Zipit using this link and support my site.  You won’t find them anywhere cheaper than that anyways.

RetroMacCast podcast review

I ran across the RetroMacCast the other day when I was looking for podcasts focusing on older computers.  This podcast is ran by two guys, James & John who are both collectors, restorers and modders of old Macintosh computers.  They seem to be mostly interested in 68000 and early power PC architectures but certainly mention G3’s and G4’s all the time as well.  I like to listen to podcasts from the start when I find them.  The RetroMacCast started on December 17th, 2005 so they have been around a long time now.  As of today (6/27/2010) they have 165 episodes under their belts.  Their goal is to podcast once a week.

As of now, I’m only on episode 23 of this podcast so anything I mention now may change later but I like this podcast for several reasons.  Let me just list them off:

  • They keep it moving at a good pace.  Aside from interviews, no segment goes on for over a five minutes or so.
  • It is consistent.  You always know what to expect when you listen so if you like the first one, you’ll probably like them all.
  • The format is good.  They read some fan mail, talk about a particular retro mac of the week, a piece of hardware or memorabilia, an eBay find of the week and current news.
  • No sponsors so the podcast isn’t junked up with a bunch of ads.
  • Good audio quality and production.

I’m not a big Mac guy personally.  I like the MacBook Pro that I use but I’m not a fan boy, I don’t idolize every little nuance of the company and I don’t collect old Macs.  That being said, I always learn some new and interesting about old Macs and old computers in general from this podcast and never find it overwhelming to listen to.  Going back to the start, it’s fun to listen to these guys speculate about new hardware coming out such as the iPhone, iPod Touch, MacBook Air, etc.  To me, listening to these podcasts about the old Macs is better than actually owning most of the systems since it takes up less space to just listen to their podcast and look at the pictures they post.  I’m confident that if I ever DO decide to buy a retro Mac, I’ll have the proper knowledge to figure out which one to buy thanks to this podcast.

James and John do a very good job of keeping it interesting and leave the listener wanting to hear more.  One of my favorite segments of their podcast is the eBay find of the week.  They will discuss a few rare items that are listed, give recommendations on whether to bid on them or not and then the next week, they follow up and tell how much the items did or did not sell for.  I would not be as kind as they are when talking about some of these sellers such as the guy wanting $500 for a toaster Mac case back or the other guy trying to get $3500 from a third party external scsi drive.

If you are into old Macs, this is your podcast.  If you are into new Macs, this might also be your podcast since they do hit all of the major announcements and don’t tend to drag on about them too much.  If you are into computer history, this is definitely your podcast.  Sometimes they even step outside their scope and dare to talk about things like the Apple I, Apple Lisa and Newton Message Pad.  If any of this sounds interesting, check out their website or just subscribe in iTunes.

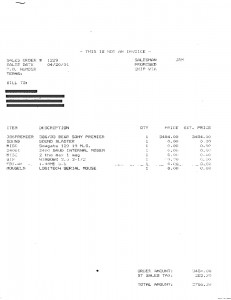
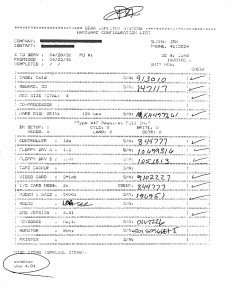
Digging through my files the other day I came across these little gems.  They are the sales order and build sheet for the first IBM compatible system my family ever had.  It was built by Bear Computer who is actually still in business to this day but they moved to a different location down the street.

The system we bought was configured as follows:

  • 386DX/33 chip and motherboard
  • 4 megs of ram
  • Seagate 120 meg hard disk
  • 2 the max 1mb video card
  • 16-bit generic IDE/serial/parallel combo card
  • 5 1/4 inch floppy drive
  • 3 1/2 inch floppy drive
  • 2400 baud internal modem
  • 13″ Sony Trinitron SVGA 1024×768 monitor
  • Keytronics 104 key keyboard
  • Logitech Serial Mouse
  • MS-DOS 4.01
  • Windows 3.0

Price?  $3766.20 including Washington State sales tax.  That was a good chunk of money in April of 1991 but my dad felt it was necessary for his construction business to have computerized accounting and felt that it would help me take an interest and learn more about computers.  I think the computerized accounting was far more trouble than it was worth in 1991 but the second goal of peaking my interest in computers was certainly a success.

Reading this paperwork brings back memories.  Oddly, my dad purchased the computer and they handed us the sound card separately in a box.  The technicians didn’t feel comfortable installing it in the system.  I thought this was a bit odd since they felt comfortable enough to plug in 30 pin simms and a 386 chip into a non-ziff slot but couldn’t deal with a $200 sound card?  Oh well.  I’m really GLAD they did this since it gave me the opportunity to open up the system myself and jam that sound card in there.

There were several other things that happened with this system.  Somehow, we managed to fry 3 IDE controllers while it was still under warranty.  One time was CLEARLY my fault but the other two I’m not so sure about.  A Smith Corona electronic typewriter that we had featured a DB9 port on the back so I tried to plug that into the controller to see if I could interface the two.  That ended up releasing the magic smoke.  The other couple of times were random failures I think.  Back in those days, computer parts had just started being mass produced in China so there were some QC issues from time to time.

Roughly two months after my dad purchased that computer, I got a summer job working for my friend’s dad building computers at his computer store in Bellevue.  Keep in mind, I was twelve years old at this point.  As part of my working there, I managed to trade up to a 486DX/33 CPU and motherboard.  Needless to say, my dad didn’t know whether to be pleased or furious when he came home to his 2 month old computer in pieces while I was swapping in the new board.  The computer he just paid nearly $4,000 for I might add.  In the end it worked out though.  I worked off the price of the upgrade, the computer still worked after the upgrade and he didn’t have to put out a dime for it.

That wasn’t the last time I tore into the hardware or broke the software on this poor system.  I’m shocked my dad didn’t rip his hair out after the 10th time or so that I had to reinstall the operating system for one reason or another.  I did learn a lot from breaking it and fixing it however.  Those were all invaluable lessons and proof positive that the learning process includes making a few mistakes along the way.

Even the sales order itself is as archaic as the computer described on the paper.  It was printed on a dot matrix printer with tear off sides and has faded terribly over the years.  Oh the good old days…  at least I have this paperwork to remember them by.

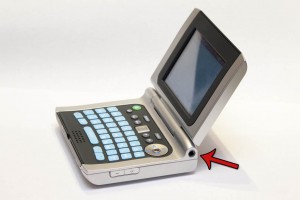
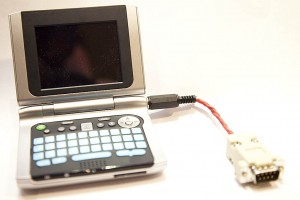
Usually when I modify something, I try not to ruin the aesthetics. It has to perform and look better(or the same) than before I start the project, otherwise I don’t want to do it. I think this mod has achieved that. With some help from a friend, I managed to design and build a surface mount serial level converter board that fits inside the Zipit Z2 behind the screen. It pops out of the Zipit in the form of a 3.5mm headphone jack that is stuffed up in one of the only spots it would possibly fit. From there, I built a short cable that turns the 3.5mm plug into a DB-9 for plugging into any standard serial hardware.

The mod is powered entirely from the Zipit it and will have an unnoticeable effect on battery life. The chip I used is the Maxim 3221 CAE 16 pin SOIC variant which also has some built in power saving functionality. This was the smallest chip that I could find that would do the job. The size of the capacitors on the board are not entirely critical but their function is. They help the IC boost the voltage up to the proper level for communicating with RS-232 devices. Without the caps, chances are that the converter will work for some devices and not for others because it will fail to fall within the RS-232 spec. I used .1uF surface mount caps in a 603 package. They are pretty tiny but certainly not unmanageable. There are plenty of tutorials out there on soldering surface mount components if you happen to be nervous about this.  Here is the schematic.

Before we can put the board in, we need to crack the case so I put together this Zipit disassembly guide.  After it was apart, I could see the space that I had behind the screen.  It’s a surprising amount really.  They could have made this thing a little thinner if they wanted to.

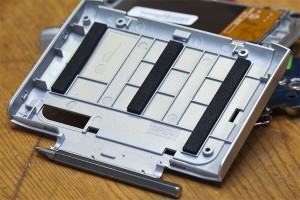
Here is a good view of the area behind the LCD

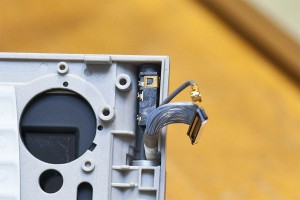
Test fitting the 3.5mm jack

As I was I saying, the 3.5mm jack is stuffed in the only spot I could find for it.  It’s where the LCD cable comes down from the upper half of the Zipit.  I happened to salvage this headphone jack from a Sansa Shaker which is a great MP3 player for a baby.  I had an extra one that was broken so I took the two headphone jacks out of it and gave one to my friend.  rkdavis found a 3.5mm jack on Digikey that looks pretty similar to what I used.  The space is very tight so the size of the jack is critical.

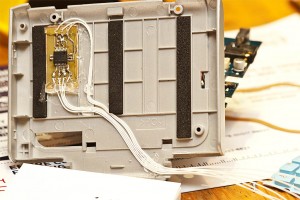
The wires routed and board mounted

As you can see, that board fits perfectly in that empty square.  I used a few dabs of hot glue to hold everything together and route the wires where I wanted them to go.  I took care to mark the wires with Sharpie pen notches so I knew which wire went where.  The wires I used are Kynar 30 AWG wire wrap wire.

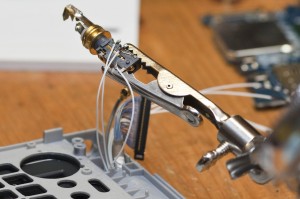
Using helping hands to solder the 3.5mm jack

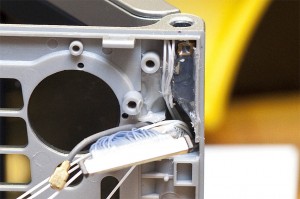
After the wires were all routed, I stuck the LCD housing back together.  I pulled all 7 wires through the same spot where the LCD wiring comes into the lower half of the unit.  I used some Helping Hands to hold the headphone jack and solder tiny wires to it.

3.5mm jack hot glued in place

I used copious amounts of hot glue to make sure that headphone jack didn’t move.  I also drilled the hole extra tight and crammed the jack into it so I don’t expect any movement at all.  After this step, the hard part is done and there are only 4 wires left to hassle with.

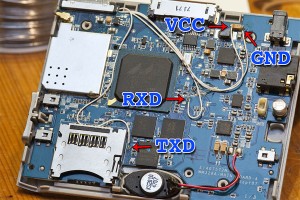
Mainboard locations for hooking up the serial converter

I stuck the keyboard back together and put the motherboard back into the zipit it.  Then it was fairly easy to solder the last four leads to these locations and put the bottom half of the case back together.  Now that it’s done, it’s time to plug it into a serial port.

The completed mod including the dongle

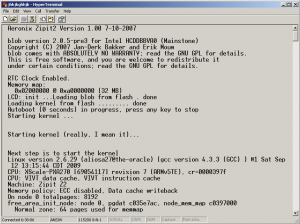
I’m using Hyper Terminal in Windows XP under VM Ware Fusion.  The port settings are 115,200, 8 bits, 1 stop bit, no parity and NO flow control(very important).  Here is what pops up when I first boot the Zipit.

This is what pops up when you first boot the Zipit

If anyone wants to replicate what I’ve done, here is the PCB layout for Kicad.  Feel free to comment if you need more assistance.

Now for that USB host mod

If you are interested in buying your own Zipit to hack and you like the information on my site, please buy your Zipit using this link and support my site. You won’t find them anywhere cheaper than that anyways.

Powered by WordPress. Theme: Motion by 85ideas.