Latest Entries »

Zipit Z2 disassembly guide

The Zipit Z2 is the perfect little hacking platform.  Searching around on the web, I couldn’t find a decent group of pictures showing how to disassemble the Zipit so I decided to post my own little guide.  Obviously use this guide at your own risk…

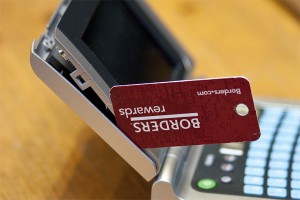
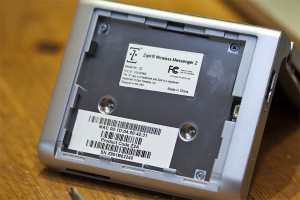
First we slide a plastic card to separate the dark gray plastic piece behind the screen from Zipit  Using a plastic card will avoid scratching the case.  In this case, I used a Borders key chain membership card I found on the sidewalk.  This will expose three screws behind the screen and the ribbon connector for the screen that I would suggest not messing with.  Remove those three screws.  The top two are slightly shorter than the bottom one.

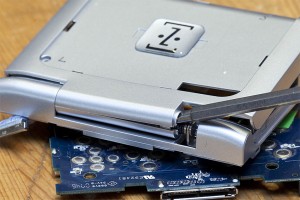
Now you will need to use a slotted screwdriver to pop the plastic snap loose that is shown in the picture.  Don’t force it too hard but it IS fairly tight so you’ll have to use a bit more force than you’d normally expect.  Now that you have that nice gap, wedge your plastic card in place and slide it down the lcd housing.  There should be four plastic snaps that you will be able to work lose.  Notice the little magnet towards the top of the picture?  That’s what makes the Zipit stay closed nicely.

After I get this far with it, I like to flip it over and crack the bottom case.  The battery needs to come out if you haven’t already done so.  There are three screws under it.  Go ahead and pop those out.  After you’ve done that, it’s time to start prying with your plastic card.  I like to start at the back near the hinges since I seem to be able to wedge my card in there the best and get the case to flex the furthest.  I’ve tried it from the SD slot as well but it’s hard to get enough leverage that we since you don’t have the screen to hold onto from that side.  There are four of those snap tabs that are holding the bottom case together.

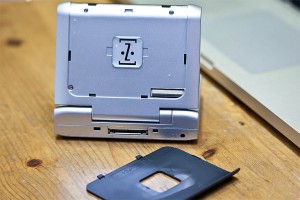
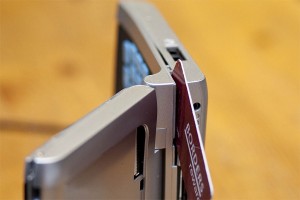
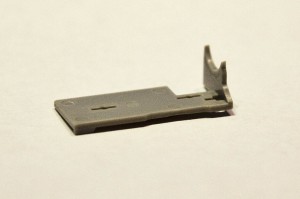
After you have the bottom separated, go back to the top.  There is a small piece of plastic that is in the hinge section.  You can now pop that off from underneath if you need to or whatever other angle.  After it’s off, you’ll need to pry upward as shown in the picture.  After it’s popped loose, you need to slide the whole back/upper half of the LCD housing towards the side you are prying from.  There is a small lip on the back half that is keeping it in place.  Similar to the lip near where the screwdriver is prying in the picture.  That’s it!  There is one extra piece that rkdavis insists is necessary but I’ve been using mine fine without it for a month now so you can make the final call.

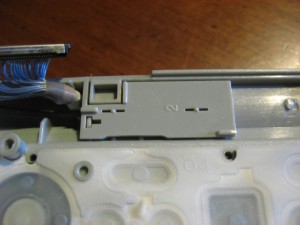
Mozzwald graciously loaned me his picture of the mystery plastic piece installed in place:

If you are interested in buying your own Zipit to hack and you like the information on my site, please buy your Zipit using this link and support my site. You won’t find them anywhere cheaper than that anyways.


Running Haiku OS in VMWare Fusion on OS X part II

Feeling brave today, I decided to click the “upgrade” button this time when I started up Haiku.  I’m running VMWare 3.1.0 so I’m referring to when I start up VMWare and it asks me if I want to upgrade the VM to use newer features of 3.1.0.  The warning is that it will no longer work in older versions of Fusion once I push this button.  This is an acceptable risk to me since I don’t have any older versions.
When I first pushed the button, it was very uneventful and the dialog simply disappeared.  Maybe 15 seconds later, another one appeared asking if I’d like to replace my serial output file “serial-port.txt” since one already existed.  Sure why not?
After that, it took about 30 seconds and booted right up like nothing happened.  That’s a win in my book.  Time to break stuff…

First I’ll take a snapshot.  WOW!  By far the quickest snapshot I’ve ever taken of anything!  This only took all of 5 seconds.  On windows, I’ll get up and take a coffee break while I’m waiting for snapshots to finish and when I want to rollback I’ll stick that on before I go to bed(j/k, it’s not quite THAT bad).  A snapshot is no good of course if it can’t be restored sooooo let me test that out right now….twenty seconds later, it’s restored.  Oddly, it did ask me again if I wanted to replace the serial-port.txt file again.  Oh well, I don’t really care at this point.

Let’s try some peripherals.  A serial port oddly comes to mind.  The one I tried has a prolific chipset in it so nothing too exotic.  When I hooked it in via the VM, nothing happened.  No error, no message, no noise…nothing.   Doing a quick browser of the applications that come pre installed, I didn’t see anything resembling hyper terminal and from the command line, no minicom either.  Oh well, no huge surprises here.

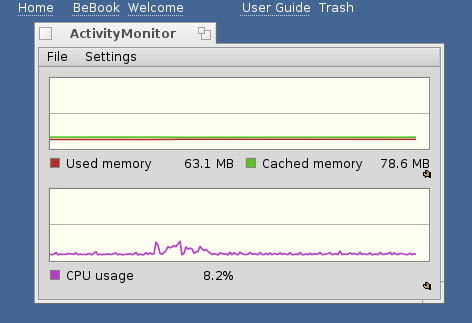
While browsing for a program that could communicate with the serial port, I DID come across the activity monitor.  This thing is very impressive.  It refreshes several times per second and is very responsive.  On my system, it averages about 9% CPU usage and pegs at 64.2MB of ram.  That is LOW comparing to OS X that hogs up well over 512MB right on boot up.  Opening a terminal in Haiku brings the memory usage up to a whopping 72MB of ram in use.  8MB of ram for a terminal?  I can accept that.  OS X takes 10MB or so for me.  Bash is a bit of a pig from what I understand though so this can probably be optimized by using a different shell.

Next I noticed the “find” option in the menu.  In the couple of years I’ve had my Mac, I’ve become completely spoiled by the spotlight tool I have to admit.  I love having the results to my search show up as I find them.  But on the same note, I couldn’t POSSIBLY expect that kind of behavior out of an OS that will run on super light weight hardware.  That being said, I found the search to be really snappy.  I searched for “terminal” and had the results in less than 2 seconds.  I’d have to fill my poor system with a LOT of junk to really put this feature through it’s paces but I like what I see so far.

Haiku Terminal

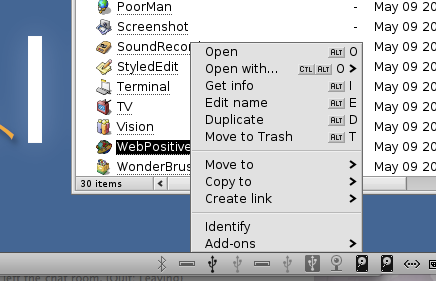
Lastly, I want to create a WebPositive icon on my desktop.  As I mentioned in another post, I tried right clicking the icon in the Tracker and tried dragging the icon from the Tracker as well and that didn’t do the trick.  Next thing I did was to click “applications” in the tracker.  This gave me a directory listing so I dragged the icon out of there but then it was gone from that menu.  Hmmm…  I dragged it back and now tried to right click on it in the directory listing.  Voila!  That seems to have worked but it presents me with a somewhat overwhelming list of options that sound like they would do the job.  There is “copy to” which I probably don’t want to use since I’m assuming it would copy the entire application.  Then there is “duplicate” which made a copy of the entire application(or shortcut in this case) in the same directory.  Finally there is the “create link” which opens a sub menu allowing the link to be sent directly to a myriad of locations including the trashcan!?!  Why would you want to create a link in the trashcan?

Now that I have my WebPositive icon, I want to see how much ram Haiku’s web browser takes.  Keep in mind this browser does not support Flash and presumably a couple of other features but I DID jump into Google Docs and saw no problems at first glance and it seemed very responsive.  I did notice something else cool about Haiku in the course of this.  I opened up the ActivityMonitor and at first the ram was sitting at 122MB but as I’m typing this, I’m watching the ram usage count down and the cache usage count up.  It’s actively moving active ram into cache as I’m allowing it to idle.  Less than 2 minutes after I’ve stopped using the program, the active ram is down to 95MB of usage.  To me these is really nice and a refreshing change from Windows where applications tend to continually eat more memory.  When I click on WebPositive again, all the cache pops back into memory instantly and the usages goes back up to 120MB.  If I open up another program instead, the ram is free for that new program to use.  Everything in the background seems to get counted off into cache.

This second look at Haiku has given me far more appreciation for the effort the developers have gone through to make a compact and efficient, yet modern operating system.  I wish the other vendors would take a few hints to see how it’s done.

Trying out Haiku OS on old hardware

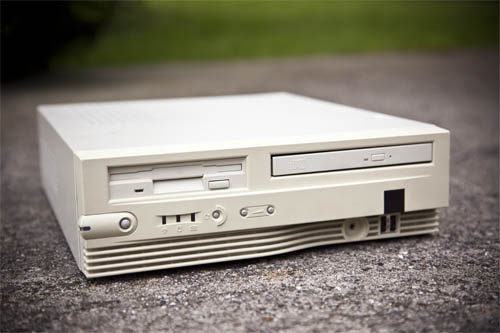
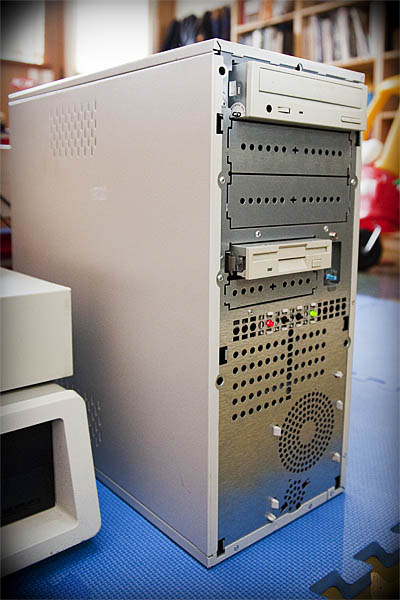
I tried out the new Haiku OS VMWare image the other day to see what it was like.  I was fairly impressed and everything worked smoothly and quickly running under VMWare Fusion on my MacBook Pro.  Today, I wanted to try Haiku OS out on some REALLY old hardware.  I have a little shoebox computer based on an Asus MES-N motherboard.

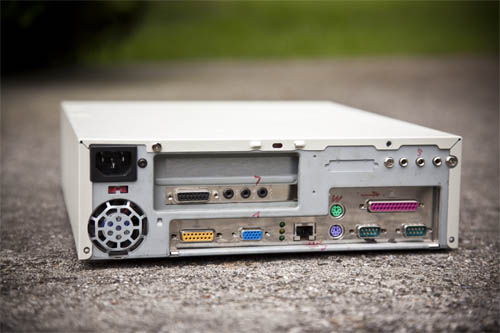
This system came out long before Shuttle was a household name and was pretty early for a compact desktop system.  This thing is so old that it has not one but TWO on-board serial ports.  It does have an on-board 10/100 network adapter which was innovative for the time.  It’s based on a Celeron 466Mhz, has 128mb of ram and a 30gb Seagate Barracuda I picked up at a local computer recycler in Redmond.

Alas, all of the build-up and pretty pictures is for nothing because it didn’t work.  I’m not sure if it is choking on the on-board video card or if there is some other hardware conflict but on this system, after it reads the Haiku CD, I only get a blinking cursor.  I tried to disable the on-board VGA and popped in a couple of different ISA video cards from another project but neither of those would boot in that system.  Unfortunately I don’t have any PCI video cards on hand.  Luckily I did have an entire other old desktop system though.  This time, a 700MHz Athlon-based system that had a hard drive puke a while back.  It’s darned ugly but it did the trick.

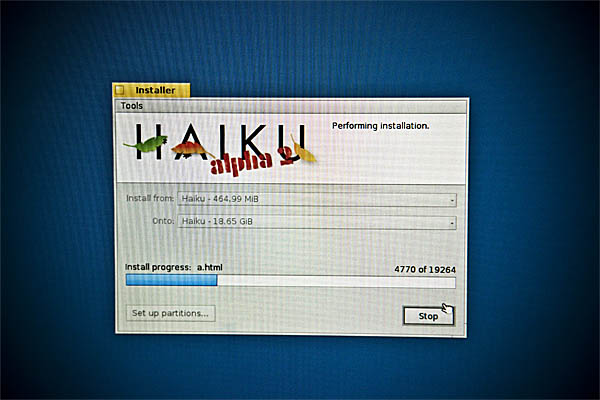
This system has 256mb of ram and I tossed a 20gb Seagate Barracuda that I also obtained from that computer surplus store in Redmond(if they fix their website I might link to them someday).  I popped the Haiku disk I burned in and booted it up.  I was greeted with more icon candy while waiting for the desktop to load.  Once it popped up, it asked me if I wanted to install or run it as a live CD.  This system is for fun stuff so I decided to try the install out.  I was warned profusely to do the partitioning myself and not trust their tool since it is an alpha release.  I decided to live dangerously and use their partitioning tool.  It worked quick and well.  After I was down partitioning, I finally figured out that I had to close the window that the partition manager had popped up in since there was no next button or anything similar.  Once back at the one and only install dialog, I chose the source disk(the CD), the target disk(my new partition) and hit install.

About 5 minutes later, it was done.  Once again, I was left with no real options besides “install”(again?!?) and “quit” so I chose the third option which was to close the window of the installer program.  Miraculously, the Haiku installer knew my intentions and it rebooted the computer.  It even popped the CD tray for me so I could snag that CD out of there.

When it restarted, I was greeted with more icon eye candy but not for long.  I only got to stare at those for 10-15 seconds.  Then the desktop appeared and maybe 10 seconds later, it was ready to roll and looking great.  I sat down and dove into some fractals for a minute and then spun a teapot or two before I powered down for now.  I was a little skeptical that the power down would trigger the soft power function but to my joy and disbelief, the system powered down barely 5 seconds after I sent the kill command.

If it’s one thing Haiku has right, it’s the boot up and boot down sequences.  Those are incredibly slick.  I hope to put it through it’s paces a bit further in the coming months.  When I do, I’ll post my findings here.

Qwitter for the obsessive compulsive in all of us

Do you ever sit on twitter and wonder why your “followers” number has declined?  I have to admit being guilty of this.  I want to know which one of my “friends” no longer thinks that I’m worthy of their twitterspace.  Usually it’s not a friend in all honesty.  Generally it’s those people who follow you (and 14,000 other people) to try to get you to follow them so they can spam you with their “social marketing wizardry” or just feel like someone actually gives a crap about what they have to say.

I personally never follow back just for the sake of it.  I enjoy tuning my twitter feed to my specific interests.  My followers might be confused.  I am a real estate agent and a techie so sometimes I’m tweeting tech to my real estate followers and vice versa.  I’m interested to see who is saying, “enough is enough, this dude isn’t interesting to me anymore”.  Lately, I’ve been heavier into tech so I could understand if some of my real estate followers a bit bored with my tech tweets.

I’ve never really cared enough to seek a tool to do this but I’ve noticed lately that I’ve been pegged between 198-202 followers for months and that is starting to bug me.  Hopefully this tool will help me figure out what is going on and if I’m losing anyone important…

Try it out for yourself at www.useqwitter.com.

What happened to rend386?

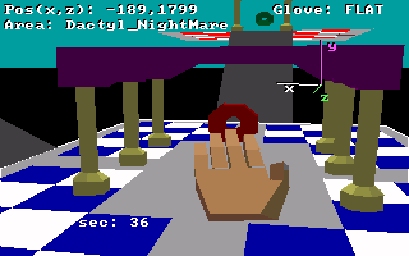
Long before the latest 3D craze that was spurred single-handedly by Avatar, there was a big virtual reality boom in the early to mid 1990’s.  It was a prime time for virtual reality 1.0 because of movies like the lawnmower man and the availability of relatively cheap 3D-capable hardware.  If you already had a 386DX/25, you could interface a Mattel Power Glove and a Segascope 3-D to it via parallel ports and run rend386, a MS-DOS based virtual reality environment.  By that time, those items were outdated and showing up at thrift stores for next to nothing and rend386 came with several books, most notably Virtual Reality Creations with was written by the authors of rend386.

As of 1993, the Dave Stampe and Bernie Roehl decided to split up and perpetuate virtual reality research with separate tools.  Dave Stampe apparently went on to write a tool called VR-386 which was essentially a 90% rewrite of rend386 and was exponentially better.  Unfortunately, I can’t seem to find any more information on it than is mentioned here on the power glove page.  Bernie on the other hand went on to create a tool called AVRIL.  Then Bernie went on to work on VRML which was designed to be used in a web browser and subsequently worked on Java3D.  Taking a quick look at some of the Java3D examples, I’m thinking that it’s not really quite as easily implemented as rend386 but I’ll reserve judgment for a later date when I have a chance to delve into some of these languages.

Reading the VRML wiki, it seems that VRML has been superseded by a language called X3D which is an XML based description language for virtual worlds which I plan to take a closer look at.

I am tentatively planning on building a USB power glove and/or Segascope interface out of an Atmel AVR at some point in the future.  As we all know however, hardware useless without the accompanying drivers and software.  Consequently, I’m still looking for the final environment in which I want to implement my interface.  Maybe I’ll just grab a 486DX/66 and dig up one of those old copies of rend386 but I would far prefer something that I could use with Google Sketchup drawings so the search continues.

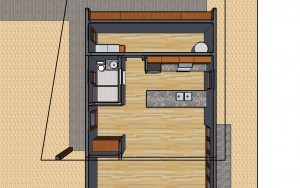
Here is a small contemporary house I drew in Sketchup

Here is the inside

Here is another inside view

Here is a view of the back

I’d love to walk through that house in 3D with my Segascope and power glove in hand someday…

Ada’s Technical Books now open in Seattle

Ada's Technical Books on Capitol Hill in Seattle

I went to Portland a month ago or so and went to the best bookstore I’ve ever been to.  It’s called Powell’s Technical Books.  If you ever go to Portland, don’t miss Powell’s Books.  It’s absolutely gigantic!  One of the largest book stores I’ve ever seen.  It’s very overwhelming in Powell’s but when I was there, I didn’t end up staying very long.  I came to find that as large as the store is, they required a whole separate building just for computer and technical books.  We were on our way out of town but still needed to eat.  Lucky for me, the place we ate just happened to be 1/2 a block from the Powell’s Technical Books location.  We went in for a little bit and I was pleasantly surprised.  The store is the size of a Trader Joes and it’s all Computer, Engineering and other technical books.  In the back corner was a real treat though.  They have a bunch of vintage computer hardware and vintage computer books for sale which is something I’m currently interested in.  Some of the prices were fairly steep and many of the items weren’t priced at all but it was fun to see this hardware on display at the very least.  I ended up leaving Portland wishing and wondering if there would ever be anything like this in Seattle…

Today I was reading the DC206 mailing list and noticed someone mention a hacker space on Capitol Hill.  They went on to add at the bottom that it is across from a great bookstore, Ada’s Books.  I had not heard of this store before so I clicked the link and found that Ada’s Technical Books just opened to the public on June 11th, 2010.  Hoping that it has any resemblance to Powell’s Technical Books I found myself jumping in my car instantly to go see it for myself.

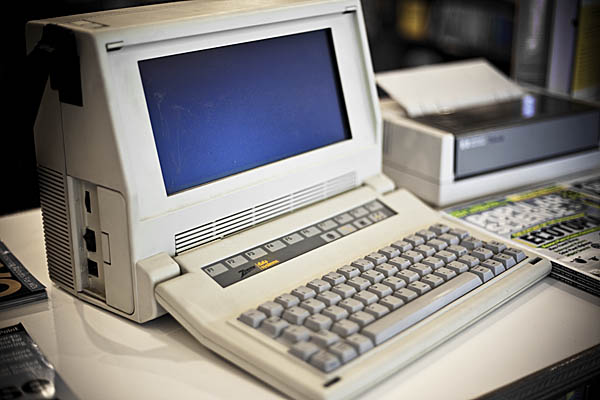
When I arrived I was a little surprised that it was smaller than it looked in the pictures.  I decided not to let the size cloud my judgment however.  When I walked in, I was greeted by a Zenith portable lunchbox computer that was in excellent condition.

Upon further investigation, I found a couple of books to buy.  One was Programming the IBM Personal Computer: Assembly Language by Chao Chien.  I felt the price was very fair at $4.50.  After browsing through the rest of the computer books, I found the electronics book section.  I was pleasantly surprised by the selection available in that section.  Ada’s has one of the best selections of electronics books that I’ve seen in any local bookstores.  I picked up a new copy of Getting Started with Arduino by Massimo Banzi out of that section.

When I went to check out, I learned more about the store.  The owner of the store is actually one of the folks that runs Toorcon.  Him and his wife were inspired to start this bookstore after visiting Powell’s in Portland.  They felt that Seattle needed a technical book store and I tend to agree with them.  I eagerly await to see what gems turn up on their shelves in the coming months.  I would hope for some more historical computer books and any books on 1980’s computers such as the C64, Atari computers, etc.  Those books are hard to find, especially at reasonable prices.

Ada’s Technical Books is located at 713 Broadway East, Seattle, WA 98102 on Capitol Hill.  I encourage anyone local to the area to go take a peek and buy some computer books from Ada’s.

Haiku operating system rises from the ashes of BeOS

Does the world need another operating system?  That seemed to be the question that was asked when BeOS was first unleashed on the world in 1995.  When BeOS was ported to the x86 platform in 1998, I got a copy and gave it a try.  It was awesome!  I remember it having forward-looking features that the Mac platform only recently has added and stability that none of the current operating systems(at the time) could claim.  The problem was software however…  I had all but forgotten about BeOS as soon as I had discovered it since it didn’t have nearly enough applications for me to practically consider switching to it as a primary desktop platform.  From my understanding it did gain a small following in the pro audio world.  There were a few commercial audio applications that were released for it including one that I used to own, T-racks.

Fast forwarding to present day, what have the former BeOS developers been up to?  In a word, Haiku.  This new system continues in the spirit of BeOS in the sense that it has been designed from the ground up to be an efficient, integrated & complete “single vendor” open source system.  It’s not based on a Linux Kernel but instead has a Kernel written from scratch to integrate with the rest of the OS specifically.  This is a stark contrast to Linux where thousands of developers have written code in the Kernel and many more thousands have ported countless core applications over to the Linux platform which results in a mish mash of incompatibilities and less than ideal subtleties.  A better explanation of Haiku is available on their FAQ.

Haiku is distributed in several different formats.  There is a live CD version, a regular install CD and a VMWare image.  First I’m going to try out the VMWare image on my MacBook Pro…  I have VMWare Fusion 3.1.0 currently and I’m trying out the R1/alpha2 version of Haiku.  When I first try to open the VMWare image, it asks me if I want to upgrade the VM for better 3D performance, etc.  At this point, I’m going to decline and continue.  Upon boot up I’m presented with some eye candy icons and in less than 45 seconds, the machine is booted and ready to operate.  It is no surprise that VMWare tools is NOT installed and presumably does not exist so I’m keeping my fingers near the control-command keys for now.

After the machine is booted, the desktop comes up with the tracker and a few desktop icons as seen in the screen shot above.  Clicking on the “Haiku” icon, I’m greeted with a pop up window showing the eight items present at the bottom level of the hard drive.  Honestly it reminds me a bit of the older Macintosh System operating system.  On a side note, I recently read a very interesting article by Tom Pittman that describes a blueprint for a 21st century operating system and for some reason, Haiku made me think of that.  Anyhow, back to the 2nd icon now which is “Welcome”.  After clicking that icon, the dream fades back into reality and I end up waiting 15-20 seconds for a web browser to finally pop up with the welcome document in it.  I am drawn back in however when I type www.google.com into the web browser and find that not only does the network link work but Google pops up pretty darned fast.  I should mention that upon launching the web browser, the tracker application added a button, icon or whatnot to it with the name of the browser “WebPositve” in it.  I closed and relaunched the web browser and this time it popped up on the screen nearly instantaneously so I will excuse the slow initial start up.

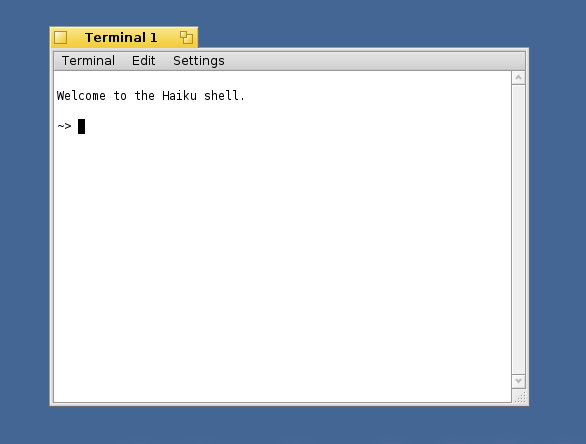
Next I tried to pop up a terminal.  It loaded very quickly.  I wanted to add the terminal as an icon on my desktop but right clicking or dragging it from the tracker menu are not doing the trick.  Those are two of the most intuitive ways I could think of to accomplish the task but I’m probably missing something.  Whatever the case, ls works, top works and uname -a reveals:

Haiku shredder 1 r36769 May 8 2010 20:58:31 BePC Haiku

With that, I’m going to sign off for now and move on with some other tasks but so far my first taste of the Haiku OS is just as pleasant as I remember BeOS being.  It’s very easy to use, quite responsive and seems to have a lot of potential.  I sincerely wish the development team luck with this project.  The copyright shows that Haiku has been in development since 2001.  Wow!

What is the use of this new operating system?  What niche does it fill that hasn’t already been filled by Windows, Linux, Mac OSX, Android, etc?  First off, older hardware.  The system requirements of Haiku are incredibly low for a modern OS.  Apparently you can run it on something as poky as a Pentium II.  Second, it may be even easier to use than Mac OSX and to reiterate, it certainly has lighter hardware than Mac OSX.  Beyond that, I’m really not sure.  Reading the Haiku website, I cannot find any indication of where this operating system fits into the pecking order with the others.  It might be a good server platform since it appears to have some level of POSIX compliance and the kernel could be extremely secure since the development team is relatively small and because there are simply no exploits or vulnerabilities available for it.  It could also make a good platform for 2nd hand computers since it’s WAY easier than Linux and has light system requirements.  Only time will tell if Haiku is just another solution without a problem.

Further testing of Sprint’s 4G network

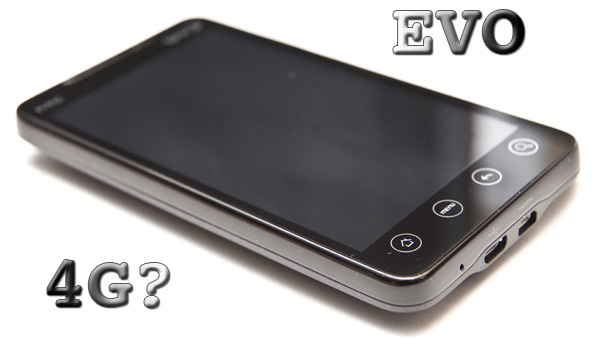
As much as I love my new HTC EVO 4G, so far I’ve been very disappointed with the so called 4G performance.  I am going to run a series of tests randomly, right now, and post my results here so you will see what I mean.

Testing 3G – I used the www.speedtest.net app on the from the Android Marketplace.  I’ve seen this number as high as 1.5Mbps but today I am getting 831kbps down and 295kbps up.

Testing 4G(local) -Speed testing while on 4G resulted in 2272kbps down and 370kbps up.  Better?  Yeah, sure, way better.  Worth $10/mo to me?  No way.  It doesn’t make the phone any more usable to me as it sits.  It’s also nowhere near the bandwidth that was promised.

Testing 4G(shared on hotspot) – Running speedtest.net on my iPod touch connected to my home wifi yields me a 4835kbps downstream and a 610kbps upstream.  No, I don’t have the fastest internet out there but it’s NEVER gone down in 6 years and I have a static IP.  Anyhow, this final statistic is the punchline of my whole blog posting…  When I connect my iPod to the EVO in 4G hotspot mode, I get a whopping 168kbps downstream and a 248kbps upstream.  I’ve repeated this test over and over again at different times of the day.  This is actually the fastest speed I’ve gotten out of the mobile hotspot.  Generally it has been under 100kbps.  I tested this before and after 2.1-update1 was pushed out to me and the results were the same.

One last note here is that it is NOT possible to run a mobile hotspot on 3G.  I find this extremely annoying since you can’t get 4G service everywhere.  Presumably the coverage won’t be as good even when Sprint does fix the speed problems.  This one poor decision on from Sprint means that this device currently cannot replace my Verizon Mifi.  I am patiently hoping that the 4G improves dramatically and will report back when I actually obtain some acceptable speeds.

Whenever you get rid of an old hard drive you should always wipe it.  This goes without saying but what does “wiping a drive” entail?  When I say wipe, I mean more than a format.  I even mean more than a destructive format.  If you’ve had to wipe a disk for work or some other reason, you’ve undoubtedly heard of Darick’s Boot and Nuke A.K.A. DBAN.  This is a great tool that will fill all of your sectors with zeros.  It will even do multiple passes to comply with different data sanitization standards.  It’s self-contained and easy to use but it has a limitation…

DBAN cannot wipe data blocks that your hard drive has internally marked as “bad” in the g-list(grown list).  The g-list is created by firmware in the hard drive whenever a sector takes too much time to access.  When the firmware detects that a sector is slow, it determines that the sector is bad and if it can read the data, it will COPY the sector to a new physical location on the disk and this will be reflected as an updated entry in the g-list.  Of course this is all done in a way that is totally transparent to the operating system.  Windows or whatever other system will have no idea this has occurred and will just continue plugging away.  But what about that “bad” block?  If it’s bad, it can’t be read anymore, right?  Maybe, maybe not.  There are tools that exist that have entended control over the physical hard drive that sometimes CAN read that data.  It might not be much if you don’t have a lot of bad sectors but it’s probably something and it’s probably not all zeros.

The situation sounds a little grim but the manufactures of IDE hard drives thought of a solution.  There is a command in the ATA command set that will make the hard drive erase itself, good AND bad blocks.  This will require a couple of things though.  You will need a bootable MS-DOS(compatible) disk and a hard drive attached directly to your IDE controller.  This will not work through a USB-IDE enclosure since USB doesn’t support a full implementation of the ATA command set.

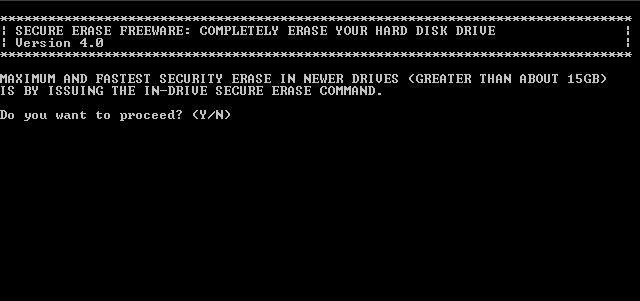
You will also need a free tool called Secure Erase.  It is graciously provided by the Center for Magnetic Recording Research (CMRR) along with instructions but no support.  It’s a very small, simplistic program but it does a simplistic job.  I am going to borrow a chart from the Secure Erase documentation. I would like to point out that DBAN would share the “medium” slot with the DOD “Block Erase” and I also slightly disagree with the author on the final method suggested:

Type of Erasure Average Time

(100 GB)

Security Comments
Normal File Deletion Minutes Very Poor Deletes only file pointers, not actual data
DoD 5220 Block Erase Up to several days Medium Need 3 writes + verify, cannot erase reassigned blocks
NIST 800-88

Secure Erase

1/2-2 hours High In-drive overwrite of all user accessible records
Enhanced Secure Erase Seconds Very high Change in-drive encryption key

In my opinion, the Secure Erase tool should be considered as good as it gets for software solutions.  I can’t see how changing the in-drive encryption key could possibly be more secure than making the hard drive obliterate every single block, good or bad.  The encryption is EXCELLENT right now and for all practical purposes unbreakable but does anyone else remember when Netscape was limited to exporting 40-bit encryption because we didn’t want foreign countries to have anything better than we could crack?  That quickly was tossed out the window and clever cryptographers have now broken far more sophisticated algorithms.  Seems like breaking or bruteforcing(practically) any encryption is theoretically possible with enough computing horsepower but perhaps I’m entirely misunderstanding the author’s statement.  If the chart kept going, the BEST possible way to sanitize your data, of course, is to shred the drive.

IBM PC XT, now with VGA video

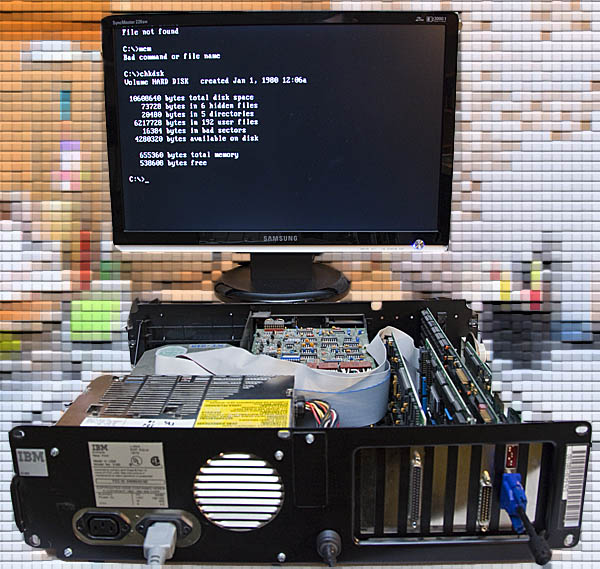
My XT booting up with a 16-bit ISA VGA card

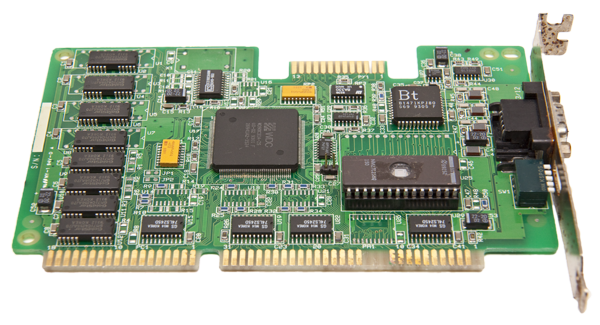
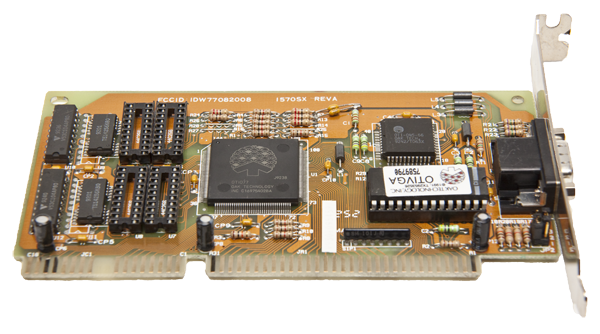
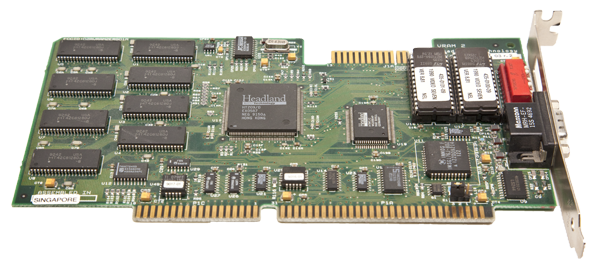
Last time I talked about my PC XT, I didn’t know if it actually worked properly because it had a CGA or similar old video card in it and I don’t have a monitor that supports that standard.  Thanks to some helpful friends, I gathered up 3 separate ISA VGA cards to try out in the system.  There was just one catch…  The IBM PC XT has an 8-bit data bus and all of the video cards I had were 16-bit.  One of my friends helpfully explained to me that some 16-bit VGA cards will work in 8-bit mode.  I was a bit skeptical but I figured that this guy knew what he was talking about since he cut his teeth on an XT.  The list of candidate cards follows:

WDC WD90C31A – I received this card from rkdavis from all the way across the country.  Thanks RK, unfortunately I’ve looked up this card and found that it doesn’t support any 8-bit mode.  All of the jumpers on the card pertain to refresh rates and other trivial settings. This card survived a flood in the basement of a pizza restaurant apparently so I was really rooting for it to work after I was able to clean it up with Simple Green and a toothbrush but alas, it will end up in another project.

Oak Technology 1570SX(OAK 77) – This is a card that I obtained from REPC, a Seattle area computer recycler.  This card was floating around in a HUGE bin of other ISA, PCI and AGP cards that were all being sold as-is for $1/ea.  I thought it was a fair gamble.  Unfortunately after looking up this card, I was also disappointed that it could not be jumpered for 8-bit mode either.

Headland Video Seven HT209/D – The final card that I tried was a Headland Technology 650-0436-03 r.2.  The page that I linked to is not an exact match for this card but apparently the layout is slightly standardized because I flipped SW1-7 and SW1-8 to the open position and it fired right up in glorious color on my flat panel display.  This card was provided by my friend James who has had the card in his closet for years with no real use for it.  It’s also available on eBay from a bunch of ripoff artists for $75-$150.  Granted it WAS a very expensive card when it was new but so what?  This card is worth $20 on the right day to the right buyer IMO.  Whatever the case, this is the one 16-bit ISA card out of my three that will work in 8-bit mode so I’m very happy.

So next, after I have a working card, the system booted up.  I watched in disbelief as it painstakingly counted all 640 kilobytes of memory individually.  Next, even more amazingly, the 20MB Seagate MFM hard drive proved to still be functional since MS-DOS 3.2 booted up.  DOS 3.2 is missing a few of my favorite programs such as edit.exe but it’s a good, solid version unlike the piece of crap better know as MS-DOS 4.01.  The AST clock/ram/controller board miraculously still works as well although it does not appear to be Y2K compliant.  It seems like DOS is ok with a 4-byte date but the AST card keeps jumbling it up when you try to set it to a date in the current millennium.

My next project with this system will be to come up with a method of transferring data to and from this system since my MacBook Pro does not seem to be equipped with a 360Kb 5.25″ floppy drive nor does anything else in my house.  Once I find a way to transfer this data, I’ll have to decide what that data should be.  Decisions, decisions.

I want to give a shout out to Stason for his AWESOME collection of data on old video cards such as these.  Without his page, I would still be caught up in a quagmire of experimentation and trial but most of all ERROR.

Powered by WordPress. Theme: Motion by 85ideas.