Latest Entries »

TinyELF subtraction

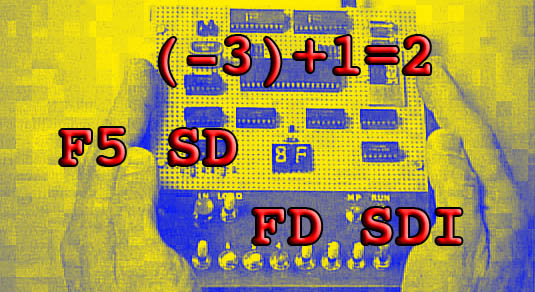
After a long break from Tom Pittman’s online book A Short Course in Programming, I’m digging in again to attempt to understand the second half of chapter 5.  I’m still running the same suggested program which is 5.1 ALU OPS.  The bytecode for subtraction is F5.  There is nothing profound about this command other than you enter the data backwards.  For instance, it’s not:

3-1=2

It’s more like:

(-3)+1=2

If you screw up and go the other way with it, you won’t end up with 2 for an answer, you’ll loop register and come up with FE.  Makes sense to me since 1-3=FE on the 1802 which cannot directly represent signed numbers natively.  So the thing to take away from this is that the “negative” number is the first operand that you will input after the instruction.  The second number will always be interpreted as a positive number.

The next subtraction instruction is FD which tells the 1802 to subtract the next byte in memory after the instruction from whatever is in the memory location 0060.  The third byte of the default, unmodified program is ignored and replaces with C4 since that lives at location 2A in memory.  If I put in FD, 01, 55, the computer does this:

(-01)+C4=C3

This part of the chapter is getting sticky for me again.  Hopefully I’ll be ready to muddle through it some more shortly.

Mozzwald’s Ubuntu for Zipit RC1 torrent

Mozzwald ran out of bandwidth for a bit so I’m starting this torrent anyone who would like to can grab his RC1 Ubuntu Distro for the Zipit.  See my installation instructions here.

I’m taking my first stab at creating a torrent here.  Hopefully it works.  Please seed it yourself if you like it:

Ubuntu for Zipit RC1 torrent

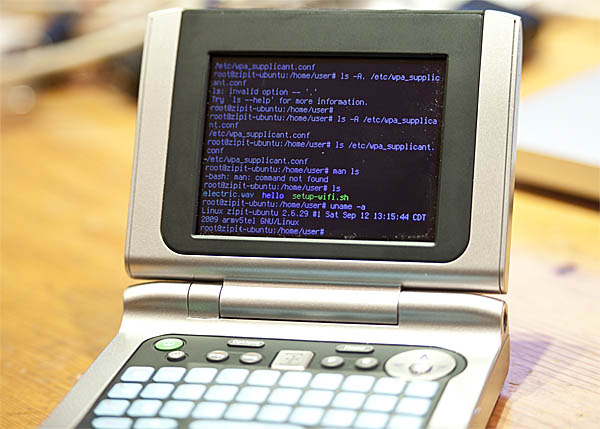
I took a closer look at the Easy Wifi Configurator script implemented on Mozzwald’s Ubuntu for the Zipit.  There are a couple trivial differences between Debian, Iz2s and Ubuntu for the Zipit and the setup-wifi.sh script tries to account for them all.  The long and short of it for now is that you need to change the line with the gawk statement to use awk instead.  That worked for me at least for the short term. There is also a broken sed statement which needs some attention but that will get worked out later I’m sure.

Sometimes you come across a need to troubleshoot a misbehaving script or program things roll by on the screen too quickly.  The other day, I was troubleshooting a script that was blurting out an error and then continuing to open up a “dialog” screen which redraws the entire screen and clears the error.  I needed a way to send just the errors to a logfile.  If you are familiar with C programming, you’ll realize that there is STDOUT which writes to the console.  There is also STDERR which usually writes to the console but cannot be captured with a standard redirect such as:

program 1> logfile.txt

You’ll capture the STDOUT of that program but not any errors.  If you want just the errors, you’ll want to use:

program 2> logfile.txt

If you want to grab both the errors and the STDOUT, you can use:

program &> logfile.txt

Free Stuff!

Hunter Davis is cleaning out his closets again.  He is running a contest for 7 days or 5000 entries and giving away all of the items in the picture up above in bundles.  I don’t envy having to manually parse through 5000 emails… beats having a garage sale I guess.  I shamelessly entered but I couldn’t really make up my mind which bundle I would most like to acquire.  The half-an-eee and diji look pretty cool but beggars can’t be choosers.

Second day with Ubuntu on the Zipit Z2

I decided to pick up my Zipit and try out Mozzwald’s Ubuntu distribution again.  I ended up manually starting up the wifi for now since rkdavis’ script isn’t working for me at the moment.  The following commands did it for me:

  • iwconfig eth0 essid your_id_here
  • iwconfig eth0 key your_hex_key_here
  • ifconfig eth0 down
  • ifconfig eth0 up
  • dhclient eth0

We’ll work on that EWoC script later…  Digging deeper into this distro, there is no GUI implemented yet.  First, let’s get a proper web browser on here:

apt-get install lynx

Now let’s grab the tweaked version of dosbox off Hunter Davis’ blog and try to compile it…

Five hours later I’m signing off here.  I’ll let you know next week when it finishes if it actually works.

Categories and tags can be a confusing subject to a newer WordPress blogger but they are very powerful and should not be ignored.

Every tag you use makes a new page which gets indexed by Google but you don’t want to use too many tags.  My blog has too many in some spots and I think that works against you.  A maximum of 3-4 is probably a good rule of thumb.  You want to use the same tags in many multiple posts for added relevancy.  Some experienced bloggers even say that you should use only tags OR categories but not both.  I’m not so sure about that.  I think tags and categories serve different purposes so I tend to use both of them.

Every category you make also makes a new page on your blog.  You can put a page in more than one category but it’s best to stick to one or two categories per post.  Let me illustrate:

Here is a category page on my blog:

http://www.notanon.com/category/unix-tricks/

There are 3 posts on that page(as of 5/20/10) that live in that category.  A category is kind of like your menu bar.  You have things broken down like reviews, mac, unix tricks, etc.  Pretty much anything you can categorize a post as.

Here is a tag page:

http://www.notanon.com/tag/ipad/

I have 3 posts where I talked about the iPad(as of 5/20/10) so I added a tag for that.  A tag is basically just a keyword that you want to be indexed on Google.  To give you an idea of how powerful this is.  Check out this post:

http://www.notanon.com/unix-tricks/how-to-get-a-root-shell-in-ubuntu/2010/04/23/

If you go in there, you’ll see that it’s in the Unix tricks category and has 3 keywords.  That means that it’s indexed on 5 pages in Google just on my blog and maybe by several other pages on other people’s blogs/sites.  So Google sees references to that one single posting on these pages:

http://www.notanon.com/unix-tricks/how-to-get-a-root-shell-in-ubuntu/2010/04/23/
http://www.notanon.com/tag/root/
http://www.notanon.com/tag/shell/
http://www.notanon.com/tag/ubuntu/
http://www.notanon.com/category/unix-tricks/

and when it was a fairly new post, you also could see it on:
http://www.notanon.com/

and I may have posted about it on twitter:
http://www.twitter.com/grostad

The added benefit of tags and categories is that Google will cross-index with multiple posts that are in the same tag or category page.  For instance on this page:

http://www.notanon.com/category/unix-tricks/

There is a post about Ubuntu Linux and then another one about md5 checksums.  Someone searching for Ubuntu md5 checksums might wind up on that page(or on this page even).  It may not have what they are looking for but they might see something else interesting on my site and decide to take a look around.
Switching the Zipit from Side-Track to Ubuntu

I just came across a very exciting blog post on Mozzwald:

Ubuntu on the Zipit Z2

In all honesty, I don’t care much about Ubuntu.  It seems alright but I actually prefer Debian just slightly.  The really exciting part however is that mozzwald got gcc working!  Halle-freakin-lujah I’m glad someone finally tackled this problem.  There are a lot of things I like about Side-Track but there are also some broken things that were carried over from Rootnexus which I could do without.  Let’s dig in.

  1. firing up the Ubuntu VM on MacBook Pro
  2. download Mozzwald’s rootfs from right here http://www.mozzwald.com/zipit/zipit-ubuntu-rc1.tgz
  3. untar the image file into the home directory
  4. su to root.  Check this link to learn how to enable a root shell in Ubuntu
  5. dd if=zubuntu-jaunty-basic-rc1_05172010.img of=/dev/sdb (/dev/sdb on my system)
  6. with the flash card unmounted run gparted and expanded the partition on the flash card to the full capacity of the card
  7. download the Cozybit drivers from http://cozybit.com/projects/gspi8686/
  8. untar and rename the files to gspi8686.bin and gspi8686_hlp.bin, mount the flash card and copy them to /lib/firmware/libertas on the flash card
  9. unmount/eject the flash card and pop it in the Zipit Z2 (cross fingers)

Success!  It seemed to boot up nice and quick since it doesn’t boot into a window manager.  The l/p is user/ubuntu.  Right away I had to pull the Ubuntu root shell trick.

I’ve run into a small snag with the setup-wifi.sh not working properly but I think that will be sorted out soon enough.  I’ll report back after I’ve played with this distro a bit more.

Keep in mind that for this distro to work on your zipit, you’ll need to install the openzipit bootloader onto your device.  Instructions can be found here on Irongeek’s site.

How to force Mac Address Book to Sync with Google

I’ve been merging my address books in preparation for my new HTC EVO 4G that I’ll be getting on June 3rd.  As it sat, I had contacts in 3 seperate places.  There was the Mac address book, Google and Outlook in my Windows XP VM which I ONLY used for Activesync to backup my phone contacts.  First I exported everything from Outlook into a CSV file.  Then I imported that file to contacts in Gmail.  That went pretty smooth since I didn’t have many contacts in Gmail already.  Then I went into Mac Address Book into preferences and turned on “Syncronize with Google”.  I considered the warning that I was about to modify over 25% of my address book and I clicked “sync”.  There were a few conflicts resolved fairly automatically and it resynced.

After all that, I noticed tons of duplicate contacts.  I went into Gmail and from there I found a button in Gmail that allowed me to automatically clean up the duplicates.  I did this and it found 65 dupes out of 450 contacts.  Not bad.  That saved me a few minutes but then I wanted to reflect the changes in the Mac Address Book.  Low and behold, there is a button up in the menu bar on the right hand side that allows you to force a sync anytime you wish.  I posted a screen shot so you can see what I mean.

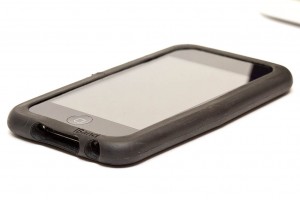
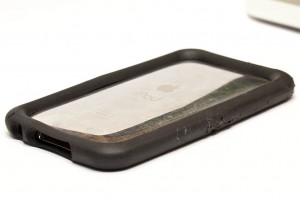
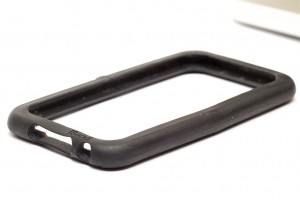
I’ve owned and iPod Touch for several months now.  I spent the first couple of weeks I owned it searching for the perfect case for it.  I saw the thin skins that ripple every time you touch them and I saw the clunky hard sided plastic cases.  The whole appeal to the iPod Touch for me was the fact that it is so small and sleek.  Yes, I want to protect it but no, I don’t want it to feel twice as bulky as it really is.  Then I found the Tech21 iBand.  At first, it looks like just a rubber ring.  It’s not the cheapest case at $25 but I have to say it’s well worth the price.  When you put this on your iPod touch 2nd or 3rd gen, it feels well protected.  It’s molded perfectly to the dimensions of the iPod Touch so it fits well and does not feel like it will ever come loose on it’s own.  If you set it on the table facing up or down, the iPod itself doesn’t touch the table.  If you happen to drop it on a flat surface, it’s pretty much guaranteed to be protected.

The case itself doesn’t add much weight to the ipod.  It only weighs 15.5 grams which is nearly nothing considering the iPod itself weighs 108 grams.  Over the time I’ve had the case, I have found it to be very durable.  It has one edge that has a bit of wear on it but that wear hasn’t spread or spiraled out of control like it would with other materials.

While I can’t think of any ways to improve the case, I do have a couple of gripes about it.  First off, it makes the power and volume buttons fairly hard to use.  The converse of that is that you won’t be pressing them by accident any time soon.  Secondly, some headphones may not fit through the hole as it sits.  The Apple ones work flawlessly though so it’s not a big deal to me.  Third, when I plug in my sync cable, a small part of the front rubber near the brand name sometimes catches on the connector.  Again, not really a big deal to me.  Last one that might be a deal killer for many folks…  It won’t dock while in the case with ANY docks that I have seen available.  This has been a little disappointing to me but I’ve learned to live with it.  If you were REALLY concerned, you could always roll your own cheaptastic iPod Touch dock.  The bottom line is that the Tech21 iBand is the best iPod case I could find.

Powered by WordPress. Theme: Motion by 85ideas.