Latest Entries »

Craigslist Psychology

Simpsons-Arcade

I hate Craigslist.

I hate having my time repeatedly wasted by flaky people and “professional” negotiators.  People who say they are on their way to pick something up, but they’re not.  People who email you interested in an item and then flake when you say “let’s meet” and my favorite…  people who say “Sure, I’ll sell it to you, let’s meet in the morning” and then when you go to follow up they say “ah, sorry dude, someone came by last night and bought it”.

Maybe I’m being too harsh on Craigslist.  I’ve gotten some great deals on there.  I’ve often purchased pro audio equipment on Craigslist and ended up selling it for double or triple the amount I paid months or years later.  If I tried to make a career of that, I would surely drive myself crazy but for recouping hobby money to spend on other hobbies, it’s been great.

None of this is really what I’ve chosen to zero on at the moment though.

Lately I’ve been looking on Craigslist for arcade games.  As much as I would love to find an environment Discs of Tron for $500 in Kirkland, it hasn’t happened yet.  That being said, I have seen other interesting things.  There is an odd phenomenon that I have noticed and the easiest way to explain it is via example.

There is a mint looking 4 player Simpsons arcade machine on Craigslist right now.  The seller wants $650 for it and it’s in Bellevue.  There is no point in me linking you to the ad because it will be long gone by the time you read this.  Whatever the case, a friend of mine offered the guy $550 via email and got no response at all.

There is also a wanted ad on Craigslist “looking to buy a 4 player Simpson’s arcade cabinet. Must be in good condition. Reasonable price. Thank you.”  That person is in Redmond which is geographically next to Bellevue.

These guys sound like a perfect match up but there are so many things that could be at play here…

Simpsons arcade machine seller:

  • Maybe he’s firm on the price an isn’t responding to “lowball” offers.
  • Maybe the ad is fake and is designed to screw with hungry and pathetic arcade collectors.
  • The wanted ad may have been there before the seller posted the game for sale and he may not have looked.
  • Perhaps he listed the machine on Craigslist and left town or hasn’t checked his email since he listed it.

Guy who placed the wanted ad:

  • Maybe this guy isn’t willing to pay $1 over $300 (unrealistic expectations)
  • Maybe he didn’t look on Craigslist before posting his wanted ad although this is extremely unlikely.
  • Maybe the game listed for sale was not listed at the time this wanted ad was placed.
  • Perhaps this guy saw the game when it was first listed on Craigslist for a higher price and felt it wasn’t even worth attempting to negotiate the price since it was so far from what he was willing to pay.
  • Perhaps he’s a flake and tried to buy the machine listed on Craigslist currently without following through.
  • Perhaps the wanted ad guy does not like the for sale ad guy and is just trying to screw with him for some form of revenge.
  • Maybe this is just part of an odd social experiment.

On Craigslist, sometimes it’s easy to lose perspective.  For instance, you can look on there and find “the deal of the century” and all of the sudden you decide that you are only willing to pay THAT price for another copy of the same thing.  This can skew your view of value drastically.  Remember that even though it’s on the Internet with a price tag on it, it’s not necessarily for sale or obtainable by you (or maybe anyone).

As far as the two gentlemen with ads on Craigslist…  I’ll leave you with a simple question, would the wanted ad exist on Craigslist at all if the for sale ad wasn’t already posted on there?  I have seen this situation many, many times before on things like cars, bicycles, houses, etc, etc.  My thought is that the person who suddenly covets this item didn’t know they wanted or needed the item before seeing the “for sale” listing on Craigslist.  Once the seed is planted though and they decide that the original item that sparked their interest does not meet their needs, then they set out on a quest to obtain this item.

What does the guy who placed the wanted ad expect though?!?  Is someone susposed to come out of the woodwork with a NICER copy for LESS money and deliver it to him?

Freeze Spray vs Donkey Kong

I’ve been spending a lot of my free time lately helping the guys over at The Airlock bring some of their newly acquired arcade games back up to good working order. The majority of the time, monitors are the problem area with these games.

One of the latest ones I fixed was Donkey Kong. It’s an original dedicated Nintendo cabinet from the early 80’s. One of the better looking design schemes out there. In the cabinet is the original Sanyo EZ 20 monitor mounted up on it’s side which is important to note for later…

This monitor had a weird problem. It lost all ability to hold the picture horizontally which appeared as vertical static since the monitor is mounted sideways. The weird thing though was that when you first turned it on, it was fine but then if you rebooted it, this condition existed. Sometimes it went into this condition after many hours of play though as well.p

With monitors, my usual starting point is caps. The electrolytic capacitors in this monitor appeared to be 30+ year old originals. CRT monitors are notoriously hard on caps. These games were only designed to last 2-3 years at the most since in the golden era of arcade, it was unfathomable that anyone would care about a game past that point.

Back to Donkey Kong though. Of course I started with the caps. I figured I had fixed it when I fired it back up to a perfectly clear picture. I turned it off to finish reassembling the monitor and when we turned it on to retest, we found our familiar squiggles.

Kelly, one of the guys at The Airlock, thought this may be a logic board problem in the video circuitry since it was a problem we were unfamiliar with in our experience of fixing monitors. After 20 feet of solder later and many questionable joints fixed on the logic board the problem still remained however.

Enter the freeze spray

Since the problem appeared only after the game warmed up, I figured that we may have a chance to pinpoint the faulty component with the old freeze trick. I grabbed a can of r134a that is on hand there and the little red straw and started blasting while someone watched the screen for me. It didn’t take long since the screen went back to a perfect picture practically on my first spray.

I power cycled the system and luckily the problem immediately reoccurred. We repeated this process, each time being more precise with the can of spray until we finally pinpointed the problem component, a 1/4w 1k resistor. Swapping that out fixed the problem and it’s been rock-solid ever since.

It was interesting to me that a resistor became heat sensitive. I was originally expecting it to be a solder joint, a cap(but they were all replaced) or a heat-sensitive IC perhaps.

Simplified Python Multithreading

I’ve been bashing my head against this topic for months now on some level.  I’ve looked around the web at people’s horrible explanations of how to use the threading module in Python and now that I figured it out for myself, let me unleash my horrible explanation on the world.  🙂

In order to properly use threading, first off, you need a task that can be passed off to a thread and done in the background in parallel with other tasks.  For example, crawling a website.  A crawler could grab a page, parse all of the links for that page and then pass all of the links off to process threads to speed up the process.

My problem before was that I was thinking about threading all wrong.  I was thinking that you launch the threads via the process you are trying to accomplish so in other words something like:

def thread(url):
    content = crawlPage(url)
    return content

^^^ BAD!!!  That doesn’t work.

The proper way to think about threads is that you are creating empty background while loops.  Those loops continue running and picking things out of your queue to process.  If there is nothing in the queue, they’ll just indefinitely loop until something shows up.  The code I’m going to show you below has been distilled down to what *I* think you need for a good thread implementation.  It has several great features such as monitoring, throttling(upwards only) and a queue.

There is some fluff in this code for purpose of demonstration that could be pulled out when it comes time for implementation but I would suggest you download/retype this code, run it and tweak it a bit to see what happens with it.  I pretty much promise you that you’ll get a better feel for how threads work after messing with this code for a bit.

#!/usr/bin/python

import time 
import Queue 
import threading 
import random

# create the queue that will feed the background threads
q = Queue.Queue() 

# this starts and individual thread that continuously 
# pull jobs out of the queue
def backgroundThread():
# this while loop keeps the thread running continuously
    while True: 
        # get the job out of the queue
        job = q.get() 
        # do the job
        print "Job output: %s" % job
        # pause so the loop doesn't spike your cpu load
        time.sleep(5)
        # report back to the queue that the task is finished
        q.task_done()

# this launches the necessary number of background threads
def launchThreads(num_threads):
    for i in range(num_threads): 
        # create the thread
        t = threading.Thread(target=backgroundThread) 
        # setting daemon mode makes threads cease when
        # main thread is terminated
        t.setDaemon(True)
        # start the thread
        t.start() 
        print "Now launching %s" % t.name
        
# launch 2 background threads
launchThreads(1)

# Main loop
while True:
    #this spins up more workers if queue gets too big
    if q.qsize() > 10:
        launchThreads(1)

    # this will be results of another process or a list/file iteration
    job = random.uniform(1,300)

    # push the job into the queue.
    q.put(job)

    # this slows down the queue filling up for demonstration
    time.sleep(random.uniform(0,1))

    # shows the size of the queue
    print "%s jobs in queue" % q.qsize()

    # this prints a list of the threads currently running
    for thread in threading.enumerate():
        print thread


If downloading the code works better for you, here’s a link to it.  threading-demo.py

IRC on my (nearly) 30 year old PC XT

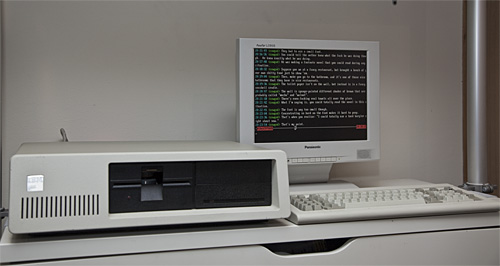
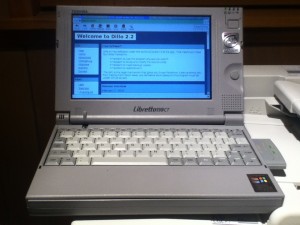
I recently had the urge to fire up my IBM PC XT.  The challenge usually is to do something interesting on the machine.  Playing games slower than my Libretto 50CT or using Microsoft Word 1.0 is not especially interesting to me but hooking it up to my network and chatting on IRC… that’s more like it.

I have had this thought in the back of my head for a while.  I knew it was possible to put it on a network but finding an 8-bit ethernet card is challenging.  Not only are they super rare but on eBay now they are super expensive.  I’m NOT paying $100 for a network card for a computer I only paid $20 for in the first place.  As a rule, I’ve kept my retro computer hobby cheap so I wasn’t about to make an exception here.

In retro computing, patient generally equals cheap.  This case was no exception.  Someone on one of the IRC channels I hang out on randomly asked me if I wanted another Libretto.  Of course I do!  Any Librettos will find a good home here.  This person graciously sent me not only a nice Libretto 70CT but also a bunch of accessories including a Xircom PE3-10BT pocket ethernet adapter.

This is something I had NO idea existed.  It is an ethernet adapter that hooks up to a parallel port.  It also has a short PS/2 keyboard pass through cable that supplies power since parallel ports don’t have power in their specification.

This left me with two problems on my XT.  First off,the XT has no where to plug in a PS/2 keyboard and second, while I have a parallel port on my AST Six Pack Plus expansion card, the pigtail for it is long gone.  The previous owner probably never installed it in the first place even though MSD(Microsoft Diagnostics) showed that the port was activated.

I poked around online a bit and saw that 8-bit ISA parallel port cards are a whopping $30.  No thanks.  I poked around my garage and found a 16-bit ISA controller card.  This one was just like the 100’s that I installed when I was building clones (as a profession) back in the 386/486 days.  Now I know there is no chance that the IDE bus would work in an 8-bit ISA slot but I thought there was a good chance that the parallel port would work so I jammed the 16-bit ISA controller in the 8-bit card slot and let the extended part of the bus hang over the slot.  I disabled EVERYTHING on the controller except the parallel port.  Lucky enough, I fired up the computer and it showed up in MSD as a bidirectional parallel port.  Yay!!

The next challenge was getting power to it.  I ended up building a very convoluted adapter that went from PS/2 to AT to a hacked midi cable and then to a hard drive Y-cable.  It’s ugly but it works flawlessly.  When I get the proper connectors, I will build something proper.

After that, there was nothing left to do but fire it up and snag the software for it.  First off I needed a packet driver for the Xircom card.  Since Intel bought Xircom many moons ago, they still have the drivers available on their website.  (Xircom PE3 Driver).  So after you unpack the driver, you simply run PE3PD.EXE and it will work if all the hardware is in order.

Second, you need a TCP/IP stack and some applications.  This is solved by the mTCP project.  This project has a DHCP client, Telnet, FTP Client/Server, IRC, Ping, Netcat, an NTP client and a WGET clone of sorts.  One of the most surprising things to me was that this project is still extremely current.  As of this blog post, the last update was October 29th, 2011.  Even if there is never another update though, I’m fairly impressed with what I see.  The IRC client, IRC JR, works flawlessly after you set up the config files which is well documented.

I could use this machine as a terminal for one of my more powerful machines as something mundane like a clock but being able to hook it up and use it as a well-equipped IRC client is fairly pleasing and gives me many more excuses to fire up my XT in the future here.

This picture intentionally left blank 😉

This is a continuation of my instructions on installing Gentoo on the Libretto 110ct.  After I got xorg-server running properly, I noticed that screen blanking and LCD powerdown did not work correctly.  They produced very strange effects and did not ultimately blank the screen or power down the backlight.  This is an old computer but I intend to leave it running constantly so I want to make sure to preserve the life of the backlight as long as possible.

First off, make sure the Toshiba experimental ACPI driver is compiled into the kernel.  It’s included by default in the 3.0 and many of the earlier kernel versions.  Then you’ll want to grab toshset.  Toshset is the key to this whole process.  You can test the driver by typing:

cat /proc/toshiba

You can test it further after installing toshset by typing:

toshset -q

If all that stuff works, you are ready to move forward.

I searched the Internet high and low and could not find what I needed.  What I wanted was something extremely light weight that would use the hooks already built into xorg-server to invoke toshset.  I still feel like this must be possible even though we went a different direction.

In my search I came across exactly one person on the Internet who sounded like she ran across the same problem as me.  On her page she said:

“So what if you really do want your backlight to turn off after a specific interval? There doesn’t seem to be a way to get Xorg to do it directly. But you can cheat: Write a script that calls vbetool dpms off. Then set that script to be your screensaver. “

Sounded close, so after more searching I finally gave up and emailed Akkana and asked her how she did it.  Turns out she didn’t remember but after a couple of email exchanges, we came up with an idea together of how to do this pretty easily.  I had the idea to use a python script to poll the mouse and keyboard nodes out of ‘/dev/inputs’.  I was really pleased when Akkana emailed me back the next day and said something like “Ya, good idea, here it is!”

She sent a script that monitored the everything in ‘/dev/inputs’ and then invokes a system command(whatever you specify) when the idle time counts up to a certain point.  I modified the script a bit so that it would also run another program when activity in those nodes is detected.

When the screen is not blanked, the polling interval is 5 seconds to keep things REALLY light weight.  I tweaked it to up the polling interval when the screen is blanked to 5 times per second so there is no perceivable lag when waking up the screen.

Did I mention this script is REALLY light weight?  It doesn’t even show up in top when it’s on the 5 second polling interval.  (I haven’t ssh’d in yet to check the .2 second interval yet).  So after all that buildup, here’s the script:

#! /usr/bin/env python

# idlerunner -- run a screensaver-type program when input devices are idle.
# By Akkana Peck, akkana  shallowsky (dot) com
# based on an idea from Geordy Rostad, geordy  hotmail (dot) com
# Copyright 2011, please re-use, share and improve under the terms
# of the GPLv2 or later.

import sys, os, select
import time

# how long to wait before firing the screensaver:
TIME_THRESH = 60 * 5   # seconds * minutes

# Global polling interval
interval = 5

# Read from every /dev/input device:
INPUTDIR = "/dev/input"
inputdevs = []
for devname in os.listdir(INPUTDIR) :
   try :
       inputdevs.append(open(os.path.join(INPUTDIR, devname)))
   except :
       pass
#      print "Not watching", devname
# uncomment for troubleshooting ^^^

last_event_time = time.time()

while True :
   time.sleep(interval)
   inp, outp, err = select.select(inputdevs, [], [], .5)

   if not inp or len(inp) == 0 :
       # we're idle! But for how long?
       idletime = time.time() - last_event_time
       if idletime > TIME_THRESH :
#          print "Firing screensaver!"
# uncomment for troubleshooting ^^^
# command to blank the screen
	   SCREENSAVER = "toshset -bl off"
# Set polling to a really quick interval when screen is blanked so it wakes quickly
           interval = .2
           os.system(SCREENSAVER)
           # Let this wait until the screensaver process finishes,
           # so we won't keep checking and fire up another copy.
       else:
           pass
#          print "Idle but only for", idletime, "secs"
# uncomment for troubleshooting ^^^
       continue

   # There's apparently no way to flush input without reading it:
   SCREENSAVER = "toshset -bl on > /dev/null"
# Switch back to longer polling interval when screen saver is off
   interval = 5
   os.system(SCREENSAVER)
#  print "There's something there in", len(inp), "devices"
# uncomment for troubleshooting ^^^
   last_event_time = time.time()
   for f in inp :
       os.read(f.fileno(), 4096)

I’d stick idlerunner.py in ‘/usr/local/source’ (along with toshset).  Make sure to set it executable.  You’ll want to add a file to your ‘/etc/local.d’ directory to start idlerunner in the background.

echo “/usr/local/idlerunner.py &” > /etc/local.d/idlerunner.start && chmod 755 /etc/local.d/idlerunner.start

Next, in your xorg.conf file, you’ll need to add some lines to your xorg.conf file.  These lines will prevent the odd behavior from the built in stuff from occurring.

In the Monitor section add: 

        Option          "DPMS"

In the ServerLayout section, add:

        Option          "BlankTime"     "0"
        Option          "StandbyTime"   "0"
        Option          "SuspendTime"   "0"
        Option          "OffTime"       "0"

This all turned out even better than I had hoped because it’s independent of X entirely and blanks the local consoles as well.  Props to Akkana for generously spending her time to help a complete stranger with a problem on a 15 year old computer.

Installing Gentoo Linux on the Libretto 110ct

I finally broke down and bought a Libretto 110CT.  This machine was pretty incredible for it’s day.  It’s a Pentium 233MHz with MMX and has 64mb of ram.  It had a 4.3gb hard drive in it.  That needed to go so I snagged another CF to IDE adapter off Amazon and put a 16gb Kingston CF card in it.

I didn’t bother trying to install Gentoo on the local machine.  That would be ridiculously slow and probably impossible because of the PCMCIA cdrom drivers.  I opted to use my much faster Celeron 466MHz.  I decided to dedicate that machine to building system disks for my 3 Librettos. I decided it would make life easier to grab a CF Adapter on a Bracket and stick that into the Celeron.

I’m glad I did this since this build-out required a LOT of experimentation.  I built up the system mostly as normal but the first deviation from the path was in the partitioning.  I made explicitly sure to make the first partition the /boot partition.  That had to stay under 1gb I believe but I kept it at 100mb since I figured that was all I needed.

Next, I used lilo.  In lilo, I did a couple of tricky things.  One of which was to use “linear” mode.  All these years I wondered what exactly that meant but now I know.  It’s a mode used for bioses that don’t support aalternate geometries such as LBA mode.  To be honest, I don’t think I really needed that setting on the Libretto 110ct but I’m positive that it’s necessary for a Libretto 50ct to boot a “disk” larger than a gig or so.  Also in lilo.conf, I specified some undocumented kernel features.  Let me print it here and then I’ll explain:

#lba32
# If lba32 do not work, use linear:
linear

# MBR to install LILO to:
boot = /dev/sda
install = /boot/boot-menu.b   # Note that for lilo-22.5.5 or later you
# do not need boot-{text,menu,bmp}.b in
# /boot, as they are linked into the lilo
# binary.

menu-scheme=Wb
prompt
# If you always want to see the prompt with a 15 second timeout:
timeout=150
delay = 50
# Normal VGA console
# vga = normal
# VESA console with size 800x480x24 (this warrants additional experimentation)
#vga = 0x808

image = /boot/bzImage-stable
root = /dev/sda5
label = Gentoo
append=”video=neofb:libretto”
image = /boot/bzImage
root = /dev/sda5
label = Test
append=”video=neofb:libretto”

So there it is, “video=neofb:libretto”.  That is one of the keys to making the framebuffer work on this system.  Someone already did the hard work for me of putting the necessary 110ct setting straight into the linux kernel for me.  I just wish they had documented it somewhere so I didn’t have to go digging through kernel code to find that.

Beyond lilo, the kernel config is also somewhat notable.  I’m running the 3.0.6-gentoo kernel on here which is the newest currently available.  My .config is definitely not optimized to the point it needs to be but it’s certainly a good starting point.  I would only suggest using it with the identical kernel version.  If not, I would only use it as a guide.  Mainly there is the Yenta PCMCIA, Neomagic Framebuffer, Generic PATA and some other tweaks.  Just read the config.

Next bit of secret sauce is in the xorg.conf.  That drove me (and some friends) completely nuts.  Partially because I tried to get too clever and compile dwm without xinerama.  That used to work, now it doesn’t.  Here is the xorg.conf I’m using:

Section “ServerLayout”
Identifier     “X.org Configured”
Screen      0  “Screen0” 0 0
InputDevice    “Mouse0” “CorePointer”
InputDevice    “Keyboard0” “CoreKeyboard”
EndSection

Section “Files”
ModulePath   “/usr/lib/xorg/modules”
FontPath     “/usr/share/fonts/misc/”
FontPath     “/usr/share/fonts/TTF/”
FontPath     “/usr/share/fonts/OTF/”
FontPath     “/usr/share/fonts/Type1/”
FontPath     “/usr/share/fonts/100dpi/”
FontPath     “/usr/share/fonts/75dpi/”
EndSection

Section “Module”
Load  “extmod”
Load  “dbe”
EndSection

Section “InputDevice”
Identifier  “Keyboard0”
Driver      “kbd”
EndSection

Section “InputDevice”
Identifier  “Mouse0”
Driver      “mouse”
Option        “Protocol” “auto”
Option        “Device” “/dev/input/mice”
Option        “ZAxisMapping” “4 5 6 7”
EndSection

Section “Monitor”
Identifier   “Monitor0”
VendorName   “Monitor Vendor”
ModelName    “Monitor Model”
HorizSync    31.5-48.5
VertRefresh  56-72
#    ModeLine     “800×480” 40 800 864 928 1088 480 481 484 509 -hsync -vsync
#       ModeLine     “800×480” 31.5 800 860 940 1000 480 508 511 525 -hsync -vsync
#    ModeLine     “800×480” 36.769 800 848 896 1120 480 508 511 525
#    HorizSync    25-75
#    VertRefresh    50-75
DisplaySize 160 100
EndSection

Section “Device”
### Available Driver options are:-
### Values: <i>: integer, <f>: float, <bool>: “True”/”False”,
### <string>: “String”, <freq>: “<f> Hz/kHz/MHz”,
### <percent>: “<f>%”
### [arg]: arg optional
Option      “ShadowFB”    “off”           # [<bool>]
Option      “PCIBurst”    “off”
#Option     “Rotate”                 # <str>
#Option     “fbdev”                  # <str>
#Option     “debug”                  # [<bool>]
Identifier  “Card0”
Driver        “neomagic”
Option “DisplayHeight480”
#    Driver      “vesa”
BusID       “PCI:0:4:0”
Option “override_validate_mode”
Option “XaaNoScanLineImageWriteRect”
Option “XaaNoScanLineCPUToScreenColorExpandFill”
EndSection

Section “Screen”
Identifier “Screen0”
Device     “Card0”
Monitor    “Monitor0”
DefaultDepth 16
SubSection “Display”
Depth     16
Modes “800×480”
EndSubSection
SubSection “Display”
Viewport   0 0
Depth     24
EndSubSection
EndSection

Fair warning, I’m not sure if this is totally optimal but it seems to do the trick for me.  Here is the make.conf I’m using now which also may not be optimal:

# Please consult /usr/share/portage/config/make.conf.example for a more
# detailed example.
CFLAGS=”-O2 -march=i486 -pipe”
CXXFLAGS=”${CFLAGS}”
# WARNING: Changing your CHOST is not something that should be done lightly.
# Please consult http://www.gentoo.org/doc/en/change-chost.xml before changing.
CHOST=”i486-pc-linux-gnu”

USE=”X mmx png python fbcon jpeg tiff xorg dri -minimal udev hal -evdev -alsa -pppd
-introspection -cairo ssl gtk ncurses -ipv6 -kde -gnome xinerama -test -savedconfig
-selinux -doc -static-libs crypt -pm-utils”
VIDEO_CARDS=”neomagic fbdev vesa”

At this point, I see no reason to leave the fbdev and vesa in the video cards section.  Some of the other flags are a bit random as well but at the moment, they are getting the job done.  Here is my current world file (for the curious):

app-admin/eselect
app-admin/syslog-ng
app-editors/vim
dev-lang/perl
dev-libs/glib
dev-vcs/subversion
net-analyzer/dsniff
net-analyzer/netcat
net-analyzer/nmap
net-analyzer/tcpdump
net-analyzer/traceroute
net-irc/ircii
net-irc/irssi
net-misc/dhcpcd
net-misc/ntp
net-misc/socat
net-wireless/wireless-tools
net-wireless/wpa_supplicant
sys-apps/pciutils
sys-apps/pcmciautils
sys-boot/grub
sys-boot/lilo
sys-devel/distcc
sys-devel/libperl
sys-kernel/gentoo-sources
sys-power/acpi
sys-process/vixie-cron
www-client/dillo
www-client/links
www-client/lynx
x11-base/xorg-server
x11-base/xorg-x11
x11-misc/dmenu
x11-terms/eterm
x11-terms/rxvt
x11-terms/st
x11-terms/xterm
x11-wm/dwm
x11-wm/fluxbox
x11-wm/twm

Some of the tools are for experimentation, others are requirements.  Another notable thing is my default runlevels:

lrwxrwxrwx 1 root root   18 Jan 15  1990 dhcpcd -> /etc/init.d/dhcpcd
lrwxrwxrwx 1 root root   15 Nov  6 14:39 gpm -> /etc/init.d/gpm
lrwxrwxrwx 1 root root   17 Oct  8 08:50 local -> /etc/init.d/local
lrwxrwxrwx 1 root root   16 Nov 13 12:37 ntpd -> /etc/init.d/ntpd
lrwxrwxrwx 1 root root   21 Oct  8 17:11 syslog-ng -> /etc/init.d/syslog-ng
lrwxrwxrwx 1 root root   22 Oct  8 17:11 vixie-cron -> /etc/init.d/vixie-cron
lrwxrwxrwx 1 root root   26 Nov  6 14:21 wpa_supplicant -> /etc/init.d/wpa_supplicant

Notice ntpd, dhcpcd and wpa_supplicant.  I’m using wpa_supplicant to do all wifi configuration.  It seems to work very slick and for any type of network I want now that I figured it out.  Here is a sanitized version of what I put in the /etc/wpa_supplicant/wpa_supplicant.conf file:

#WPA1/2 with passphrase
network={
ssid=”anotherlinksys”
psk=”password”
}

#WPA1/2 with passphrase
network={
ssid=”myrouter”
psk=”password”
}
#WEP with passphrase
network={
ssid=”TheAirlock”
key_mgmt=NONE
wep_key0=”the airlock rules!”
wep_tx_keyidx=0
}
#WEP hex key
network={
ssid=”linksys”
key_mgmt=NONE
wep_key0=0123456789
wep_tx_keyidx=0
}

You can have as many networks as you want in there and it seems to automatically jump to the best one.  Now, I wouldn’t actually need the wireless-tools package at all except for what I’m doing next.  In order to put proper status in the bar on dwm, I did a little .xinitrc scripting:

#!/bin/sh

ntpdate pool.ntp.org &

while true
do
LOCALTIME=$(date +%A” “%D” “%I:%M%p)
RAM=$(free -m | awk ‘/cache:/ { print $4″M Free” }’)
BAT=”Bat. $(acpi -b | awk ‘{print $4 ” ” $5 }’ | tr -d ‘,’)”

xsetroot -name “$BAT | $LOCALTIME | $RAM”

sleep 15s

ROUTER=$(iwconfig wlan0 | awk ‘/ESSID:/ { print $4″ ” }’ | tr -d ‘ESSID:”‘)
SIGNAL=$(iwconfig | awk ‘/Quality=/ { print $2 }’ | tr -d “Quality=”)

xsetroot -name “Access point: $ROUTER | Strength: $SIGNAL”

sleep 10s
done &

#startfluxbox
dwm

This flashes between two status displays.  The first stays on the screen for 15 seconds.  It looks like this:

Bat. 100% | Thursday 11/17/11 12:56AM | 15M Free

The second stays up for 5 seconds and looks like:

Access Point: linksys | Strength: 29/70

None of it is rocket science but I was rather pleased with myself.  It also makes dwm WAY more friendly.  I’m convinced that dwm is the best window manager for the Libretto 110ct because it’s the lightest I know of and makes the absolute best use of the screen real estate.  I would urge you to give it a try.  If you don’t like it, fluxbox is another great choice.

All in all, I’m certain there is more experimentation to be made.  BTW, udev is required to recognize pcmcia cards so don’t get the stupid idea I had to pull it out.  Speaking of which, I’m using a D-Link DWL-G650 wifi card which is atheros 5k-based.  It seems pretty stable overall.  One thing that does not seem 100% is the power management.  I think it has led to a couple of lockups for me.  Mainly when plugging and removing AC power but certainly not always.

Bottom line…  How many other modern, fully patched and up-to-date operating systems do you think would run on an ancient laptop like this?  Not many.  Next task is to get X forwarding and distcc working.  Then I’ll be off to hack the gibson…

Damn Small Linux on the Toshiba Libretto 50CT

I’ve been trying to get some version of Linux on my Libretto 50CT for quite some time now.  One of my conditions for this is that I wanted it to run off of a compactflash card instead of the clunky old 800MB hard drive that originally came in the Libretto.  There is a problem with this though.  I’ve been running into a wall trying to use a 4GB CF card because of LBA mode or some other layer of translation.  For some reason, fdisk can’t come to grips with this.  Most reasonable Linux distributions need at least a gig of disk space but I searched out one that did not….  Damn Small Linux.

DSL only needs 200mb minimum which is perfect since I happen to have a 256mb CF card laying around.  I popped it into my Pentium 133 desktop system with a CF-IDE adapter.  I went into the BIOS to make sure to auto-detect the card in “NORMAL” mode instead of “LARGE” or “LBA” modes.  Then I used a Redhat Linux 5.0 disk I had laying around to fdisk the partition.  I created one big partition that took all of the space, made it bootable and saved/quit.

After that, I popped in the DSL 4.1.10 ISO-LINUX live CD.  It booted up into the gui and I ran:

sudo /usr/sbin/dsl-hdinstall

I made sure to run that from a black xterm so I could see the text.  At the end, when it said it wanted to reboot to finish the setup, I stopped the computer and popped the CF card into my Libretto and booted it up there.

It booted up just fine but when it got to X it was REALLY ugly and the mouse didn’t work.  I hit “ctrl-alt-del” to pop out of X.  At the prompt I ran:

xsetup.sh

I made the following choices:

  • Xvesa
  • no USB mouse
  • no mouse wheel
  • ps2 mouse
  • 2 buttons
  • 640×480 pixel
  • 16-bit color depth
  • no “choose own dpi”
  • us keyboard

After all that, I restarted X and it appeared picture perfect with a functioning mouse.

Next priority was network access so I popped in a Xircom card I’ve been toting around forever.

There is a nice control panel in DSL that allowed me to configure it pretty quickly.

Next was wireless access but the problem is that there is no support for WPA in the 2.4 kernel or in any 16-bit PCMCIA cards that will actually work in this laptop.  Luckily there were quite a few 16-bit PCMCIA wireless cards available.  I have a few but I happened to chose an Orinoco Gold Wireless PC Card since it’s a nice robust card and I have a couple laying around.

Being a security-minded individual, the best solution I can think of is implementing a wireless network with the following parameters:

  • a hidden essid
  • MAC filtering
  • WEP
  • 802.11B only
  • attached to my outside DMZ

Beyond that, I’m at a bit of a loss.  It’s still a WEP network afterall and there is only so much that can be done to secure it.  But alas, I snagged on of my extra WRT54G’s and configured it with those parameters in mind and everything is pretty much up and running flawlessly.  Time to rebuild another battery I guess 🙂

The Living Computer Museum and SRCS meeting

Someone on the DC206 mailing list posted about a Seattle Retro Computer Society Meeting which sounds cool on it’s own but what really caught my eye was that it was being hosted at Paul Allen’s new Living Computer Museum in Seattle.  This museum is not yet open to the public so I thought this would be an excellent opportunity to see the place and check out the retro computing meetup.  I showed up and the group was small (12-15 people) but very enthusiastic about what they were doing so that made it worth seeing.  It’s nice to know at least that I’m not the only one interested in old gear.

There was Frank who built a single board computer based on a 6800 in an old AT style chassis.  Very cool stuff.

Then there was someone who had a Tektronix computer that ran BASIC and was based on vector graphics.

Then Dave had an old TRS-80 but had a Catweasel card in his PC that allowed him to produce disks for that system (or nearly any other) from images stored on his system.  But I didn’t snag a picture of it.

Hanging out with and talking to all these guys was awesome but then the bonus came later when the museum guys Bill and Keith showed up and gave us a tour of the upstairs where they are working on the exhibits that will eventually make up the museum.

We made out way up the rickety elevator to the dimly lit 3rd floor and we suddenly transported to nerd-heaven.  First on the tour was a PDP-7 from 1967.  That is their oldest machine.

Next few stops we some other PDP’s that were all extremely cool too but the crashed 200mb hard drive really caught my eye.

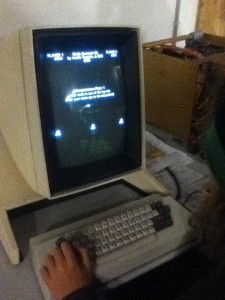
Then we moved on to see an Altair and a Xerox Alto which were both quite impressive.

After those, there was an XKL Toad-1 hidden in the back road.  This system stands out in my memories because I actually went to XKL a couple of times when the Toad-1 was being built.  I picked up a bit of trivia today about it.  Toad apparently stands for “ten on a desk” which refers to the PDP-10 it was built to emulate but they didn’t quite get there with the large rack mount form factor.

In the same room as the Toad-1, there was also a couple of DEC System 20’s.  One of which they had interfaced with a modern NAS in order to preserve the life of the system’s hard disks.  Speaking of which, there were a few of those in there as well.

The tour ended with what probably was the newest system there which was a mid to late 80’s DEX VAX 780.  Still pretty old stuff but I would wager that there are a lot of VAX systems out there still in use today.

Can’t wait for the SRCS meeting next month.  Now I have a better idea of how it works and have some cool stuff I can bring to share and hopefully everyone will get a kick out of it.  If you want to see more even better pictures of the types of computers this museum has, check out this book Core Memory.


After 6 months of talking about it, I finally gave my soldering 101 presentation at Black Lodge Research today.  If you were there or not, there are a few points that I was trying to drive home with this presentation.

  • Wash your hands and beware of lead
  • Clean your tip
  • Lead-free solder sucks ass!
  • Secure your work with fun tak

For those who missed it, sorry.  For everyone else, look forward to a couple of future classes on soldering surface mount devices and another one about making your own circuit boards at home.  Here are the slides and notes from the class:

Soldering 101 Open Office Presentation

Soldering 101 Presentation notes

Thanks to the folks who came out and made this talk fun and also thanks to the folks who dropped money in the donation box to help keep our hackerspace running.

The Downside of Having a Long Password

I’ve had a thought forming in the back of my head since a recent ISD Podcast we did the other day featuring a breach of a Star Wars fan site.  In the case of a data breach like this, it really doesn’t matter what your password is if the website stores in in clear text.  Obviously you would hope that they wouldn’t do this but if they do, you are screwed.

No matter how much care you put into having that 80 character pass phrase with punctuation, etc, the data thief is sitting there staring at your password plain as day.  Furthermore, you are standing out as the lone wolf who has this crazy password.  From the thief’s perspective, that makes you a more interesting target since you are A) Either just more careful than the average Joe or B) You have something spectacular to hide.

Most people choose a password of 7-8 characters.  This is because this is the minimum required length for most websites.  A password of that length is somewhat trivial to crack these days practically no matter how much capitalization or punctuation you have present.  When you move up to more like a 15 character password, I’ll dare say that you are beyond the practical reach of current capabilities. If you were dumb about it and made it easy to guess then all bets are off.  Putting in spaces can help but even just combining odd words will make a better password.  To illustrate:

“sneakyrubberdogbath” is safer than “P4$$#ui!”

But then if a website gets hacked and the all the user accounts are leaked, having something REALLY long and REALLY crazy is going to make you stand apart from the pack.  Probably far more than you really want to.  If I saw something like…

userbob: St4rz4rr666brown_wag1n4setz_blahblahblah_blahlitmus_vermin

…my interests would personally be peaked and I would wonder what was so damned important that userbob is trying to protect.  My point is that you should keep your password within a range and not get carried away too far in either direction.

Powered by WordPress. Theme: Motion by 85ideas.