Latest Entries »

Ten more hacker/computer-related movies

Wargames: The Dead Code -Better than I expected but still somewhat annoying to me.  I get annoyed by any movie where so-called smart protagonists repeatedly make stupid decisions.  The director did capture an era of a young generation of texting and facebook addicts but I felt some of this was wedged in there a little too much.  Also I wanted to slap his stupid friend Dennis many times during the scene where he was playing the “dead code” game.  Overall though, I thought the movie got pretty good when Dr. Falken appeared.  Of course at that point, the plot also basically rehashed the first Wargames movie.  Casting needed to pick a more attractive leading lady for this one in my opinion.  This movie is worth a watch.

Real Genius – Not a pure hacker movie but it has several scenes with hacking concepts demonstrated.  There are some eproms reprogrammed, some hex dumps, patching with ribbon cables and brute force password cracking.  I avoided this movie for a long time because the cover made it look extremely cheesy.  It’s actually a pretty good movie.  Sure it’s a little dated but it’s entertaining and it holds up well even today.  This one is fun to watch and leans more towards a comedy genre.

Minority Report – A high-tech mistaken identity sort of thriller.  If nothing else, this show is worth a watch just for the crazy computers that the detectives are using and for the high tech surveillance technology.  This movie rehashes some of Orwell’s classic 1984 ideals and sets them to a modern, somewhat believable theme with minor suspension of disbelief.
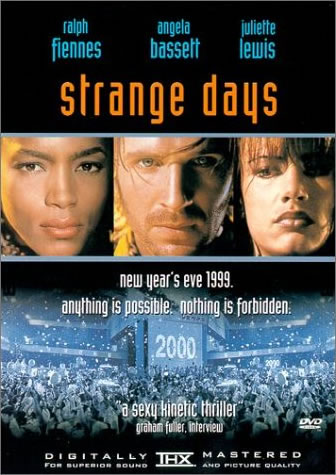
Strange Days – More of a virtual reality sort of movie than a hacking flick.  This movie does a good job painting the world in a pseudo-post-apocalyptic sort of way that James Cameron is known for.  It’s no Terminator 2 but there is enough computer VR sci-fi here for anyone who can suspend disbelief a bit.

Mission Impossible – How could I forget a movie where a hacker breaks into a system will suspended from two wires from a drop down ceiling?  The hacking wasn’t the interesting part as much as breaching the perimeter and actually obtaining access to the computer.  This movie has probably inspired more penetration testers than any other.

The Italian Job – A high tech robbery theme that includes some hacking of course.  There are plenty of other related scenes as well such as safe cracking and who doesn’t like a good high speed chase?

Ocean’s 11, Ocean’s 13 – Another high tech robbery series but I would have to say these are among the better films of that genre.  Skip Ocean’s 12.  What a piece of crap that was.  The other two movies, however, are not half bad.  There is a LOT of great social engineering, high tech hacking and insider threat demonstrated.  These movies are among the few who should have the right to use their particular cinematic.  Most movies who try to look this cool simply fall on their face and annoy me.

Die hard 4: Live Free or Die Hard – This movie belongs on the list if only because Justin Long(the I’m a Mac guy) is in it.  Amongst other things he does a great social engineering hack on an Onstar-equipped vehicle right before Bruce Willis launches the car at a helicopter because he “ran out of bullets”.  I’m a big Diehard fan.  This brings Diehard more up to date but doesn’t cram Gen-Y cultural crap down your throat. (see Wargames 2 review at the top of the page)

Firewall – I personally didn’t really enjoy this movie.  I like Harrison Ford but, as I stated in my Wargames 2 review above, I get annoyed when so-called smart protagonists repeatedly make stupid decisions.  This movie takes the cake in that respect.  If you can get past the frustration factor, you may find a decent movie here.  This movie kept me on the edge of my seat… SHOUTING at the screen “WTF?!?  WHY DON’T YOU F’ING KILL THIS BASTARD THAT JUST SPENT THE LAST HOUR TORTURING YOU?  YOU’RE HOLDING THE GUN!”

Some of these movies are second choices on movie night when compared to movies on my other list: “Thirteen great hacker/computer-related movies

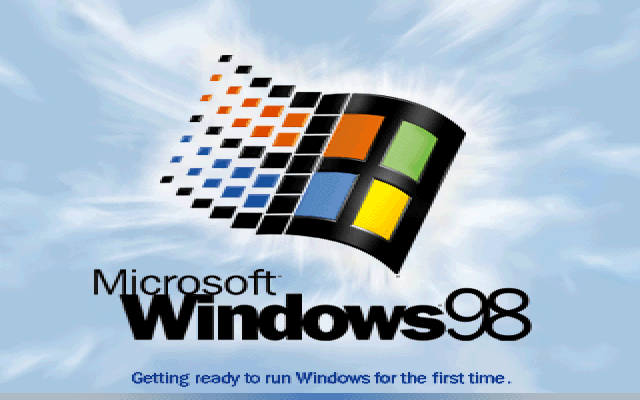
Installing Windows 98 on my Libretto 50CT

I haven’t installed Windows 98 in a LONG time but my Libretto is a Pentium 75MHz so Windows 98 is a reasonable choice of an operating system for it since thus far I’ve been unable to make a modern Linux distribution work with the system.  I wanted to how well Windows 98 stacks up to a modern operating system.

I have a pair of Libretto 50CT’s.  Both of which have adapters so I can use Compact Flash cards as hard drives instead of the noisy and power-hungry 810mb drives that ship with them.  This allows me to swap out drives quickly and easily.  Since the Libretto won’t boot of the pcmcia CD-ROM drive and I no longer have the Windows 98 startup floppy, I simply placed the Compact Flash card in a different ancient system for installation purposes.  That worked out just fine and the install went smoothly.  Before I put the card into the Libretto, I did the smart thing and copied the win98 directory off of the CD-ROM onto the hard drive for future reference.  The reason for this follows…

Windows 98 has some idiosyncrasies compared to a more modern OS like XP.  Pretty much every time you sneeze on some configuration parameter, you are required to insert the Windows 98 CD, copy files off of it and reboot the system.  Yes, this is archaic and annoying but back in 98’s heyday, hard drives were MUCH smaller so you wouldn’t have wanted to waste a bunch of disk space storing all of the CAB(cabinet) files.  People complain how XP and newer systems are so bloated, this is one reason that they are…  The CAB files are on the hard disk AND they have MANY MANY more drivers preloaded so that many hardware devices are covered on at least some level.

After I got Windows 98 installed and the CAB files copied over, I swapped the Compact Flash card into the Libretto.  As expected, when it first booted up, it updated drivers for the Libretto’s hardware configuration.  It needed to go through a couple of reboots to get it right but they were soft reboots.  An advantage of Windows 98 was that it was built on MS-DOS so it had the ability to soft-reboot where it would just kill the GUI and go down to the DOS level and restart from there.  This saves you the pain of the POST sequence and ram count.  After it was booted up and running, I was surprised and impressed that ALL the hardware seemed to be working perfectly.  I was expecting to have to track down Windows 98 drivers for the screen and sound but the Windows 98 second edition seems to have the Libretto 50CT covered perfectly.

Next, I wanted to get some wifi working so I found a SMC 2632W 16-bit PCMCIA wifi card in my stash.  First I’ll mention the bad…  WEP only.  As far as I know, there are no 16-bit PCMCIA wifi cards that support WPA/WPA2.  No surprises here.  I have a sandboxed access point to connect WEP devices to anyways so no worries here.  On the good note, SMC still has the Windows 98 driver for this particular card available on their website.  I copied the driver onto another CF card on my MacBook and put it in an adapter in the PCMCIA slot in the Libretto, after I copied it to the system, I remembered something else… No built in unzipping tool.  Back to the web I found an old pkunzip.exe file somewhere and copied that onto the Libretto.  I put pkunzip in the C:\windows directory and associated it to zip files and ran into another failure.  Pkunzip doesn’t respect directory structure of the zip files by default so I found the dialog to edit file associations and added a “-d” parameter to the pkunzip command.  This fixed the issues and I was able to move on with the installation.

I inserted the card and then pointed the hardware wizard at the desktop where I had unzipped the SMC drivers.  This went fine but the driver is REALLY kludgy.  There is no way to perform a scan of available access points(something else we take for granted).  Obviously I knew the AP I wanted to connect to but it took a reboot before it was all working properly.  After the reboot, I tried a ping….  SUCCESS!  So then I tried internet explorer and the home page it was set to actually crashed it.  I opened it back up and stopped the page from loading and then hit up google.  OUCH!  Surfing modern sites on this thing is SLOOOOOWWWW.  Oddly, surfing web 1.0 sites is just fine though.

The next thing I tried to do is Windows Update.  I went to the page and was informed that support had stopped in 2006 and only the updates to that date would be available.  Unfortunately, this did not prove to be true.  It appears that Microsoft has finally shut down the Windows 98 update servers entirely.  Not that I blame them but it would have been nice if they just scaled them down to one old server or something.  Oh well, I won’t be using this thing outside of a firewall anytime soon.

The last thing I did was put a keyboard banger program on this system for my son to mess around with.  He got a kick out of it and played with it for a good 45 minutes.  I think he likes this system because it’s so small.  His 2.5 year old fingers are probably the perfect size for touch typing on a Libretto.  🙂

How to set up 802.11b wifi on MS-DOS

While it may seem pointless at first I actually have a halfway legitimate reason for going through the effort.  First off, of course, I wanted to see if it could be done and how usable it would be.  Second, I was sick of taking the compact flash card out of my Libretto 50ct and sticking it in my Mac to put new files on the system.  I figured it would be easier to punch up a URL and download the file directly.

Now that the “why” is out of the way, now we need to cover the “what”.  What you need is a wireless card that has MS-DOS drivers available for it.  There are a couple but for me, the easiest to find was an Orinoco Silver/Gold card.  Part of the reason I went with this card is that it is NOT cardbus.  It’s a 16-bit pcmcia card so it works in my Libretto 50ct.  The Orinoco card uses an Agere chipset so in theory this may work for other similar cards.  Once you’ve obtained your card, you will need the driver which is available on this server.  That little zip file on there contains everything you need.

Now for the how…  The first part can be a bit interesting.  After you’ve stuck your card into the laptop and unzipped the file, you are pretty much interested in two directories from the zip file.  First you’ll need to deal with what is in the CAD directory.  Read the readme.txt first and you will find out that you need to run MSD(Microsoft Diagnostics) and find a free location in memory to use as a base address.  In the readme, the suggest using:

/m=d000

However this didn’t work for me.  I found another location that was suitable and inserted a line similar to this one into my config.sys:

DEVICEHIGH=C:\DRIVERS\CAD\WVLANCAD.SYS /i=10 /b=1300 /m=b400

That is what worked for me, your mileage may vary.  Reboot your computer and see if that works.  By working, I mean not getting an error.  After that is done, you’ll need to deal with the files in the PACKET directory.  First you’ll want to edit the PACKET.INI file.  This may disappoint some of you here but you only have two options which are open or WEP.  Hopefully you have a WEP router that is off in the corner of your network where it cannot hurt anyone.  In the packet.ini file, you’ll want to set the following lines most likely:

Wireless_Network_Name = ANY (put in your ssid)

Station_Name = John Does Notebook PC (obvious)

;Enable_Encryption = N (uncomment and change to “Y”)

;Key1 = abcde (uncomment and put in your key.  Use “0x prefix for hex)

After these things are done and the file is saved, you can try out your settings with:

wvlan42 /L

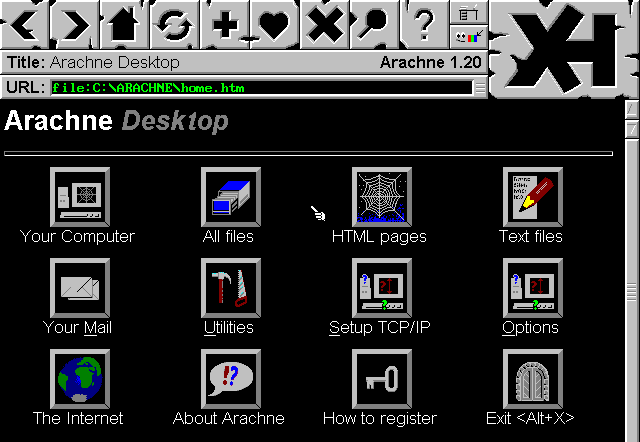
This should finally turn the light on your card on.  This means everything is probably working but it’s pretty hard to say at the moment because you don’t have ping or anything installed by default with MS-DOS.  Feel free to add that line to your autoexec.bat if you don’t want to have to worry about it in the future.  Now it’s time to download Arachne which is a fully graphical web browser for MS-DOS.  It’s the best one that I tested and the only one I could get to work.  Once you start up Arachne, you’ll need to set up some network settings.  The drivers above handle your layer 1 and layer 2 functions.  Arachne will pretty much handle the rest itself.  When I configured Arachne, I chose “Resident packet driver” and “bootp/dhcp”.  After that, you need to either restart or hit the “use new settings button.  If all goes well, you should be surfing like it’s 1999 all on your MS-DOS based laptop.

How to use an ISO as a virtual cd under MS-DOS

My Libretto doesn’t have a CD-ROM drive in it.  Sure there is an external drive that I can plug in and run but why would I want to haul around a drive that is almost as large as the whole computer just to play some old game that requires a CD-ROM drive to function?  Many of the old CD-ROM games are around 10mb anyways so it makes no sense to use a CD-ROM drive for them.  Even on a desktop, do you really want to monopolize your CD-ROM drive with a disk just to play one game?  I figured that someone out there must have a solution so I found one.  The problem was that I couldn’t find any documentation, just odd hints scattered across the web.

The program you need is SHSUCDHD and SHSUCDX.  These are part of a package called SHSUCD that is available here.  The whole package is pitched as a replacement for mscdex but the feature I’m interested in is just the emulation.  What’s nice about it is that it doesn’t require any TSR’s in your config.sys file.  You can either start it on demand or in the autoexec.bat file.  My goal was to run Wizardry 7: Crusaders of the Dark Savant.  So I put a chain of commands into a batch file that I run when I want to start that game.  The lines related to SHSUCD are as follows:

shcdhd86 /f:wiz.iso

shsucdx /d:shsu-cdh

This assumes that SHCDHD86 is in the same directory as wiz.iso.  SHCDHD86 is the same as SHSUCDHD if I’m not mistaken so hopefully that isn’t too confusing.  The first lines points the virtual cd-rom driver at the iso you wish to mount.  The second line specifies what drive letter bind the image to.  After all of this is done, you should be able to go to the D:\ drive and there will be the contents of your ISO.

In my spiffy batch file, I put commands to unload the cd-rom drivers after the game is done using them:

shsucdx /u

shcdhd86 /u

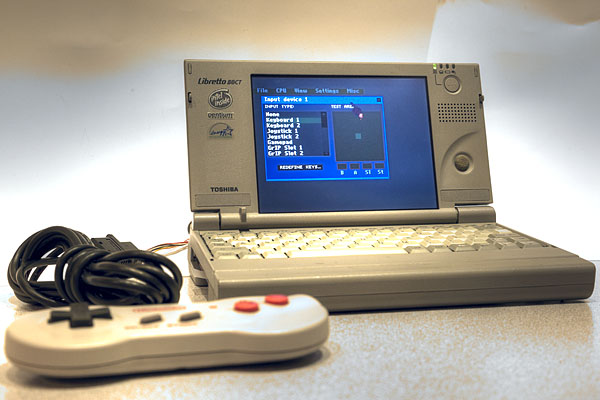
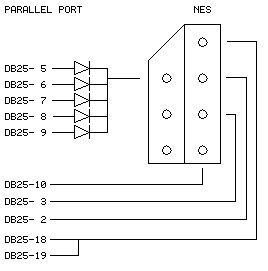
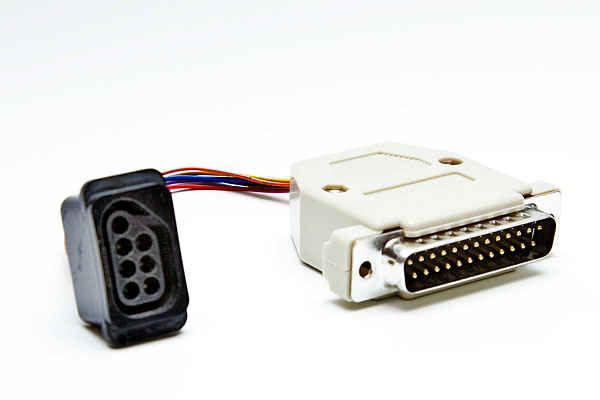
At some point, some clever folks figured out that a NES controller contains a simple 8-bit shift register that can be read by a parallel port.  There are really just 3 things that matter.  Those are CLOCK, LATCH & DATA.  The rest of the pins and the diodes are just for power and ground.

With my version, I actually used one additional pin for power which was pin 4.  According to some sites, 1n914 diodes are ideal but in my case, I used 1n4001 diodes which were readily available at Radio Shack in a grab bag and they seem to work just fine.  I think that almost any silicon diodes will do the trick in this application.  The only reason for them is so the power is not back fed through the port as a side effect of tying all the lines together.  Overall, this is a GREAT beginner hack if you are just learning about electronics since it doesn’t even require a circuit board.

After the hardware was done, the software is the next piece of the puzzle.  I am using sneskey as my driver.  Sneskey is a slick little program that allows you to map many different types of controllers to keys on your keyboard.  You don’t really run sneskey in the background as a TSR though.  Instead, you set up the sneskey configuration file to load your emulator.  In my case, I used nesticle.  To set this whole thing up, download I would just extract all the sneskey files into the same directory as you extract nesticle and it’s companion program dos/4gw.  After that, you’ll want to edit the nes.ini file and change the ProgPath line to look something like this:

ProgPath = c:\nesticle\nesticle

Check the key bindings while you are in there.  They should be fine though.  After that, you should be able to launch nesticle and sneskey with the following command:

C:\nesticle>sneskey nes

Once you have launched the program with your controller plugged in, go to settings –>  input  –>  device 1.  In there, make sure Keyboard 1 is selected.  If all went well, everything should work except A & B.  Hit “redefine keys” and click on “A”, then press “A” on the gamepad to bind the key.  Repeat the process for “B” and you should now be good to go.

Converting a Toshiba Libretto 50CT to solid state

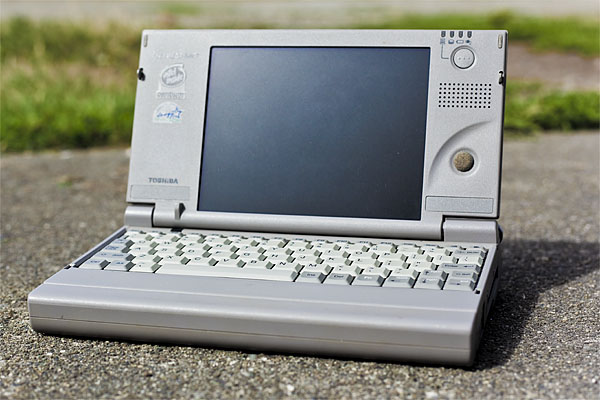
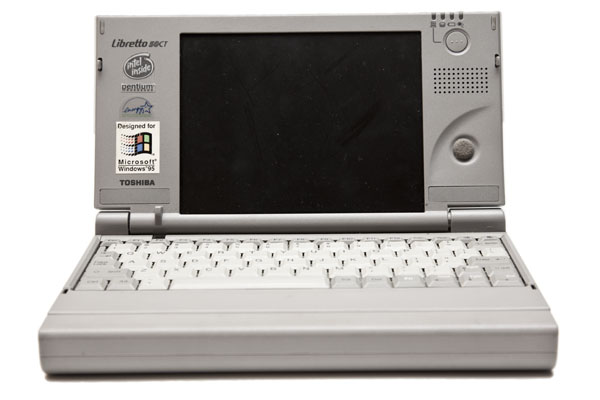
Ever since the first time I saw a Toshiba Libretto I have wanted one.  For years I’ve been watching them on eBay but never wanted to pay the ridiculous prices that they fetched but finally I won my very own Libretto 50CT for $16.  Sure it’s insanely old technology now given that it’s a Pentium 75MHz(sorta) with 16mb of ram and a 815mb hard drive but it’s still a neat little computer and should be great for playing some old dos games and a few other uses I’ve yet to think of.  If you are not familiar with this computer, it is roughly the size of a VHS cassette tape.  Very small in other words.  This Toshiba Libretto 50ct was released in the USA around 1997.

One thing about this little machine that actually disappointed me a bit was that when I booted it up, I found the hard drive to be unbearably loud.  I mean I have 3 other laptops in the room and this one managed to overpower them all(sonically) by a significant margin.  No worries though because I came up with a solution.

While I admit that the Syba 2.5 inch IDE Dual Compact Flash Adapter costs almost as much as the laptop itself did, I have to also say that it was well worth it.  It was not a perfect fit however…  There are two problems with putting the Syba into the Toshiba Libretto.  First off, it’s too thick.  The Libretto hard drive is WELL under the normal spec at a super slim 7.5mm while the Syba is actually bloated for the spec it was trying to achieve.  The Syba is a fat 9.9mm instead of a more standard 9.5mm.  This was easily rectified by deshrouding the thing though.  Pulling off the unnecessary plastic slims the Syba adapter down to 8.7mm which is snug but ultimately does comfortably fit inside of the Libretto.

Click to expand

Next problem is also easy but the solution may not be for the faint of heart.  The Toshiba Libretto is expecting a keyed connector on the hard drive.  The Syba adapter, however, has all 44-pins as would be expected according to the spec.  The solution is to carefully line up the original hard drive and the Syba adapter paying CAREFUL attention to which direction is up.  Then simply take a pair of diagonal cutters and cut the interfering pin off your new adapter.  Doing this will also ensure that you will not need to fear screwing up the alignment when inserting the adapter into the Libretto.

One bummer about this setup is that the second CF slot is non-operational in the Libretto.  Apparently the controller does not have a second channel or it is used somewhere else.  One more bit of advice is the put the adapter in with no CF card in it so you can see to the bottom of the drive bay and line it up properly.  After that, stick your CF card in.  You can make a little tape tail for your CF card if you want your cards to be easy to swap out when you open up the drive bay.  I have not delved into performance benchmarking yet but so far it seems snappy enough for my purposes so I am pleased with the setup.  One final caveat I will leave you with is that this setup will not accept a micro drive since that is too thick.

My new $43 network

I’ve been working on a lot of virused computers lately.  Typically I haven’t had much concern for other devices on my network but then I ran into a recent rash of viruses that are much more sophisticated than usual.  One of them was silently doing “click fraud” in the background at the rate of 1000 clicks per minute or so.  This got me a little spooked about the rest of my network.  Even though my main computers are macs, I do think that cross platform or mac viruses will become a more regular occurrence.  This is why I decided to rebuild my network.

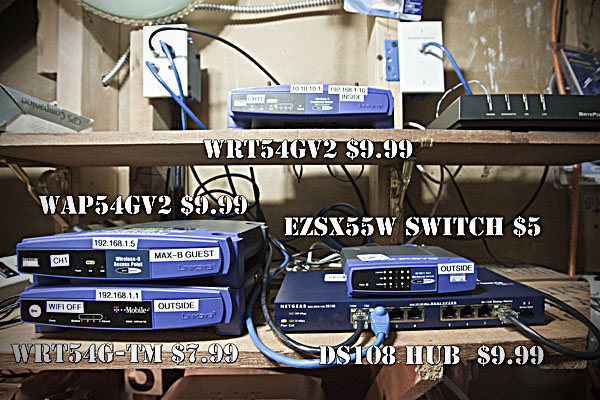
I have been hitting a lot of thrift stores lately.  It’s unbelievable what people are throwing out in my area.  Some stuff I can understand like the network hub for instance but other stuff like the wrt54g’s are a bit of a surprise.  The routers I have found range from WRT54Gv1’s to WRT54G-TM’s and routers as new as WRT54Gv6’s.  The prices have been as low as $7 up to about $13.  Sometimes I get the power supply with them, other times I pick up extras somewhere else.

In the matter of 2-3 months or so, I’ve managed to snag about 10 of them at bargain basement prices.  Personally, I don’t see the need for 802.11N for everything.  If I want to go REALLY fast, I’ll just plug in a wire, that’s always going to be faster than wireless anyways.  Whatever the case, their loss is my gain.  I’ve flashed these routers with DD-WRT for now since I don’t have a good grasp on OpenWrt quite yet and don’t need the extra functionality for the moment but I plan to start experimenting with OpenWrt a bit more at a later date.

Here’s how my network is laid out now:

DSL MODEM
^
OUTSIDE ROUTER(WIFI DISABLED)
^
HUB  <–>  Network sniffer
^
SWITCH  <–>  Guest access point(802.11B, WEP devices) & virused systems
^
INSIDE ROUTER(WPA enabled) <–> Most protected systems

I had a couple of goals with this layout.  First, I wanted to provide a single point where I could sniff ALL traffic going in or out of my network.  The hub provides me this because all of the traffic is spewed across all of the ports.  When I only have 2 devices plugged into the hub, there should not be a performance hit from this. One caveat however is a switch labeled as a hub.  I was unfortunate to purchase such a device but at least it was only a few bucks.  Another challenge is actually finding a 10/100 hub.  Most of them on the used market seem to be 10mbit.

My next goal was having a place to isolate guests and hook up older, insecure devices that only work with WEP and/or 802.11B.  One of my next steps will be adding another dedicated guest router for 802.11G devices but that’s not a huge priority.  Most importantly, I wanted to segment virused PC’s off of my network.

Hopefully this new setup will allow me to research odd malware behavior and keep my good systems a bit safer in the process.

Exploring Zipit memory addresses with U-boot

At first, U-boot may seem like just a way to load a root file system on your Zipit Z2 but it is capable of so much more.  If you type “help” at your U-boot prompt, you will get a HUGE list of commands.  Some are self explanatory but others are coupled with vague descriptions.  To delve deeper into some of these commands, I did a bit of poking around online.  Before you proceed, please realize that attempting to fuzz memory locations like this could potential result in a brick or hardware damage. That being said, here is a short list of commands I’ve put together that I’ve found useful for exploring the Zipit at the bit level:

MD (Memory Display) – You can use this command with a couple of suffixes.  For example md.b, md.w & md.l all change the way that the output is displayed.  Experiment with those and see which one works best for your purpose.

md 0x40E00000

By default, md will show you several lines of memory starting at the address you type in.  To see the exact contents 4 bytes of memory, you would type in something like:

md 0x40E00000 1

The “1” is an offset value that tells the command to display one 4-byte block.  You can change that to see however many locations you would like.  After you use a value here, it will persist until you use a different value.  In other words, next time you type “md 0x40E00000”  without the “1”, it will show you 4-bytes until you run the command again with a different offset.

MTEST (Memory Test) – Memory test will perform test passes on a specified range of memory using a specified pattern.  For instance, if you want to see some interesting bits get flipped, type in:

mtest 40E0000C 40E0000D FFFFFFFF

This will fuzz the range of memory from 40E0000C-40E0000D with the specified test pattern.  I believe the LCD or power saving features may live in this range because this command makes the screen flicker.  I’m not entirely sure how the pattern value (“FFFFFFFF”) works but a bit of experimentation and you should be able to figure it out.

NM (Memory Modify) – This command allows you to selectively flip bits of any byte in memory.  For instance, if you run:

nm 40E0000C

You will see something similar to:

40E0000C: 0000032a ?

That is a prompt that is showing you the existing contents of the 4-bytes.  If you type in “FFFFFFFF”, that will set ALL of the 32-bits(4-bytes) to the “on” position.  In this case, it makes the screen dimmer.  The line will increment and ask you again what you would like to change to.  This time, if you type “00000000”, it will turn ALL 32-bits off and the screen will go to full brightness.  If it’s not already obvious, ALL of those bits and bytes don’t control the screen brightness.  You can start to narrow it down by flipping the nibbles(half-bytes).  Starting with “F0000000”, “0F000000”, “00F00000” and so on will narrow down which byte the brightness lives in.

It appears to be in the “00000F00” nibble.  So now it’s time to start flipping the bits.  The individual bits are at 1, 2, 4 & 8.  So something like “00000100”, “00000200”, “00000400” etc will track down the specific bit.  Turns out that it’s the most significant bit of that specific nibble.  So in binary, it looks like “1000”.  That translates to 8 in hex.  To sum it up, changing between “00000800” and “00000000” with toggle the LCD backlight between bright and dim.

If any of this is confusing, you should read my post on binary to hex number conversion.  Many people seem to think that computers somehow don’t operate on binary logic anymore but an exercise such as this proves quite the opposite to be true.

On the Zipit Z2, you probably don’t NEED to probe around like this since you can download a manual for the CPU and find most of the memory locations in there but if you just want to experiment or if you have another similar undocumented device that you want to reverse engineer, then this is a good way to go.

Lasers are cool

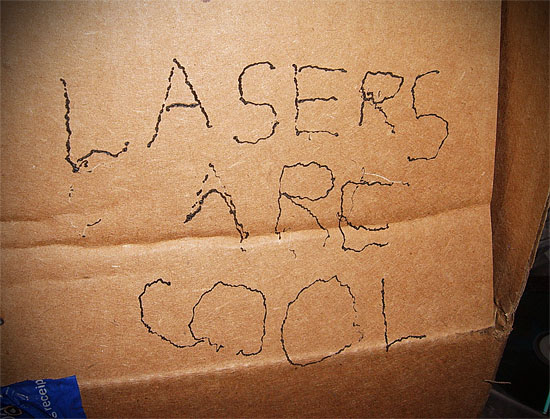
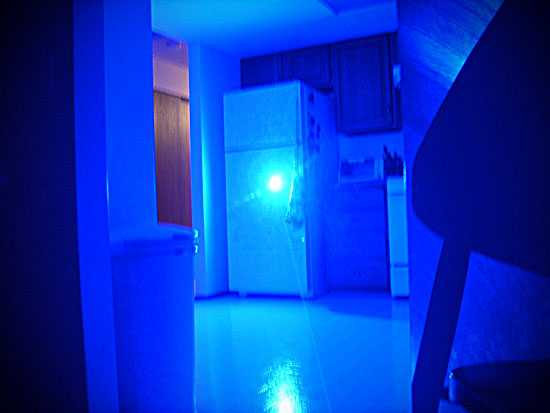
My friend James likes to play with fire and burn stuff.  It’s a bonus for him when he can use previously unobtainable technology to do so.  Recently he has been buying Casio XJ-A140 projectors for the purpose of parting out the 445nm Nichia laser diodes(24 of them!).  He has sold some of these on eBay to others who don’t want to tear into an $800 projector but recently he hooked one up to an LM317 regulator to see what it can do.  What you see in the pictures is the result of roughly 1.2 watts of output.  The visible blue light is totally dangerous and even the reflections could cause permanent eye damage but I’m SURE he locked away his kitties and wore protective goggles(yeah right).

So you have U-Booted your Zipit Z2?  Great!  Now you are ready to exploit one of the biggest advantages of moving from blob to U-boot…  Building your own kernel.

First off, you need to have built a cross-compiler of some sort to build the kernel.  I have posted directions for my version here in my post about building U-Boot for the Z2.  After that, you will need to make sure u-boot-tools is installed on your system.  On Gentoo you can use portage to install it but you will need to unmask the package.  To unmask that package on Gentoo, add ACCEPT_KEYWORDS=”~x86″ to your /etc/make.conf.  Then type “emerge u-boot-tools”.

Next, download the latest version of the Zipit kernel from here:

http://git.kernel.org/?p=linux/kernel/git/marex/pxa-linux-2.6.git;a=shortlog;h=refs/heads/zipitz2

To start off, I’m going to use Mozzwald’s suggested .config file.  You will need to rename it .config and put it in the base directory of your kernel.  Next, replace the <base_kernel_dir>/arch/arm/mach-pxa/z2.c with a bleeding edge one if desired.  Mozzwald and Sweetlilmre both have been diligently hacking away at that file so you could ask in the irc.freenode.net #zipit-dev channel to obtain the latest version or use this z2.c for now.

Now for the fun stuff.  You can use a make menuconfig command as follows to add your own customizations to the kernel:

make ARCH=arm CROSS_COMPILE=arm-linux-gnueabi- menuconfig

Now it’s time to build the new kernel:

make ARCH=arm CROSS_COMPILE=arm-linux-gnueabi- -j9 uImage

Now, if you built a modular kernel, you will need to build the modules and stick them somewhere:

make ARCH=arm CROSS_COMPILE=arm-linux-gnueabi- modules
make ARCH=arm CROSS_COMPILE=arm-linux-gnueabi- INSTALL_MOD_PATH=/where/to/drop/modules modules_install

After this is done, your new kernel should be sitting there for you ready to go in the arch/arm/boot directory and your modules are wherever you put them.  Just copy the uImage and modules to the appropriate locations on your Zipit’s SD card and you will be good to go.

Powered by WordPress. Theme: Motion by 85ideas.