Latest Entries »

How to add a splash screen to U-boot on your Zipit Z2

The latest version of U-Boot(as of 8/19/2010) adds the ability to use the screen and keypad on your Zipit Z2 to display a console(albiet sideways).  U-boot also allows a splash screen on the LCD during boot up if a sideways console is not useful to you.  Personal I like the console on my serial port anyways so a nifty splash screen would be a nice touch.  Since I have a serial mod, I will provide instructions to add the splash screen via ymodem.  First thing is first, you will need a bitmap file that is 320×240 and rotated 90 degrees counter-clock-wise.  It also has to be 8 bit color depth.  In order to save a BMP as an 8-bit file in Photoshop, you will need to change the mode to “indexed color”.

From your serial console, type in the following command:

loady 0x5c000000

Next, you will need to write that file to memory.  Use the flinfo command to make sure your memory matches mine.  The last two sectors are where we will store your file.  Make sure your file won’t take up more than two sectors(it shouldn’t).  The bmp file I’m using is only 79k or so which uses only one and a third of a sector or so.  After you’ve checked your memory, use the following command to move your bitmap to a permanent location:

protect off all; erase 0x7e0000 +20000; cp.b 0x5c000000 0x7e0000 0x13034

The last number 0x13034 is your file size in hex.  If you look up the screen a bit, your loady command should have outputted a file size in hex and decimal.  Use YOUR file size instead of mine unless you are using my file of course.  Now you can test your image:

bmp display 0x7e0000

Cool, eh?  Now it’s time to make it load automagically on bootup:

setenv splashimage 0x7e0000

saveenv

Now when you reset, you should see your splash screen.

How to build U-Boot from source for the Zipit Z2

Since there is no central repository for fresh U-Boot binaries for the Zipit Z2, I decided to build my own u-boot.bin from source.  Before I could do this, I needed to build a cross compiler for the arm processor.  This is something I’ve always had trouble with on Debian systems but this time I used Gentoo and everything worked flawlessly.  Luckily Marex left me with some very helpful hints on how to get the job done.  First, you’ll need to set up a cross compiler if you have not already:

emerge crossdev

You’ll need to add the following lines to your /etc/make.conf:

PORTDIR_OVERLAY=”/usr/local/portage $PORTDIR_OVERLAY”

Don’t forget to make the following directory since that is where your new tool chain is going to live:

mkdir /usr/local/portage

Now it’s time to build your tool chain.  This will take quite a bit of time.

time crossdev -S -t arm-linux-gnueabi

After all of that, you should be ready to build your u-boot.bin.  First you need to grab the latest snapshot from http://git.denx.de/?p=u-boot/u-boot-pxa.git;a=shortlog;h=refs/heads/devel.  Go ahead and unpack the file in your home directory:

tar -xvf u-boot-pxa-*

cd u-boot-pxa

Next you need to run the following command.  Double check and make certain that you have a space between the “…gnueabi-” and the “zipitz2…” parts.

make CROSS_COMPILE=arm-linux-gnueabi- zipitz2_config

Lastly, you can build the u-boot.bin firmware file with this command:

make CROSS_COMPILE=arm-linux-gnueabi-

You should now have a working u-boot.bin file in the ./u-boot-pxa directory.  With that file, you can follow these instructions to upgrade U-boot on your Zipit Z2.  As usual, thanks to Marex for giving me the proper hints to make this happen.

There is not a lot of documentation out there about running OpenWrt on the Gateworks platform.  Specifically the gw2348-4 board that I’ve been playing with.  Mounting the CF card is not hard but there are a few prerequisites.  First I’ll assume that you have some form of network connection running.  After that, you’ll need to start with:

root@OpenWrt:# opkg update

After you’ve updated the list of packages, you’ll need to install some packages:

root@OpenWrt:# opkg install kmod-ata-ixp4xx-cf kmod-fs-ext3 e2fstools

Those will install a few dependencies as well.  After all of that is installed, you might want to reset for good measure.  When it comes back up, you should be able to see the CF card as /dev/sda.  Try formatting it as ext3 with the following command:

root@OpenWrt:# mke2fs -j /dev/sda1

That is assuming that you already had a partition on there of some sort.  After that is completed, you should be able to mount it:

root@OpenWrt:# mkdir /mnt/cf
root@OpenWrt:# mount /dev/sda1 /mnt/cf
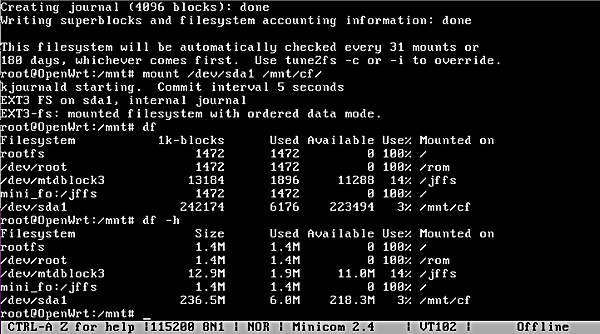
root@OpenWrt:# df -h

You should get something like this:

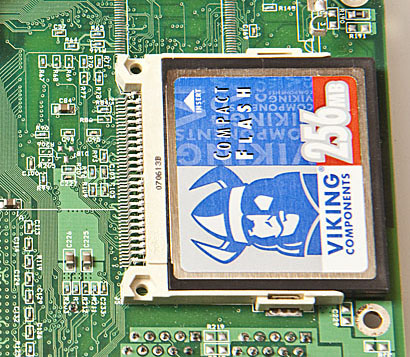
Having a CompactFlash card in this router is a great advantage over the WRT54G series.  I know those can be hacked with an SD card but I’ve messed around with some of those quite a bit and not had very good luck with it.  This board is made for this specifically and worked right away without any screwing around.  If you prefer vfat partitions instead of ext3, do a little grepping and searching the opackages for vfat and dostools.  That should be enough to get you started.

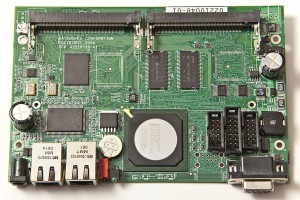
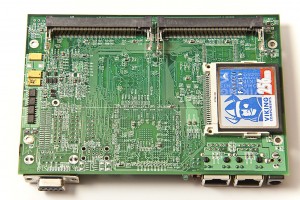
Not that I needed another project but I recently picked up a Gateworks gw2348-4 from Aliosa27.  He was selling a few of them off after a dev project that he finished.  I wouldn’t have bothered but I looked at the specs and noticed that the board seems to be sort of a souped up version of a WRT54G.  Like WAY souped up.  Here is a short list of the items that caught my eye:

  • Intel XScale IXP425 533MHz Processor
  • 64Mbytes SDRAM
  • 16Mbytes Flash
  • Four Type III Mini-PCI Slots
  • Compact Flash Socket
  • Two RS-232 Serial Ports
  • Passive Power Over Ethernet
  • Optional Dual Type A USB Host Ports

On top of all of that, OpenWrt supports it.  That’s good enough for me.  The ONLY disadvantages that I can see so far is that it only has 2 Ethernet ports and you have to add your own wifi card but in the end adding your own wifi card is actually an advantage.  That will give me an opportunity to mess with some Atheros-based cards.  Luckily I happen to have one of those on hand now along with an Realtek RTL8185L card that I picked up at a local computer recycler for $2.

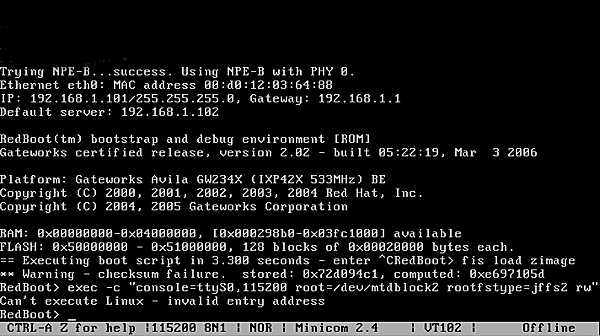
First off, I tried just plugging it in and hooking it up to Minicom.  I used the settings that seem to work with everything else I have which are 115,200,8,n,1 with no flow control.  I ended up with a RedBoot prompt and a non-loading zImage left over from the previous owner.  This is a used board so I didn’t expect much in this regard.

I see another few advantages to this hardware already.  For one, this thing has a boot loader with a command prompt and console access.  Already that blows away the WRT54G hardware.  On top of that, if you flash a bad firmware, you probably won’t brick the device.  I imagine you can just reflash it with the correct image and continue on your path.

Time to go to the OpenWrt site and grab the correct image.  I’m going to use the Backfire 10.03.1-rc1 avila image.   From the RedBoot prompt, I’ll clear out the flash memory:

RedBoot> fis init

Next I need to set up a tftp.  For this I used tftpd32.  I checked the ip addresses that were expected on the Gateworks device:

RedBoot> ip_address

This spit back that I needed to use 192.168.1.102 as the server so I plugged that into my network settings and tftp server on the Windows laptop I’m using.  After some rudimentry setup on the Windows laptop, I ran the following command on the Gateworks board to pull the file down:

RedBoot> load -r -v -b 0x00800000 openwrt-avila-zImage

After that one returns a favorable result, next is:

RedBoot> fis create linux

Checked my free space with:

RedBoot> fis free

Now I need to grab the file for the rootfs on the Windows box and then tftp it from the Gateworks device:

load -r -v -b 0x00800000 openwrt-ixp4xx-generic-squashfs.img

Then I whipped out the calc app on my mac and changed it to programmer mode to calculate my free space.  In my case it was 0xE80000 so I create the root file system.

RedBoot> fis create -l 0xE80000 rootfs

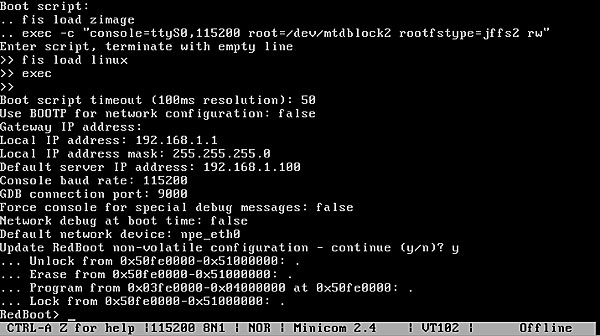
Finally, I run through the fconfig program from the RedBoot> prompt and then reset.  My settings may differ slightly from what you will see on a brand new Gateworks board.  I’m posting a screen shot for simplicity sake:

For more clarification of my instructions, visit this link.  I think this board will make an excellent snort box or maybe something even better.  Who knows?

MacBook Pro battery temporary killed my mouse

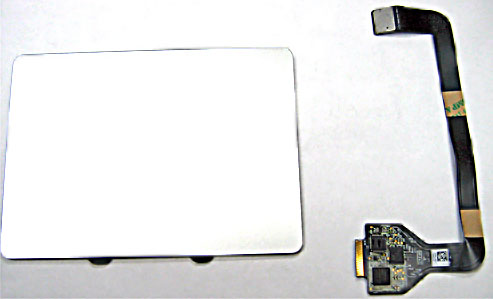
I’ve been having trouble with my mouse for the last week on my MacBook Pro.  I have the MB471LL/A late 2008 model of the MacBook Pro.  The first unibody MacBook; the one with the split bottom case.  Anyways, I’ve been experiencing problems with my mouse.  The whole trackpad usually acts as a button but this last week it has been getting progressively non-responsive.  I would try to click and I would get no tactical feedback and no response from the system.  In fact, the system was acting as if I was holding the mouse button down.  I got a bid desperate and plugged in an external mouse to try to use the system.  This didn’t work either since the left click wouldn’t work.\

Silly me…  I went and ordered a new trackpad from Powerbook Medic.  I chose them for a couple of reasons.  First off, the price was fair.  It was in line with eBay sellers for MacBook parts.  Secondly, they have some excellent instructional videos showing how to disassemble many different systems.  Lastly, they have an identifier that works off of your serial number to precisely identify which system you have and tell you which part you need.  I will be keeping ALL of these factors in mind in the future if I need more parts for repair of my laptop or someone else’s but for now, it appears that I jumped the gun.

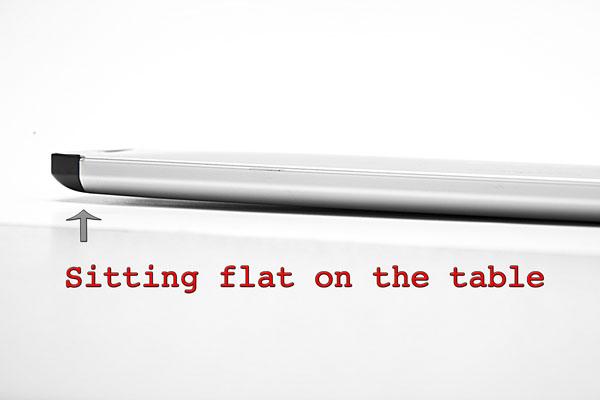
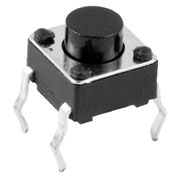
Turns out that it wasn’t the mouse.  I had figured that there was a tact switch under the mouse that I had just clicked one too many times.  Tact switches are commonly used as buttons in mice, power switches on laptops and any other use besides keyboards pretty much.  I became so desperate that I was going to pop the system open and manually disable the ribbon cable to the mouse so that it could be used with an external mouse only until the new part arrived.  When I turned my system over however, I found that the aluminum door for the battery didn’t seem to be closed all the way.  I opened the door and noticed that my battery was visibly bulging in the middle to the point that it wouldn’t even sit flat in the compartment.

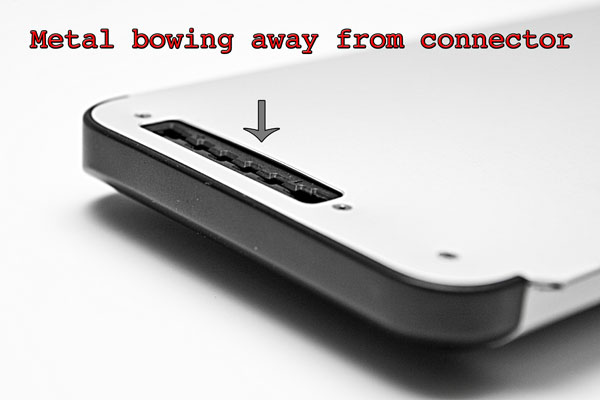
In other words, my battery was bulging so much that it was putting pressure on the mouse pad from underneath and keeping the button permanently depressed…  Wow!  I’m a little surprised that it didn’t warp my laptop or do any permanent damage.  In the pictures, the bulging may not look like much but it was enough to cause my problem.  While I was out today, I found a great little store that specializes in Apple computers.  They happened to have the battery in stock so I bought it and popped it in.  Good as new and the battery door closes properly again.

The moral of this story is that you should always try the easy fix first and do a proper diagnostic before rushing out to buy parts.  Once again I think this laptop is great and it feels like a new machine after owning it for almost 2 years now.  I will definitely buy another one when a quad core 15-inch MacBook Pro is available…  Not holding my breath though since it’s been rumored for years.

Sanyo Eneloop rechargeable batteries

My first experience with rechargeable batteries was in the 80’s with the purple Radio Shack NiCd batteries.  At first I thought they were neat but then I realized how horrible they were.  Whenever you would reach for them, they would always be dead because of self-discharge.  If you grabbed them off the charger, they would be ok for the duration of the time you were using the device you put them in but if you forgot to put them back on the charger when you were finished, they would be dead again next time.  They were also brutally expensive.  I think 2C’s were $12-$15.   I pretty much discounted rechargeables altogether until recently when my son was born.

I realized quickly that any kid of mine would require many electronic devices.  I came to find that some of these devices ate batteries quicker than others.  For instance his little Sansa Shaker MP3 Player would use up a AAA battery in 6-8 hours.  Many days he was happy listening to his music all day so that could get fairly expensive.  I started shopping around for batteries and purchased some random LaCrosse batteries and some high capacity Sanyo AA batteries rated at around 2900MAh but soon I noticed some of the same traits of self discharging again.  These NiMH cells weren’t nearly as bad as the old NiCds were but I still couldn’t depend on them if they had been sitting for any amount of time.

Continuing my search I found the Sanyo Eneloop AA’s.  These batteries have a much lower capacity rating than some of the others but the almost always exceed the specified capacity when taking a charge.  The Eneloop AA’s are rated for 2,000MAh and the Eneloop AAA’s are rated for 800MAh.  According to Sanyo’s marketing material, these batteries can sit on the shelf for a year and still have 85% of their charge.  They further claim that a normal rechargeable would be completely dead if it sat for a year.  That sounds reasonable to me based on my experience.

To sweeten the deal and perhaps prove a point, the Sanyo Eneloops come precharged in the package.  This might be slightly to their detriment from a marketing perspective because people could potentially be confusing them with the crappy “rechargeable” Alkaline cells of recent years and be wary of them for that reason.  I assure you however that the Eneloops are excellent batteries and well worth the money.  I have some cells that have been in service over 2 years now and still charge up to full capacity.  I also built a custom battery pack for our Video Baby Monitor with Eneloops.  The baby monitor started out running a full day on stock cells and degraded to the point where it would only run 3 hours before the red light came on.  With the Eneloops, the baby monitor ran for 3 days even when checking the screen a few times during the day when I first built the pack and a year later(after a very abusive charging cycle) it still runs a good day and a half or so.

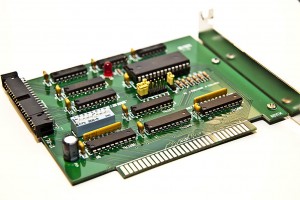
My final assembled XT-IDE 8-bit ISA card

Once I started messing with my IBM PC XT, I realized that there were things I had taken for granted all along since my first PC compatible system was a 386.  I didn’t realize that IDE uses a 16-bit bus and it would take some trickery to use an IDE device in an older 8-bit system like the XT.  I searched around and found that there were in fact 8-bit ISA controllers but they were expensive and rare.  Finding one these days would be a stroke of luck or a dent in the pocket book.  I was about to design my own when I came across the XT-IDE project.  The XT-IDE project is an open source venture where a group of people designed exactly what I needed with fairly common off-the-shelf parts.  I had my friend James to burn the code onto the eeprom for me  because I have no way to put something on a 360K floppy disc but aside from that, the project primarily consists of easy through-hole soldering.

Front side of the unpopulated XT-IDE PCB

I ordered my board the other day from Andrew Lynch who can be found lurking in this huge forum thread.  It was $14 including shipping which I felt was more than fair considering the quality of the board.  It’s a very professional dual-sided PCB with a full solder mask and silkscreen.  It would take me far too much time to attempt to replicate this at home.  It’s also nice that it has all of the settings printed VERY clearly on the board and the url for www.vintage-computer.com so I won’t forget where I found this project.

The bill of materials looks a little daunting at first but it’s really not a huge project.  The list below references Jameco part numbers.  There are a few non-critical items and some others that you can pillage from other ISA cards such as an L-bracket, pan screws and shorting blocks (jumpers).  I’m personally going to skip using most of the sockets since I’m fairly confident with my soldering skills and dual-wipe sockets tend to add another point of failure.

1               XT-IDE PCB (get this from Andrew lynch)
10   25523 	CAP,MONO,.1uF,50V,20%
1    1945428 	CAP,RADIAL,47uF,35V
2    45129 	IC,74HCT688
1    46316 	IC,74LS04
1    46607 	IC,74LS138
1    47466 	IC,74LS32
1    287144 	IC,74F245,DIP-20
3    282642 	IC,74F573,DIP-20
1    74827     	Atmel EEPROM IC, 28C64
2    112214 	SOCKET,IC,14PIN,DUAL WIPE
6    112248 	SOCKET,IC,DUAL WIPE,20PIN
1    112272 	SOCKET,IC,DUAL WIPE,28PIN
1    526205 	SOCKET,IC,16 PIN,390261-4
3    112432 	SOCKET,SHORTNG BLKS,RED,CLSE
1    690662 	RES,CF,150 OHM,1/4 WATT,5%
6    691104 	RES,CF,10K OHM,1/4 WATT,5%
2    857080 	MOLDED SIP,9PIN,BUSSED,10K,2%
1    333949 	LED,GREEN,572NM,T-1 3/4
1    1939562 	SWITCH,DIP,SPST,8-POS,16-PIN
1    53604 	HEADER,RT MALE,2RW,40 CONT
1    109568 	HEADER,.1 ST MALE,2RW,16PIN
1    109576     HEADER,.1 ST MALE,1RW,3PIN
2    2094389 	SCREW,PAN HEAD,PPN4-40X1/4
1    N/A        Keystone 9202 ISA bracket with 2 PCB mounting tabs.

Once I had all of the parts together, it was time to check out the build instructions.  This project is a VERY easy build.  All of the IC’s are labeled on the PCB, all of the caps are identical except one which is labeled and called out and all of the resistors are the same aside from the one that goes with the LED.  There are only two gotchas that I can think of.  First off, before you solder in the 40 pin IDE connector, you should pull the key pin out from the connector.  Grab an IDE cable and line it up with your connector, you will see which one is the key pin fairly quickly.  Secondly, the default dip switch setting is correct on the back side of the PCB but incorrect in the build instructions.  Set it to 01110111 as stated on the back of the card.  If you need to set this to a different setting, you will need to re-flash the firmware on the eeprom for some reason.  The default seems to work fine however so no big deal.
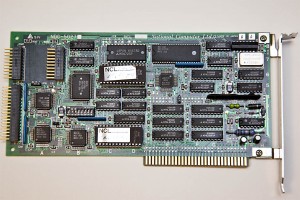
The original NCL MFM controller that came in my PC XT

Overall this project has cost me about $30.  I’ve learned some new stuff and I can now use my IBM PC XT with a modern IDE hard drive.  My next step will be to try to use the system with a compact flash card.  Now I can install MS-DOS 6.22 and hopefully Xenix at some point without disrupting the original MS-DOS 3.2 file system.

Your Mac knows where you live

With all of the recent excitement in the security world about people’s concerns regarding smart phones that know your location, a bigger problem has been overlooked.  Most Macintosh users probably don’t realize that there is a feature called “location services” in OS X 10.5 and later.  This feature is not widely publicized but I assure you that it’s there. This feature queries a database and determines your location based on which wifi access points can be seen by your computer every 12 hours or when invoked manually via a web browser or other application.  I’m not sure how well this works in the more rural areas but I live in a suburban area and location services pinned my down within 100 feet or so.  Apple’s statement on the matter follows:

“The data collected to provide your location does not identify you personally. If you do not want such data collected, you can choose to disable the feature, which does not negatively affect your Mac in any way.”

If you would like to test your own computer just go to Google Maps.  See that tiny button under the 4-way arrow in the upper left corner?  Push it.  I tested this under Firefox and Safari.  Thankfully they both had the courtesy to ask me if I would like to allow the web page to query my location.  The thing that struck me odd is that Apple seems to have left it up to the application to ask you if you would like to allow use of the feature.  Potentially a malicious application could use this in the background without your knowledge.

To my knowledge, any Macintosh with a airport card using OS X 10.5, OS X 10.6 or any Windows box with Safari has location services enabled by default.  Here is how to disable location services.  I’m curious why Apple thought that this should be a default setting in your operating system.  Thanks Apple, but no thanks.  My computer on my static IP is querying the mother ship every 12 hours to figure out where I’m sitting with my computer.  For some reason, I just don’t like that.

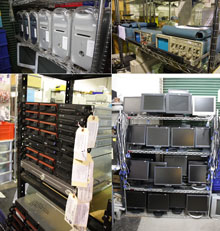
9 Seattle area computer recyclers

I like to check in on the local computer recyclers from time to time. Seattle actually has a lot of these little places hidden around the area and they are always bursting at the seams with piles of old computer parts.  I’m usually after the retro and more obscure stuff but sometimes I find things that are useful on my MacBook Pro too.  Here is the list in no particular order.

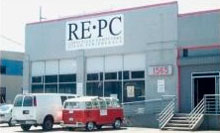
RE-PC Tukwilla – This was Bruno’s in the 1990’s.  The Tukwilla branch of RE-PC has a small section of wall devoted to retro hardware for sale and at very fair prices. I saw an Apple IIe there the other day for $30 and a Commodore Vic 20 for $20, both of which I thought were good deals.

RE-PC Seattle – This was a PC Fixx back in the 1990’s. These days, they have a gigantic warehouse with tons of stuff. Some of it is priced very well and some is a bit high but this store also has a great retro computer museum. The best publicly displayed collection of retro computers in Seattle to my knowledge. Everything from an Apple Lisa to an 8-bit ISA Soundblaster.

Computer Surplus Redmond – This is a great little store with super-friendly owners.  They have a perfect mix of new and old items.  They don’t really save or sell retro hardware since they haven’t seen a huge interest.  (Seems to be a trend)  Might be worth popping into the Redmond Value Village which is half a block down while you are at it.  These guys are more than a typical recycler.  If I weren’t a computer guy, I would take my computer to these guys for service.

PC Recycle Bellevue – This is a small, cramped store but almost always has something worth buying. They have a great selection of cables, drives and random parts such as ATX shields and usb dongles. The window display of this store is ALL retro hardware and software. If they feel like it, they will entertain offers on the window items. That is where I scored my IBM PC XT.

PC Recycle Lynnwood – This store is very cluttered and crowded with incoming piles of computer hardware.  They don’t have any retro hardware here so I probably won’t go back anytime soon but the guy that runs it is friendly and knowledgable.  If you are in the Lynnwood area, this store is probably worth a look.

3R Technology – I’m guessing the 3 R’s are reduce reuse and recycle.  This store is hard to find and deceiving.  It’s on the opposite side of the building that it’s addressed from next to some train tracks.  They seem to have a very high turnover of inventory and a friendly staff.  When you walk into the store, the front room is fairly small but then it opens up to a warehouse in back and you’ll see stacks upon stacks of various parts.  I think I saw a whole pallet of power supplies there once.  These guys are much friendlier than you would expect and they seem to enjoy visitors to their obscure location.

Seattle Goodwill – Not a pure computer recycler but it’s the absolute largest Goodwill I’ve ever seen anywhere and from time to time they will have a good selection of routers, printers and other computer-related items. I haven’t seen full systems there for years but it’s still worth a visit if you are in the area.  Every morning at 10am there is a bum rush of people cramming into the door and b-lining for the electronics and collectibles section of the store.  These are typically eBay poachers which I find fairly irritating but on the other hand, they generally aren’t looking for the same stuff that I am looking for.  In Goodwill locations around here, items are placed on the shelf with a dated, colored price tag, within the month, every color of price tag goes on sale for 50% off.  If the item does sell in a month, it gets sent the Goodwill Outlet Store where it is sold by the pound with exception of  books which are sold for $0.50 each.

Bellevue Goodwill – This is the closest Goodwill to Microsoft so a lot of Microsoft employees donate stuff here.  They tend to have one of the largest and best selections of used tech books that I can think of.  Like Seattle Goodwill, their turnover is fairly high so you never know what you will find here.

Free Geek Seattle – This store is not open yet but they are coming soon.  I’ve been to the Free Geek in Portland and in Vancouver B.C. and I can’t say they have much there for me but if you are low on cash and you need a computer, you can go volunteer at Free Geek and earn a computer.  Vancouver did have a Mac Plus with an external 20mb hard drive and a case for $50 which I thought was reasonable.

That’s my small list.  If you know of any great computer recyclers in the area that I missed, please post in the comments and I’ll get them added.

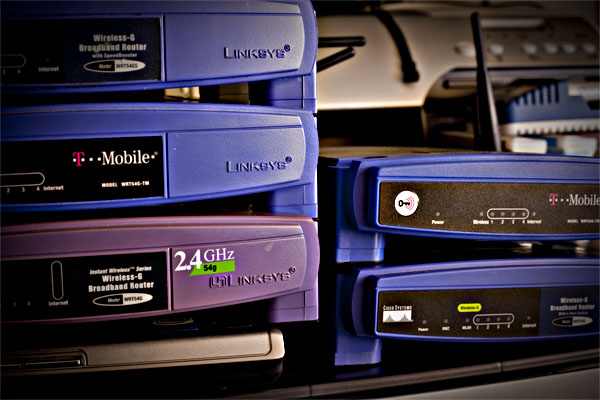
How to manually set network settings in Linux

I’ve been messing around with my stack of WRT54G routers this weekend.  So far I have serial modded two out of the five that I have sitting here.  The neat thing about the serial mod is that it’s so easy to grab a console off of it without worrying about network parameters.  The bad thing is that your router may or may not be connected to the internet when you are on that console.  It’s pretty easy to hook up to another wireless router in client mode from the console.  I couldn’t find the following information all in one place so I’m going to hash out the quick version here:

iwconfig wlan0 essid router_name

iwconfig wlan0 key 0123456789 (I have a wep router handy for connecting older devices)

ifconfig wlan0 10.10.10.40 netmask 255.255.255.0 (no dhcp client on my router by default)

ifconfig wlan0 up

route add default gw 10.10.10.1

ifconfig wlan0 up

and finally add a known dns server (like 8.8.8.8) to your /etc/resolv.conf with vi

For advanced Unix users, none of this is anything new but hopefully this will help someone else out there who is struggling through an OpenWrt or Gentoo install or can’t figure out how to configure wireless on your Zipit after you’ve put an aftermarket root fs on it.  All of these settings will disappear when you reboot your device aside from editing the resolv.conf although if you are using a WRT54G series router, your edits to the resolv.conf will also disappear.

Powered by WordPress. Theme: Motion by 85ideas.