Tag Archive: wrt54g


Every used router tells a story

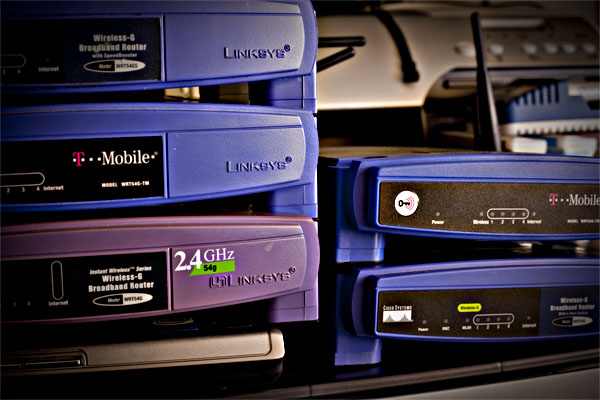
I’ve been buying WRT54G variants at thrift stores for probably a year now.  It’s a little obsessive actually.  I would say I’ve purchased about 15-20 of them now.  My wife asks why I do it and I’m not sure I have a great answer.  Some of them I’ve used to set up my own network, others I’ve swapped out with friends and family to get them onto better, more stable hardware and still others I’ve bricked and experimented with.

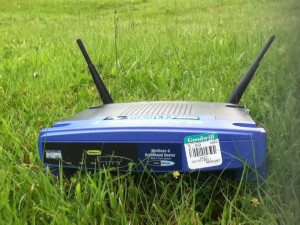
Today I was at Goodwill up in Mount Vernon, WA.  Somewhat of a podunk, low-tech place.  I wasn’t particularly expecting to find a router but I did.  It was a shiny WRT54G v2.2 for $5.99.  I couldn’t pass it up at that price but honestly I will pay up to $12.99 for them so this was a score.

Anyways, I was remembering the Samy location tool story we ran on ISD Podcast a couple weeks back.  I decided to check out the MAC address for this router and see where it came from.  First I tried the address on the bottom of the router not really expecting it to work.  Unsurprising enough, it didn’t work.  Then I remembered something that one of the other guys on ISD said… all the MAC addresses on the router are within a few digits so I incremented the last byte of the address a couple times and low and behold, I was presented with an EXACT location in Edmonds, WA.  It was so precise in fact that it even gave me a street address.  For reference Edmonds is 50 miles from Mount Vernon and there are at least 15 thrift stores closer to Edmonds than this one so I’m not sure why it ended up way out there.

This was a little bit startling.  I’m not even entirely sure what the implications are but this does seem like a security risk to me.  With the address, I am able to obtain the home owner’s name although but with no guarantee that the router lived in that house.  Furthermore, I’m able to see what the name of the WiFi was.  In this case, it was “Jayne1”.  Popping in the street address, I found this was a small condo building.  If I wanted to dig further, I’m sure I could find which unit “Jayne” lives in.  She did change the default password so I could see anything further without a bit more effort than I’m willing to put out at the moment.

If nothing else, the creepy factor here is pretty high.  Lesson here should be to reset your router config at minimum before sending your old router out to pasture.

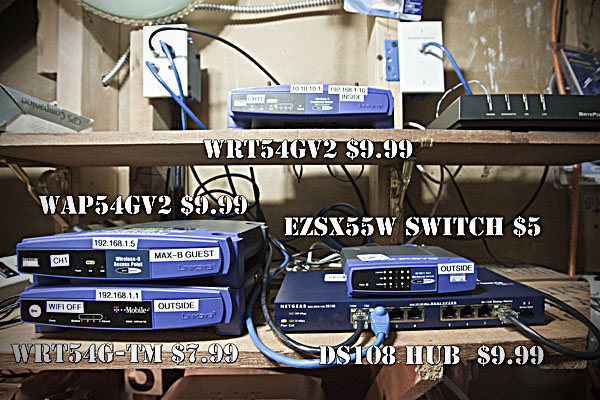
My new $43 network

I’ve been working on a lot of virused computers lately.  Typically I haven’t had much concern for other devices on my network but then I ran into a recent rash of viruses that are much more sophisticated than usual.  One of them was silently doing “click fraud” in the background at the rate of 1000 clicks per minute or so.  This got me a little spooked about the rest of my network.  Even though my main computers are macs, I do think that cross platform or mac viruses will become a more regular occurrence.  This is why I decided to rebuild my network.

I have been hitting a lot of thrift stores lately.  It’s unbelievable what people are throwing out in my area.  Some stuff I can understand like the network hub for instance but other stuff like the wrt54g’s are a bit of a surprise.  The routers I have found range from WRT54Gv1’s to WRT54G-TM’s and routers as new as WRT54Gv6’s.  The prices have been as low as $7 up to about $13.  Sometimes I get the power supply with them, other times I pick up extras somewhere else.

In the matter of 2-3 months or so, I’ve managed to snag about 10 of them at bargain basement prices.  Personally, I don’t see the need for 802.11N for everything.  If I want to go REALLY fast, I’ll just plug in a wire, that’s always going to be faster than wireless anyways.  Whatever the case, their loss is my gain.  I’ve flashed these routers with DD-WRT for now since I don’t have a good grasp on OpenWrt quite yet and don’t need the extra functionality for the moment but I plan to start experimenting with OpenWrt a bit more at a later date.

Here’s how my network is laid out now:

DSL MODEM
^
OUTSIDE ROUTER(WIFI DISABLED)
^
HUB  <–>  Network sniffer
^
SWITCH  <–>  Guest access point(802.11B, WEP devices) & virused systems
^
INSIDE ROUTER(WPA enabled) <–> Most protected systems

I had a couple of goals with this layout.  First, I wanted to provide a single point where I could sniff ALL traffic going in or out of my network.  The hub provides me this because all of the traffic is spewed across all of the ports.  When I only have 2 devices plugged into the hub, there should not be a performance hit from this. One caveat however is a switch labeled as a hub.  I was unfortunate to purchase such a device but at least it was only a few bucks.  Another challenge is actually finding a 10/100 hub.  Most of them on the used market seem to be 10mbit.

My next goal was having a place to isolate guests and hook up older, insecure devices that only work with WEP and/or 802.11B.  One of my next steps will be adding another dedicated guest router for 802.11G devices but that’s not a huge priority.  Most importantly, I wanted to segment virused PC’s off of my network.

Hopefully this new setup will allow me to research odd malware behavior and keep my good systems a bit safer in the process.

I’ve been messing around with my stack of WRT54G routers this weekend.  So far I have serial modded two out of the five that I have sitting here.  The neat thing about the serial mod is that it’s so easy to grab a console off of it without worrying about network parameters.  The bad thing is that your router may or may not be connected to the internet when you are on that console.  It’s pretty easy to hook up to another wireless router in client mode from the console.  I couldn’t find the following information all in one place so I’m going to hash out the quick version here:

iwconfig wlan0 essid router_name

iwconfig wlan0 key 0123456789 (I have a wep router handy for connecting older devices)

ifconfig wlan0 10.10.10.40 netmask 255.255.255.0 (no dhcp client on my router by default)

ifconfig wlan0 up

route add default gw 10.10.10.1

ifconfig wlan0 up

and finally add a known dns server (like 8.8.8.8) to your /etc/resolv.conf with vi

For advanced Unix users, none of this is anything new but hopefully this will help someone else out there who is struggling through an OpenWrt or Gentoo install or can’t figure out how to configure wireless on your Zipit after you’ve put an aftermarket root fs on it.  All of these settings will disappear when you reboot your device aside from editing the resolv.conf although if you are using a WRT54G series router, your edits to the resolv.conf will also disappear.

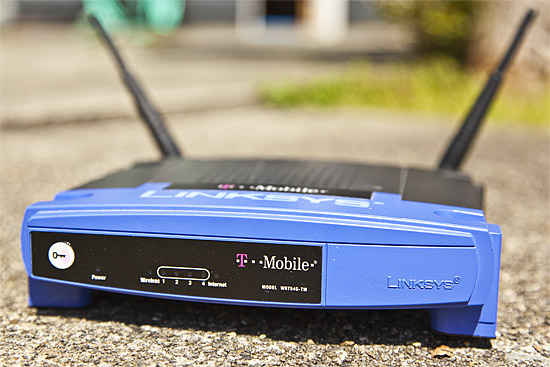
I have a small stack of WRT54G routers at my house.  When I find them second hand for cheap, they tend to be the WRT54G-TM variant.  This version is actually great for modding and hacking because people seem to think it’s tied to T-Mobile so it must require a contract to use or something and they will sell them cheap.  Personally I’ve had no trouble putting DD-WRT on the WRT54G-TM.  In fact, the WRT54G-TM has 32MB ram and 8MB which is far more than most of the other routers in the series.

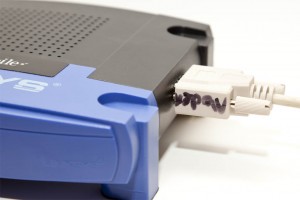
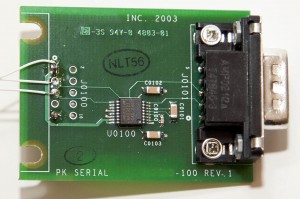
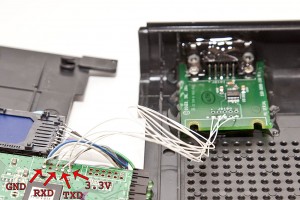
Today, I’m going to add a serial port to my WRT54G-TM so I can use a terminal to log into it.  I think this will be handy for debugging since I plan to change the firmware on this router to Openwrt.  I’m going to use a debugging board given to me by an unnamed friend at an unnamed company.  There is nothing special about the board.  It’s just a serial level shifter with a Maxim 3221CAE IC on it.  It’s a fairly standard circuit that they publish on the datasheet for that IC.  I’m just using this board because it will save me time doing this hack.  The nice thing about the 3221 variant is that it will run on the 3.3V that is already present on the header.  I’m loosely following directions from here showing two serial ports added to a WRT54GS.

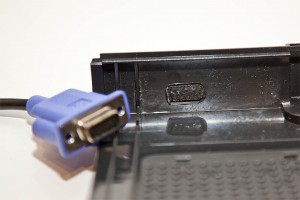
To mark out the location for my new serial port, I’m going to use fire.  I found a totally useless serial dock that corresponds with a defunct proprietary service and grabbed my blowtorch.  I heated up the end of the cable as hot as I could get it and made an impression inside the WRT54G-TM.  After that, I took a Dremel and routed out a hole for the DB9.

Next I soldered the wires in place.  On the Maxim chip, the r-out goes to the RXD pin on the header and the t-in on the chip goes to the TXD on the header.  3.3V on the header goes to VCC on the chip and GND goes to GND.  Make sure to leave the wires long enough to get the case closed again.  After I was satisfied with the soldering, I globbed on a LOT of hot glue to hold that little serial board in place.  Ignore my sd card mod since it’s not related to this hack.

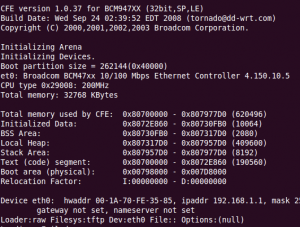
Once it was all back together I fired up Minicom with the settings 115,200, 8, 1, no parity and no flow control.  The no flow control part is especially important.  Now when I boot up the router, I can see all of the debugging information.  Now with this serial port I can experiment with vlans and other things that can break your SSH session.  If I wanted to get really tricky, I could probably even use my hacked WRT54G-TM as a wireless-serial bridge for consoling into my Cisco routers that I keep in the garage.  They are too loud to keep by my desk.

If you like this article, you can support my site by using this link to buy your next WRT54G from Amazon.  You might also consider buying Linksys WRT54G Ultimate Hacking for more advanced hardware and software hacks for your WRT54G.

It seems that all of the Linksys WRT54G’s that I’ve come across for a good price lately are the WRT54G-TM variant.  The TM stands for T-Mobile.  In all honesty I’m not sure how the T-Mobile hot spot functionality works.  I don’t really care either.  What I know is that this router is actually an excellent candidate for a DD-WRT installation.  In fact, I’d argue that it’s even better than the WRT54GL because this one has 32MB of ram opposed to the 16MB on the GL version.  The only small downside on the WRT54G-TM is that you’ll have to jump through a couple more obstacles to make it run DD-WRT.  Don’t let this put you off at all!  There are excellent instructions out there and I’m going to give you a short overview as well.  First off, here are the official instructions for putting DD-WRT on the WRT54G-TM.

If you plan to load this firmware on your WRT54G-TM, I highly recommend using Internet Explorer on Windows.  Everything seems to go the smoothest using this configuration.  When I’ve tried Firefox on my Mac I’ve had trouble and the same goes for Safari.  Just save some pain and use IE if you have access to it.  Now for the fun stuff:

  1. Download the latest version of DD-WRT for the WRT54G-TM.  Run a quick search on this page to find it.  http://www.dd-wrt.com/site/support/router-database.  While you are there, grab the tftp program and the CFE updater binary.
  2. Set your Windows machine to the static ip 192.168.0.2.  While you are in there, click advanced and add a second ip 192.168.1.2.
  3. Pick a port 1-4 and plug it into your computer’s ethernet port.
  4. Do a hard reset on your WRT54G-TM to put it back to factory settings by unplugging the router, holding the reset switch on the back of the router, plugging it in and keeping holding the switch for 30 seconds.
  5. Log into your router at 192.168.0.1.  No username, password is admin.
  6. Click administration, then update firmware.  Update the firmware with the CFE binary file.  That should go pretty quick and say something like “Upgrade succeeded”.
  7. Wait….  While you are waiting, bring up a command prompt and ping -t 192.168.1.1.  When you get a response to your pings, you can quit waiting and move to the next step.
  8. Fire up the TFTP client and type in 192.168.1.1 for the server IP and for the file put in the location of the ddwrt.v????  firmware file.  Hit upgrade and wait.
  9. Now go to 192.168.1.1 in your web browser.  You should see a screen prompting a user password change.  Now is a great time to set your root password.

That’s it!  It sounds a lot harder than it actually is.  Post some comments on your own experiences with the WRT54G-TM.

Powered by WordPress. Theme: Motion by 85ideas.